Auteur/autrice : Hervé

  • Acai Bowl: The Ultimate Superfood Breakfast

    Acai Bowl: The Ultimate Superfood Breakfast

    I’m excited to share with you the magic of starting your day with a Superfood Breakfast. It’s not only delicious but also packed with nutrients!

    I remember my first experience with a Healthy Acai Bowl. The flavors and textures were amazing. It was love at first bite!

    As someone who loves healthy eating, I’m excited to explore Acai Bowls. In this article, I’ll show you how to make this nutritious breakfast at home.
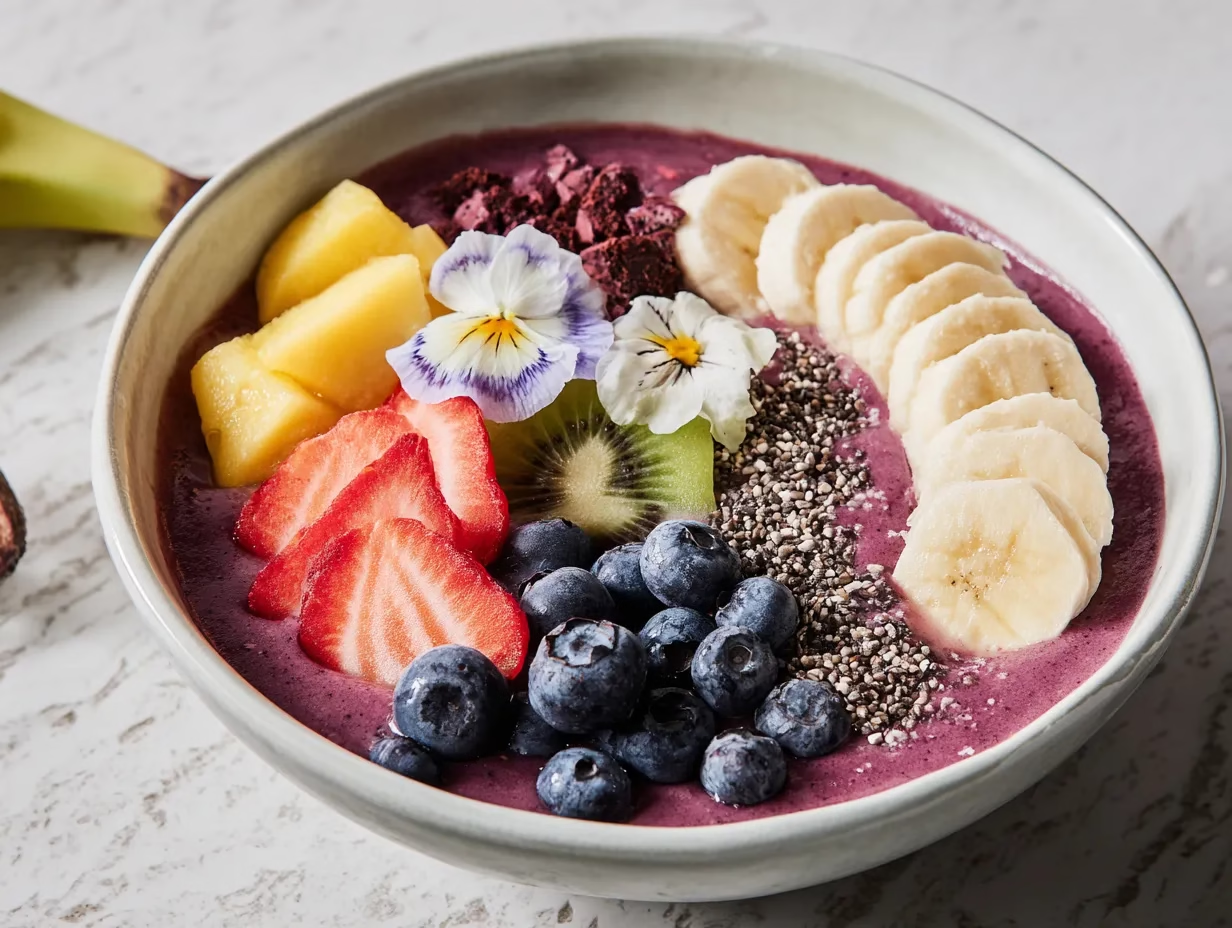
    Vibrant acai bowl topped with fresh fruits and granola

    Acai Bowl

    A refreshing and nutritious acai bowl topped with fresh fruits and crunchy granola.
    No ratings yet
    Print Pin Share on Facebook Rate
    Type de plat: Petit déjeuner
    Cuisine: International
    Diet: Diabetic
    Keyword: Acai Bowl
    Temps de préparation: 10 minutes
    Temps de cuisson: 0 minutes
    Temps total: 10 minutes
    Servings: 2 Servings
    Calories: 350kcal
    Author: Hervé
    Cost: $5-$8

    Equipment

    • High-speed blender
    • Serving bowls

    Ingrédients

    • 1 packet frozen acai puree (100g)
    • 1/2 frozen banana, sliced
    • 1/2 cup frozen strawberries
    • 1/2 cup frozen blueberries
    • 1/2 cup almond milk
    • 1 tbsp honey
    • granola, for topping
    • fresh fruits (e.g., banana slices, strawberries, blueberries), for topping
    • chia seeds, for topping
    • coconut flakes, for topping

    Instructions

    Prepare the Acai Base

    • In a high-speed blender, combine the frozen acai puree, frozen banana slices, frozen strawberries, frozen blueberries, almond milk, and honey.
    • Blend on high until smooth and creamy. If needed, add a little more almond milk to reach desired consistency.

    Assemble the Bowl

    • Pour the acai mixture into serving bowls.
    • Top with granola, fresh fruits, chia seeds, and coconut flakes as desired.
    • Serve immediately and enjoy!

    Video

    Notes

    Special Notes

    • For a vegan version, replace honey with maple syrup.
    • Use unsweetened almond milk to reduce sugar content.
    • Freeze your serving bowls beforehand to keep the acai mixture cold longer.
    • Customize toppings with your favorite fruits, nuts, or seeds.
    • Blend with less liquid for a thicker, spoonable consistency.

    Nutrition

    Calories: 350kcal | Carbohydrates: 60g | Protéines: 4g | Fat: 10g | Lipides saturés: 3g | Sodium: 50mg | Potassium: 500mg | Fibre: 8g | Sucre: 30g | Vitamine A: 10IU | Vitamine C: 15mg | Calcium: 100mg | Fer: 2mg
    Apports nutritionnels
    Acai Bowl
    Quantité par portion
    Calories 350 Calories des lipides 90
    % des apports journaliers*
    Fat 10g15%
    Lipides saturés 3g19%
    Sodium 50mg2%
    Potassium 500mg14%
    Carbohydrates 60g20%
    Fibre 8g33%
    Sucre 30g33%
    Protéines 4g8%
    Vitamine A 10IU0%
    Vitamine C 15mg18%
    Calcium 100mg10%
    Fer 2mg11%
    * Percent Daily Values are based on a 2000 calorie diet.

    Table of Contents

    Key Takeaways

    • Discover the nutritional benefits of starting your day with an Acai Bowl
    • Learn how to make a healthy Acai Bowl at home with simple ingredients
    • Explore the origin and history of Acai Bowls
    • Get tips on customizing your Acai Bowl to suit your taste preferences
    • Understand why Acai Bowls are considered a superfood breakfast

    What is an Acai Bowl?

    Acai Bowls are a big hit in the health food world. They are a mix of frozen Acai berries, fruits, granola, and more. This combo makes a tasty and healthy breakfast or snack.

    Acai Bowls come from the Amazon rainforest. Acai berries grow on the Acai palm tree, found in Central and South America.

    Origin of Acai Berries

    For centuries, Acai berries were a key food for Amazon people. They ate them as fruit or used them in cooking. These berries are full of antioxidants, fiber, and healthy fats.

    « Acai berries are considered a ‘superfood’ due to their high nutritional value and possible health benefits. »

    Nutritional Profile of Acai

    Acai berries are very nutritious. They have lots of antioxidants, fiber, and healthy fats. Here’s what they offer:

    NutrientAmount per 100g
    Calories534
    Total Fat32g
    Dietary Fiber7g
    AntioxidantsHigh

    They also have important minerals like potassium and magnesium.

    Health Benefits of Acai Bowls

    So, why are Acai Bowls good for you? They offer many benefits:

    • High Antioxidant Content: Acai berries fight off free radicals.
    • Supports Heart Health: They have fiber, healthy fats, and antioxidants for the heart.
    • Aids in Digestion: Their fiber helps with digestion and bowel movements.

    Why Choose Acai Bowls for Breakfast?

    Starting your day with an Acai Bowl can change your morning routine. They are full of nutrients and can be made to fit any taste.

    Superfood Benefits

    Acai Bowls are superfoods because they have lots of antioxidants and nutrients. They are rich in fiber, vitamins, and minerals. This helps your health a lot.

    The antioxidants in Acai berries fight free radicals. This might lower inflammation and improve heart health.

    Some key benefits of Acai Bowls are:

    • High in antioxidants
    • Supports heart health
    • Aids in digestion due to high fiber content
    • May help in reducing inflammation

    Energy Boost for Your Day

    People choose Acai Bowls for their natural energy boost. Acai berries, fruits, and granola give energy that lasts. This keeps you full and focused in the morning.

    To get more energy, try adding:

    1. Bananas for potassium
    2. Nuts or seeds for a protein kick
    3. Cocoa nibs for a chocolatey energy boost

    Versatile Meal Option

    Acai Bowls are great because you can change them up. They are perfect for anyone with special dietary needs. Whether you’re vegan, gluten-free, or just want something new, Acai Bowls are a good choice.

    Here are some ways to make your Acai Bowl your own:

    • Try different milks or yogurts
    • Add various fruits and nuts
    • Use honey or maple syrup for sweetness

    Learning how to make Acai Bowl is simple. It opens up a world of healthy and tasty breakfast options.

    How to Make the Perfect Acai Bowl

    Making a tasty Acai Bowl is simple. I’ll show you how. Just a few ingredients and some fun toppings can make a bowl that’s just right for you.

    Ingredients You’ll Need

    You’ll need a few key things to start. Frozen Acai berries are the heart of any Acai Bowl. They’re packed with antioxidants and give the bowl its deep purple color. You’ll also need almond milk or coconut water to blend with the Acai.

    Don’t forget a banana or other frozen fruit. They add sweetness and creamy texture. You might also want spinach or greens for extra nutrition, or protein powder for a post-workout snack.

    Steps to Blend the Perfect Base

    Blending the base is about finding the right mix. Start with frozen Acai berries, then add almond milk or coconut water. Throw in a frozen banana or fruit for sweetness and creaminess.

    Blend everything on high until it’s smooth. You might need to stop and scrape the sides. Adjust the mix with more liquid or fruit if needed.

    Creative Topping Ideas

    Get creative with your toppings. Fresh fruit like berries or mango adds sweetness. Granola or nuts give a nice crunch.

    Try coconut flakes, cacao nibs, or a drizzle of honey. The goal is to find your favorite mix.

    Acai Bowls are full of tasty options. You can mix and match ingredients to make your own special bowl. This lets you try new flavors and find your favorite.

    Tropical Acai Bowl

    A Tropical Acai Bowl is a fun twist. It includes mango, pineapple, and kiwi. Just blend Acai with frozen pineapple and coconut milk. Then, add fresh fruits, granola, and shredded coconut on top.

    Nutty Chocolate Acai Bowl

    Chocolate fans will love the Nutty Chocolate Acai Bowl. Mix Acai with frozen banana and cocoa powder. Top it with almonds, coconut, and peanut butter for a tasty crunch.

    Green Acai Bowl

    The Green Acai Bowl is great for adding greens to your diet. Blend Acai with spinach or kale and lime juice. Add green fruits and chia seeds for extra nutrition.

    VariationKey IngredientsTopping Ideas
    Tropical Acai BowlMango, Pineapple, Coconut MilkFresh Tropical Fruits, Granola, Shredded Coconut
    Nutty Chocolate Acai BowlCocoa Powder, Frozen Banana, Peanut ButterSliced Almonds, Shredded Coconut, Chocolate Chips
    Green Acai BowlSpinach, Kale, Lime JuiceGreen Fruits, Chia Seeds, Coconut Flakes

    These are just a few ideas for Acai Bowls. Don’t be afraid to try new things. Mix different fruits, nuts, and seeds to find your favorite!

    Where to Find Acai Bowls

    If you’re craving a healthy Acai Bowl, you’re in luck. They’re everywhere!

    Acai Bowls are super popular. You can find them in health food stores, cafés, and juice bars. They’re also available for delivery online.

    Health Food Stores

    Health food stores are a great spot for Acai Bowls. Many have cafes or smoothie bars. Stores like Whole Foods and Sprouts Farmers Market often have them.

    Cafés and Juice Bars

    Cafés and juice bars are also great for Acai Bowls. Places like Juice Press and The Juice Joint have many options. They use fresh, organic ingredients for a tasty and healthy meal.

    Online Delivery Options

    Online delivery is perfect for busy people. Uber Eats, GrubHub, and DoorDash offer Acai Bowls. You can also find services that specialize in healthy meals.

    Here’s a quick comparison of where to find Acai Bowls:

    LocationTypical QualityPrice Range
    Health Food StoresHigh-quality, organic ingredients$8-$12
    Cafés and Juice BarsFresh, often organic ingredients$7-$11
    Online DeliveryVaries by restaurant/store$8-$15 (plus delivery fee)

    Whether you want to grab an Acai Bowl or have it delivered, there are many choices. Just make sure to check the ingredients and nutrition to meet your dietary needs.

    Acai Bowl vs. Other Smoothie Bowls

    I love trying new breakfasts, so I’m always curious about acai bowls. They’re popular, and knowing their differences helps us choose better breakfasts.

    Let’s look at what matters: nutrition, taste, and texture. These help us pick if an acai bowl is for us or if another is better.

    Nutritional Comparisons

    Acai bowls are known for their antioxidants. Acai berries are full of fiber, healthy fats, and antioxidants. They’re a great choice for nutrition.

    Other smoothie bowls use different bases like banana or mango. They’re nutritious too, but they don’t have acai’s special antioxidants. For example, banana bowls are high in potassium, and mango bowls are full of vitamin A.

    Flavor Profiles

    Acai bowls taste unique. Acai’s deep, sweet flavor works well with many toppings. The bitterness is balanced by fruit sweetness, making a great taste.

    Other bowls offer different tastes. Pitaya bowls are milder, while mango bowls are sweeter. It’s all about what you like and your toppings.

    Texture Differences

    Acai bowls are thick and creamy. This comes from blending frozen acai with bananas or milk. This texture is satisfying and holds toppings well.

    Other bowls can be different. Berry bowls are icy, while yogurt and fruit bowls are creamier. Your favorite texture depends on what’s in it.

    Tips for Choosing Quality Acai Products

    The secret to a great Acai Bowl is choosing high-quality Acai products. With Acai Bowls getting more popular, it’s hard to pick the best one.

    Let’s look at some key tips for making a good choice. First, knowing the difference between frozen and powdered Acai is important.

    Frozen vs. Powdered Acai

    When picking between frozen and powdered Acai, think about what you want. Frozen Acai keeps more nutrients and tastes fresher. Powdered Acai is easier to use and lasts longer.

    If you want the real Acai taste, go for frozen. But if you need something easy, powdered Acai works well.

    Reading Labels

    It doesn’t matter if you pick frozen or powdered Acai. Reading labels is key. Look for products without additives, preservatives, or too much sugar. Choose ones with few ingredients and clear labels.

    • Check for certifications like USDA Organic or Non-GMO.
    • Be careful of products with unclear where they come from.
    • Make sure the product is full of antioxidants and fiber.

    Organic Options

    Choosing organic Acai makes your Acai Bowl better. Organic Acai is grown without harmful chemicals, making it healthier and better for the planet.

    By picking organic and quality Acai, you make your Acai Bowl taste better and more nutritious. You also help the environment by supporting green farming.

    The Role of Acai Bowls in Healthy Eating

    Acai Bowls can change your diet for the better. They’re not just for breakfast. They’re great for a healthy eating plan. Adding Acai Bowls to your meals can boost your nutrition and keep your diet interesting.

    Incorporating into a Balanced Diet

    To add Acai Bowls to your diet, mix them with other healthy foods. Try adding fruits, nuts, seeds, and whole grains. For example, bananas, almond butter, and chia seeds make your Acai Bowl even better. Variety is key for a balanced diet, and Acai Bowls are a tasty addition.

    Portion Control Tips

    Even though Acai Bowls are nutritious, watch your portion sizes. They can have 300 to 600 calories, depending on toppings. Be careful with toppings like nuts and granola. A good rule of thumb is to balance fruits, healthy fats, and protein without too many high-calorie toppings.

    Meal Prep Ideas

    Meal prep helps keep your diet on track, and Acai Bowls fit right in. Prepare Acai base in small containers and freeze them. In the morning, top with your favorite fruits, nuts, and seeds. This saves time and starts your day with a healthy meal.

    Acai Bowl for Fitness Enthuasiasts

    If you love working out, you’re always looking for foods that help. Acai Bowls are not just a cool breakfast. They’re packed with nutrients that help you reach your fitness goals.

    Pre-Workout Fuel

    What you eat before working out matters a lot. Acai Bowls are great because they have complex carbs, fiber, and antioxidants. The fruit’s natural sugars give you energy that lasts, helping you get through tough workouts.

    Key Pre-Workout Nutrients in Acai Bowls:

    • Complex Carbohydrates
    • Fiber
    • Antioxidants

    Post-Workout Recovery

    After a hard workout, your body needs to heal and rebuild. Acai Bowls can help with this. Add protein like nuts, seeds, or protein powder to help your muscles recover. The antioxidants in Acai also reduce muscle inflammation, making recovery easier.

    Customizing for Protein Needs

    Protein is key for fixing and growing muscles. You can make your Acai Bowl more protein-rich by adding toppings. Here’s a table to help you pick high-protein options:

    ToppingProtein Content (approx.)
    Almonds (1 oz)6 grams
    Chia Seeds (1 oz)5 grams
    Whey Protein Powder (1 scoop)25 grams

    Adding these protein-rich toppings turns your Acai Bowl into a meal that helps you recover after working out.

    Seasonal Acai Bowl Inspirations

    Let’s explore seasonal Acai Bowl ideas to make breakfast fun all year. Acai Bowls are great because you can change them with the seasons. Use fresh ingredients to keep your meals tasty and interesting.

    Fall Flavors

    When fall comes, warm spices and autumn fruits shine in your Acai Bowl. Try adding:

    • Pumpkin puree for a seasonal twist
    • Cinnamon and nutmeg for a warm, spicy flavor
    • Fresh apples or pears for a crunchy texture

    Summer Specials

    Summer brings light and refreshing flavors. Make your Acai Bowl special with:

    • Fresh berries like strawberries, blueberries, or raspberries
    • Mango or pineapple for a tropical twist
    • Coconut flakes for added texture and flavor

    These summer treats make your Acai Bowl a refreshing start to your day.

    Holiday-Themed Bowls

    Holidays can also inspire your Acai Bowls! For Christmas, try:

    • Cranberries for a festive touch and a boost of antioxidants
    • A sprinkle of edible gold dust for luxury
    • Orange zest to reflect the vibrant colors of the season

    Creating holiday-themed Acai Bowls is a fun way to celebrate the season.

    Acai Bowl Myths Debunked

    Acai Bowls have been surrounded by myths and misconceptions. It’s time to separate fact from fiction. As someone who’s dived into the world of Acai Bowls, I’m excited to share the truth behind some of the most common misconceptions.

    Misconceptions about Acai

    One big myth is that Acai Bowls are a magic bullet for weight loss. While Acai berries have antioxidant properties, they won’t magically make you lose weight. Acai Bowls are just one part of a healthy lifestyle.

    Another myth is that Acai berries are only found in certain places. But they’re actually sourced from all over the world. This can affect the nutritional profile and quality of the Acai products you eat.

    The Truth About Sugar Content

    Many people worry that Acai Bowls are too high in sugar. But the base of an Acai Bowl – made from frozen Acai berries – isn’t too sweet. The key is to be mindful of your toppings and choose options low in added sugars.

    To keep your Acai Bowl healthy, use fresh fruit, nuts, and seeds as toppings. You can also try different types of milk or yogurt to reduce sugar content.

    Are Acai Bowls Just a Fad?

    It’s hard to predict the future, but Acai Bowls have become a staple in many diets. Their versatility and nutritional benefits make them a great choice for meals or snacks.

    The adaptability of Acai Bowls is a big advantage. You can customize them to fit any dietary need or preference. This makes them a great option for many people.

    Conclusion: The Acai Bowl Craze

    Acai Bowls are more than just a trend. They are versatile and packed with nutrients. This makes them a top choice for a healthy breakfast.

    The future of Acai Bowls is bright. Future Trends show us more eco-friendly and sustainable options. We’ll see better packaging, local ingredients, and new flavors that mix old and new.

    What’s Next for Acai Bowls?

    More people want healthy, sustainable food. Acai Bowls fit the bill perfectly. They will keep being a favorite for those who care about their health.

    If you love Acai Bowls or are new to them, now is the time to get creative. Try new toppings and flavors. Make your breakfasts more fun and healthy!

    Acai Bowl Recipe FAQs

    What is an Acai Bowl?

    An Acai Bowl is a thick smoothie made from acai berry puree, topped with fruits, granola, seeds, and other nutritious ingredients.

    How do you pronounce ‘Acai’?

    ‘Acai’ is pronounced as ‘ah-sigh-ee’.

    What are the health benefits of Acai Bowls?

    Acai berries are rich in antioxidants, fiber, and healthy fats, which can support heart health and overall wellness.

    Can Acai Bowls help with weight loss?

    When consumed as part of a balanced diet, Acai Bowls can be a healthy option, but portion control and ingredient choices are key.

    What ingredients are typically used in an Acai Bowl?

    Common ingredients include frozen acai puree, bananas, berries, almond milk, granola, and various toppings like nuts and seeds.

    Are Acai Bowls vegan-friendly?

    Yes, Acai Bowls can be made vegan by using plant-based milk and avoiding animal-derived toppings like honey.

    Can I make an Acai Bowl without a blender?

    A high-speed blender is recommended to achieve the desired creamy consistency, but some food processors may also work.

    Where can I buy frozen acai puree?

    Frozen acai puree is available at health food stores, specialty grocery stores, and online retailers.

    How do I store leftover Acai Bowl?

    Leftovers can be stored in the freezer for up to a week; thaw slightly before consuming for best texture.

    What are some popular toppings for Acai Bowls?

    Popular toppings include sliced fruits, granola, chia seeds, coconut flakes, and nut butters.

    Is it necessary to use frozen fruits in an Acai Bowl?

    Using frozen fruits helps achieve a thick, ice-cream-like consistency that’s characteristic of Acai Bowls.

    Can I add protein powder to my Acai Bowl?

    Yes, adding protein powder is a great way to boost its nutritional value, especially for post-workout meals.

    Are Acai Bowls gluten-free?

    They can be, but ensure your granola and other toppings are labeled gluten-free.

    Can I make Acai Bowls ahead of time?

    Yes, but for best texture, store the base separately and add toppings just before serving.

    Is acai a superfood?

    Yes, acai is considered a superfood due to its high levels of antioxidants and nutrients.

    What’s the difference between an Acai Bowl and a smoothie?

    An Acai Bowl is thicker and meant to be eaten with a spoon, while smoothies are drinkable.

    Can I use fresh acai berries instead of frozen puree?

    Fresh acai berries are rare outside of Brazil; most recipes use frozen puree or powder for convenience.

    What liquid should I use in my Acai Bowl?

    Popular choices include almond milk, coconut water, or regular milk depending on dietary preference.

    How can I sweeten an Acai Bowl naturally?

    You can use ripe bananas, dates, or a drizzle of maple syrup or honey for natural sweetness.

    What makes an Acai Bowl healthy?

    Natural ingredients, fiber, and antioxidants contribute to its healthiness, especially when sugar is minimized.

    Can kids eat Acai Bowls?

    Absolutely! They’re a nutritious, fun, and customizable breakfast or snack for children.

    How many calories are in an Acai Bowl?

    It varies by ingredients and portion size, but most bowls range from 300 to 600 calories.

  • Delicious Spaghetti Carbonara: A Creamy Italian Favorite

    Delicious Spaghetti Carbonara: A Creamy Italian Favorite

    Who doesn’t love a rich, creamy Italian dish that’s both simple and indulgent? For me, Spaghetti Carbonara is more than just a recipe. It’s a culinary experience that takes me to the Tuscan countryside.

    I remember my first time having real Carbonara in Italy. It was magical. The tender spaghetti, savory bacon, and parmesan cheese were amazing together.

    In this article, I’ll share my tips for making a creamy Spaghetti Carbonara. It’s sure to become a favorite in your kitchen.

    Spaghetti Carbonara served in a white bowl with grated cheese on top

    Spaghetti Carbonara

    A classic Roman pasta dish featuring spaghetti tossed with crispy pancetta, creamy eggs, and sharp Pecorino Romano cheese, finished with freshly ground black pepper.
    No ratings yet
    Print Pin Share on Facebook Rate
    Type de plat: Plat principal
    Cuisine: Italienne
    Keyword: spaghetti
    Temps de préparation: 10 minutes
    Temps de cuisson: 15 minutes
    Temps total: 25 minutes
    Servings: 4 Servings
    Calories: 570kcal
    Author: Hervé
    Cost: $5-$8

    Equipment

    • Large pot
    • Skillet
    • Mixing bowl
    • Tongs

    Ingrédients

    • 12 oz spaghetti
    • 4 oz guanciale or pancetta, diced
    • 2 large eggs
    • 2 egg yolks
    • 1 cup Pecorino Romano cheese, grated
    • 1 tsp freshly ground black pepper
    • 1 tbsp salt (for pasta water)

    Instructions

    Prepare Ingredients

    • Bring a large pot of salted water to a boil.
    • In a mixing bowl, whisk together eggs, egg yolks, grated Pecorino Romano, and black pepper until well combined.

    Cook Pasta and Meat

    • Add spaghetti to boiling water and cook until al dente, according to package instructions.
    • While pasta cooks, heat a skillet over medium heat and cook diced guanciale or pancetta until crispy. Remove from heat.

    Combine and Serve

    • Reserve 1/2 cup of pasta cooking water, then drain the spaghetti.
    • Quickly add hot pasta to the skillet with guanciale, tossing to combine.
    • Remove skillet from heat and pour in the egg and cheese mixture, tossing rapidly to create a creamy sauce. Add reserved pasta water as needed to achieve desired consistency.
    • Serve immediately, garnished with additional grated cheese and freshly ground black pepper if desired.

    Video

    Notes

    Special Notes

    • Use freshly grated Pecorino Romano for authentic flavor.
    • Ensure the pasta is hot when mixing with the egg mixture to cook the eggs properly.
    • Do not add cream; the creaminess comes from the eggs and cheese.
    • Guanciale is traditional, but pancetta or bacon can be used as substitutes.
    • Serve immediately for the best texture and flavor.

    Nutrition

    Calories: 570kcal | Carbohydrates: 60g | Protéines: 25g | Fat: 25g | Lipides saturés: 10g | Choléstérol: 220mg | Sodium: 800mg | Potassium: 300mg | Fibre: 3g | Sucre: 2g | Vitamine A: 10IU | Calcium: 200mg | Fer: 3mg
    Apports nutritionnels
    Spaghetti Carbonara
    Quantité par portion
    Calories 570 Calories des lipides 225
    % des apports journaliers*
    Fat 25g38%
    Lipides saturés 10g63%
    Choléstérol 220mg73%
    Sodium 800mg35%
    Potassium 300mg9%
    Carbohydrates 60g20%
    Fibre 3g13%
    Sucre 2g2%
    Protéines 25g50%
    Vitamine A 10IU0%
    Calcium 200mg20%
    Fer 3mg17%
    * Percent Daily Values are based on a 2000 calorie diet.

    Table of Contents

    Key Takeaways

    • Understand the traditional ingredients used in Spaghetti Carbonara.
    • Learn how to achieve a creamy sauce without heavy cream.
    • Discover the importance of using high-quality parmesan cheese.
    • Get tips on cooking the perfect al dente spaghetti.
    • Explore variations of the classic recipe to suit your taste.

    The History of Spaghetti Carbonara

    Spaghetti Carbonara’s story is as rich as its creamy sauce. It has roots deeply embedded in Italian history. This beloved dish has a fascinating narrative that intertwines with the country’s culinary evolution.

    Origin Stories of the Dish

    Spaghetti Carbonara’s origins are shrouded in mystery. Various theories try to explain its birth. One story says it started in the mid-20th century, during World War II.

    It’s said American soldiers introduced bacon or pancetta to Italian cuisine. They mixed it with local ingredients like eggs, pasta, and cheese.

    Another theory says Carbonara came from the Lazio region, in Rome. It was a peasant dish made with eggs, guanciale, and Pecorino Romano cheese. The name « Carbonara » might come from the Italian word for « coal miner. »

    Traditional Ingredients Used

    Traditionally, Spaghetti Carbonara uses a few simple ingredients. These include spaghetti, guanciale or pancetta, eggs, Pecorino Romano cheese, and black pepper. The dish’s authenticity comes from not using cream, which is often mistakenly added.

    Traditional Ingredients:

    IngredientDescription
    SpaghettiLong, thin strands of pasta
    Guanciale or PancettaCured pork jowl or bacon, adding a savory flavor
    EggsFresh eggs, used to create the creamy sauce
    Pecorino Romano CheeseA sharp, salty Italian cheese, essential for the authentic taste
    Black PepperFreshly ground pepper, adding depth to the dish

    Regional Variations

    While traditional Spaghetti Carbonara is rooted in Roman cuisine, variations exist across Italy and the world. Some recipes may include cream, different cheeses, or meats. These changes adapt the original to local tastes.

    For example, some variations might use bacon instead of guanciale or pancetta. They might also add vegetables for extra flavor. But, purists say these changes stray from the authentic essence of Carbonara.

    In conclusion, Spaghetti Carbonara’s history is a rich tapestry. It’s woven from tradition, adaptation, and regional identity. Understanding its origins and traditional ingredients helps us appreciate its simplicity and depth.

    Ingredients for the Perfect Carbonara

    To make a authentic Spaghetti Carbonara, you need a few key ingredients. This dish is simple, so we’ll focus on the basics.

    Essential Ingredients Explained

    A traditional Spaghetti Carbonara recipe has just a few things: spaghetti, guanciale or pancetta, eggs, Parmesan cheese, and black pepper. Here’s what each does:

    • Spaghetti: It’s the base of the dish. Use high-quality spaghetti for the best taste.
    • Guanciale or Pancetta: These cured meats add a rich flavor. Guanciale is traditional, but pancetta works too.
    • Eggs: Eggs make the sauce creamy. Use fresh, quality eggs.
    • Parmesan Cheese: It brings a salty, nutty taste. Choose freshly grated Parmesan for the best flavor.
    • Black Pepper: Freshly ground black pepper adds depth to the dish.

    Optional Ingredients for Extra Flavor

    While traditional Carbonara is simple, you can try some optional ingredients for more flavor:

    • Garlic: Adding a bit of garlic can deepen the flavor, though it’s not traditional.
    • Fresh Herbs: Parsley or basil can add a fresh touch to the dish.
    • Other Cheeses: While Parmesan is a must, you can also try other hard cheeses like Pecorino Romano.

    By using these essential and optional ingredients, you’ll make an easy Spaghetti Carbonara recipe that’s as good as any Italian restaurant.

    Step-by-Step Guide to Making Spaghetti Carbonara

    Making Spaghetti Carbonara is easier than you think. I’m here to guide you through it. This classic Italian dish is simple and uses high-quality ingredients. Let’s get started!

    Preparing the Pasta

    The foundation of a great Spaghetti Carbonara is perfectly cooked spaghetti. To achieve this, bring a large pot of salted water to a boil. Use about 1 tablespoon of salt for every 4 cups of water.

    Once boiling, add your spaghetti and cook until it’s al dente. This usually takes around 8-10 minutes. But check your pasta packaging for specific instructions.

    While your pasta is cooking, prepare an ice bath in a large bowl. Once your spaghetti is done, reserve 1 cup of pasta water before draining it. Then, immediately submerge the spaghetti in the ice bath to stop the cooking process. This step is key for the perfect texture.

    Cooking the Sauce

    The sauce is where the magic happens in Spaghetti Carbonara. In a pan, cook diced guanciale or pancetta over medium heat until it’s crispy. If you can’t find guanciale, you can substitute it with bacon, though the flavor will be slightly different. Once crispy, remove the pan from the heat and let it cool slightly.

    In a separate bowl, whisk together eggs, Parmesan cheese, and a pinch of salt and pepper. The quality of your Parmesan is key here, so choose a good, aged Parmesan. The eggs should be fresh, and don’t be shy with the cheese – it’s a key component of the sauce.

    Combining Everything for the Perfect Dish

    Now, it’s time to bring everything together. Add the cooked spaghetti to the bowl with the egg mixture and toss it well. The heat from the pasta will start to cook the eggs, creating a creamy sauce. Then, add the cooked guanciale (or pancetta/bacon) to the pasta, along with some of its rendered fat. Toss everything together until the spaghetti is well coated.

    If the sauce seems too thick, you can thin it out with some of the reserved pasta water. The key to a great Carbonara is achieving a creamy sauce without making it too runny or too thick. Taste and adjust the seasoning as needed.

    Serve your Spaghetti Carbonara immediately, garnished with extra Parmesan cheese and a sprinkle of black pepper. Enjoy the fruits of your labor!

    Tips for Achieving Creamy Carbonara

    Making creamy Spaghetti Carbonara is an art. It needs attention to detail and expert tips. The secret is in its simplicity and quality ingredients, along with the right technique.

    The Role of Eggs in Creaminess

    Eggs are key to a creamy Carbonara. Fresh, high-quality eggs make a big difference. They should be mixed gently with hot pasta to avoid scrambling.

    Choosing the Right Cheese

    The right cheese is vital for Carbonara. Choose Parmigiano-Reggiano or Pecorino Romano for their sharp flavors. Grate the cheese fresh for the best taste and texture.

    Timing: When to Mix Ingredients

    Timing is key when mixing Carbonara ingredients. Mix the pasta with egg and cheese right off the heat. This ensures the eggs don’t scramble and the cheese melts well, making a creamy Spaghetti Carbonara.

    Follow these tips to make an easy Spaghetti Carbonara recipe. You’ll get the best Spaghetti Carbonara recipe every time. Remember, practice makes perfect, so don’t give up if it takes a few tries!

    Common Mistakes to Avoid

    Cooking Spaghetti Carbonara can be tricky. Knowing what mistakes to avoid helps a lot. When you want a real, traditional Spaghetti Carbonara, watch out for these common pitfalls.

    Overcooking the Pasta

    One big mistake is overcooking the pasta. Spaghetti should be al dente, with a bit of chew. Overcooking makes it mushy and not good to eat. To avoid this, check your pasta often and test it a bit before it’s done.

    Using Cream: Why It’s Not Traditional

    Many people add cream to their Carbonara. But, a real Spaghetti Carbonara doesn’t have cream. The creaminess comes from eggs, cheese, and pasta water. Cream makes the dish too rich and hides the flavors.

    Skipping the Pasta Water

    Not using pasta water is another mistake. The starchy water is key for a smooth sauce. It helps mix the eggs and cheese with the pasta. Always save some pasta water before draining and add it to your sauce slowly.

    To sum up, here are the main mistakes to avoid in Spaghetti Carbonara:

    MistakeWhy It’s WrongHow to Avoid It
    Overcooking the PastaMakes the pasta mushy and unappetizing.Cook pasta until al dente, checking frequently towards the end.
    Using CreamMakes the dish overly rich and masks other flavors.Use eggs, cheese, and pasta water for creaminess instead.
    Skipping the Pasta WaterResults in a sauce that’s too thick and separate.Reserve pasta water before draining and add it to the sauce as needed.

    Avoiding these mistakes will help you make a delicious, authentic Spaghetti Carbonara. The secret to a great Carbonara is in the details. Cook your pasta just right, use the right ingredients, and don’t forget the pasta water!

    Pairing Spaghetti Carbonara with Wine

    When pairing wine with Italian Spaghetti Carbonara, many options exist. The dish’s rich flavors, like eggs, parmesan, and guanciale, need a wine that complements them well.

    Let’s explore what makes a perfect wine match for this classic dish.

    For a classic Spaghetti Carbonara, a white wine is best. Here are some top choices:

    • Pinot Grigio: Its crisp acidity balances the dish’s richness.
    • Vermentino: This Italian white wine’s herbaceous notes match the dish’s savory taste.
    • Arneis: With its subtle fruit flavors and crisp finish, Arneis is another excellent choice.

    Serving Temperature for Best Flavor

    The wine’s serving temperature greatly affects the dining experience. For white wines like Pinot Grigio and Vermentino, aim for a temperature between 45°F to 55°F (7°C to 13°C). This temperature range enhances the wine’s flavors and refreshes your palate.

    Choosing the right wine and serving it at the best temperature can make your Spaghetti Carbonara experience better. It brings a perfect balance of flavors.

    Making It Healthier: Lighter Versions

    Making a healthier Spaghetti Carbonara is all about tweaking the ingredients without losing the flavor. You can enjoy this creamy Italian favorite with a few simple adjustments.

    Alternative Ingredients

    To make a lighter Spaghetti Carbonara, try substituting traditional ingredients with healthier ones. Use whole wheat spaghetti instead of regular spaghetti to boost fiber. Replace guanciale or pancetta with turkey bacon or vegetarian bacon to cut down on saturated fat.

    Using egg whites can reduce cholesterol and saturated fat. For cheese, mix part-skim mozzarella and Parmesan for a similar taste with less fat.

    Traditional IngredientHealthier AlternativeBenefit
    Regular SpaghettiWhole Wheat SpaghettiIncreased Fiber
    Guanciale/PancettaTurkey BaconReduced Saturated Fat
    Whole EggsEgg WhitesLower Cholesterol
    Full-fat CheesePart-skim Mozzarella & ParmesanLess Fat

    Portion Control Tips

    Another key aspect is controlling portion size. A serving size of Spaghetti Carbonara should be about 1 cup of cooked pasta. Use a food scale or measuring cups to get it right.

    Adding a side salad or some steamed vegetables can balance the meal and add nutrients. Be mindful of cheese and bacon, as they are high in calories and fat.

    By making these changes, you can enjoy a healthier Spaghetti Carbonara that satisfies your cravings. Try different ingredients and portion sizes to find the perfect balance for you!

    Serving Suggestions for Spaghetti Carbonara

    A well-served Spaghetti Carbonara is more than just a meal; it’s an experience that delights the senses. When you present this classic Italian dish, you’re not just feeding your guests; you’re creating memories. Let’s explore how to make your Spaghetti Carbonara a truly unforgettable dining experience.

    Garnishes to Enhance Flavor

    Garnishing your Spaghetti Carbonara is the final touch that can elevate it from a simple pasta dish to a culinary masterpiece. Consider adding some freshly ground black pepper to give it a nice kick. You can also sprinkle some grated Parmesan cheese on top for an extra burst of flavor.

    For a pop of color and freshness, a sprinkle of parsley can work wonders. I personally love adding a few shaved black truffles for a luxurious twist – it makes the dish feel like a special occasion!

    Best Sides to Serve Alongside

    While Spaghetti Carbonara is a rich and satisfying dish on its own, serving it with the right sides can complement its flavors and add variety to your meal. A simple green salad with a light vinaigrette dressing is a great choice, as it cuts through the richness of the pasta.

    Grilled or roasted vegetables like asparagus or Brussels sprouts can also provide a nice contrast in texture. For a more traditional Italian meal, consider serving some garlic bread on the side – it’s a classic combination that’s hard to beat!

    By thoughtfully selecting your garnishes and sides, you can turn a delicious Spaghetti Carbonara into a well-rounded and memorable dining experience that your guests will cherish.

    Conclusion: Enjoying Your Homemade Carbonara

    Now you’ve got the real Spaghetti Carbonara recipe down. It’s time to enjoy what you’ve made! Add some parmesan cheese and fresh parsley to make it special.

    Presentation Matters

    How you present your Spaghetti Carbonara matters a lot. Serve it in a warm pasta bowl. Add extra parmesan cheese and drizzle olive oil for flavor and looks.

    Make it Your Own

    Don’t be afraid to try new things with your Spaghetti Carbonara. Add your favorite ingredients or change the sauce. Use guanciale or pancetta to keep it true to Italy.

    With this recipe, you’re not just cooking. You’re making a special experience. So, get creative and enjoy your homemade Carbonara!

    Frequently Asked Questions About Spaghetti Carbonara

    1. What is carbonara?

    Carbonara is a traditional Italian pasta dish typically made with spaghetti, guanciale (cured pork cheek), egg yolks, Pecorino Romano cheese, and black pepper.

    2. Where does spaghetti carbonara come from?

    Spaghetti carbonara originates from the Lazio region of Italy, particularly Rome.

    3. What are the traditional ingredients in carbonara?

    Traditional ingredients include spaghetti, guanciale, egg yolks, Pecorino Romano, and black pepper.

    4. Can I use pancetta or bacon instead of guanciale?

    Yes, pancetta or bacon can be used as substitutes for guanciale, though the flavor will be slightly different.

    5. Should I use whole eggs or just the yolks?

    Traditionally, only the egg yolks are used to create a creamier sauce.

    6. Can I add cream to carbonara?

    No, authentic carbonara does not include cream. The creaminess comes from the egg yolks and cheese.

    7. What kind of cheese is used in carbonara?

    Pecorino Romano is the traditional cheese used in carbonara.

    8. Can I substitute Parmesan for Pecorino?

    Yes, Parmesan can be used, though it will slightly change the taste.

    9. How should guanciale be cooked?

    Guanciale should be cooked over medium heat until crispy and the fat has rendered.

    10. How do I keep the eggs from scrambling in carbonara?

    Mix the egg mixture quickly with the hot pasta off the heat to prevent scrambling.

    11. Can I make vegetarian carbonara?

    Yes, you can use vegetarian alternatives like mushrooms or plant-based meat substitutes.

    12. What’s the difference between carbonara and cacio e pepe?

    Cacio e pepe is a simpler pasta dish made only with pasta, cheese, and pepper — no eggs or meat.

    13. Can I use other pasta types instead of spaghetti?

    Yes, you can use fettuccine, rigatoni, bucatini, or other types of pasta.

    14. How much pasta should I cook per person?

    Typically, 3.5 ounces (100 grams) of dry pasta per person is recommended.

    15. Can I make carbonara ahead of time?

    Carbonara is best served immediately, as the texture changes when reheated.

    16. How do I reheat leftover carbonara?

    Reheat gently in a pan with a splash of water to keep the sauce from drying out.

    17. What wine pairs well with carbonara?

    A dry white wine like Pinot Grigio or a light red like Chianti pairs nicely with carbonara.

    18. Can I freeze carbonara?

    Freezing carbonara is not recommended as the sauce can separate upon thawing.

    19. How many calories are in a serving of carbonara?

    One serving of carbonara contains approximately 500–700 calories, depending on ingredients.

    20. Is carbonara gluten-free?

    No, but it can be made gluten-free using gluten-free pasta.

    21. Can I use milk instead of cream?

    Neither milk nor cream are used in traditional carbonara; creaminess comes from the eggs and cheese.

    22. How long does carbonara last in the fridge?

    It can be stored in the fridge for 1 to 2 days.

    23. Can I add vegetables to carbonara?

    While not traditional, some people add peas, mushrooms, or other veggies.

    24. What’s the difference between guanciale and pancetta?

    Guanciale comes from pork cheek, while pancetta is from pork belly. Guanciale has a stronger flavor.

    25. Can I use pasteurized eggs?

    Yes, pasteurized eggs can be used for food safety.

    26. What’s the ideal temperature for mixing eggs and pasta?

    The pasta should be hot but not boiling to avoid cooking the eggs.

    27. Can I use white pepper instead of black?

    Black pepper is traditional, but white pepper can be used as an alternative.

    28. Is carbonara kid-friendly?

    Yes, as long as you adjust the pepper level and ensure the eggs are properly mixed.

    29. Can I make a lighter version of carbonara?

    Yes, use less cheese and opt for leaner meat alternatives.

    30. What side dishes go well with carbonara?

    A green salad or grilled vegetables are great sides for this rich dish.

  • Vegan Egg Roll in a Bowl: Flavorful, Low-Carb Dinner Option

    Vegan Egg Roll in a Bowl: Flavorful, Low-Carb Dinner Option

    I’m excited to share a simple yet flavorful recipe for a quick weeknight dinner. It’s healthy and tasty, and I think you’ll love it. It’s going to be a favorite in your kitchen.

    Imagine the delicious taste of an egg roll without the wrapping and frying. That’s what « Egg Roll in a Bowl » is all about. It’s a low-carb twist on a classic favorite. You can make it your own, which is great for families or individuals.

    This easy-to-make recipe is healthier and saves time. You can have a nutritious dinner ready fast. This is perfect for busy evenings. Let’s explore what makes this dish special!

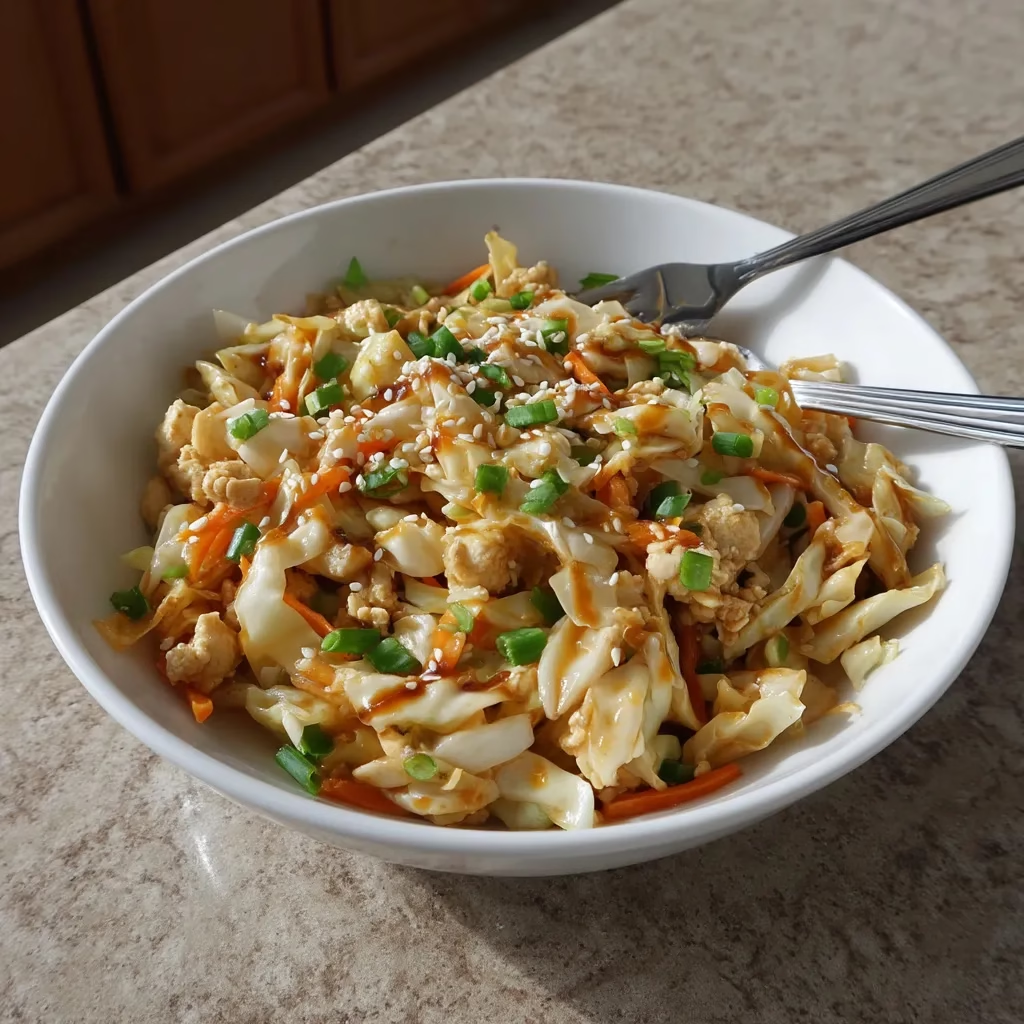
    Vegan Egg Roll in a Bowl served in a white bowl with green onions on top

    Vegan Egg Roll in a Bowl

    A quick and healthy deconstructed egg roll made in one skillet, packed with savory tofu, fresh veggies, and bold Asian flavors ready in just 20 minutes!
    5 from 10 vote
    Print Pin Share on Facebook Rate
    Type de plat: Plat principal
    Cuisine: asian
    Diet: Vegan
    Keyword: egg
    Temps de préparation: 5 minutes
    Temps de cuisson: 15 minutes
    Temps total: 20 minutes
    Servings: 4 Servings
    Calories: 320kcal
    Author: Hervé
    Cost: $5-$8

    Equipment

    • Large skillet
    • Wooden spoon

    Ingrédients

    • 1 block extra-firm tofu, pressed and crumbled
    • 1 tbsp sesame oil
    • 1 onion, diced
    • 2 cloves garlic, minced
    • 1 tsp fresh ginger, grated
    • 1 bag coleslaw mix (14 oz)
    • 2 tbsp soy sauce
    • 1 tbsp rice vinegar
    • 1 tbsp hoisin sauce
    • 2 green onions, sliced
    • sesame seeds, for garnish

    Instructions

    Prepare the Skillet

    • Heat sesame oil in a large skillet over medium-high heat.
      Overhead shot of sesame oil heating in a black non-stick skillet with a visible wooden handle, placed on an induction cooktop, stirred with a wooden spatula.
    • Add crumbled tofu and cook until browned, stirring occasionally.
      Overhead view of crumbled tofu browning in sesame oil in a black non-stick skillet on an induction cooktop, stirred with a wooden spoon.

    Add Aromatics

    • Stir in diced onion, minced garlic, and grated ginger. Cook until the onion is translucent.
      Overhead shot of tofu, diced onions, garlic, and ginger cooking in a skillet on an induction cooktop, stirred with a wooden spoon.

    Incorporate Vegetables

    • Add coleslaw mix to the skillet and cook until the cabbage is tender, about 5 minutes.
      Overhead view of tofu, cabbage, and carrot stir-fry cooking in a skillet on an induction cooktop, stirred with a wooden spoon.

    Add Sauces and Finish

    • Stir in soy sauce, rice vinegar, and hoisin sauce. Cook for an additional 2 minutes.
      Hand pouring soy sauce from a glass cup into a vegetable and tofu stir-fry in a skillet on an induction cooktop.
    • Remove from heat and garnish with sliced green onions and sesame seeds before serving.
      Bowl of tofu stir-fry with cabbage, carrots, sesame seeds, and green onions on a red-patterned tablecloth.

    Video

    Notes

    Special Notes

    • Use ground turkey or chicken for a leaner option.
    • For a vegetarian version, substitute meat with tofu or mushrooms.
    • Add a scrambled egg for extra protein.
    • Serve over cauliflower rice for a low-carb meal.
    • Top with sriracha or chili flakes for added heat.

    Nutrition

    Calories: 320kcal | Carbohydrates: 12g | Protéines: 20g | Fat: 22g | Lipides saturés: 3g | Sodium: 750mg | Potassium: 400mg | Fibre: 4g | Sucre: 5g | Vitamine A: 10IU | Vitamine C: 25mg | Calcium: 150mg | Fer: 3mg
    Apports nutritionnels
    Vegan Egg Roll in a Bowl
    Quantité par portion
    Calories 320 Calories des lipides 198
    % des apports journaliers*
    Fat 22g34%
    Lipides saturés 3g19%
    Sodium 750mg33%
    Potassium 400mg11%
    Carbohydrates 12g4%
    Fibre 4g17%
    Sucre 5g6%
    Protéines 20g40%
    Vitamine A 10IU0%
    Vitamine C 25mg30%
    Calcium 150mg15%
    Fer 3mg17%
    * Percent Daily Values are based on a 2000 calorie diet.

    Table of Contents

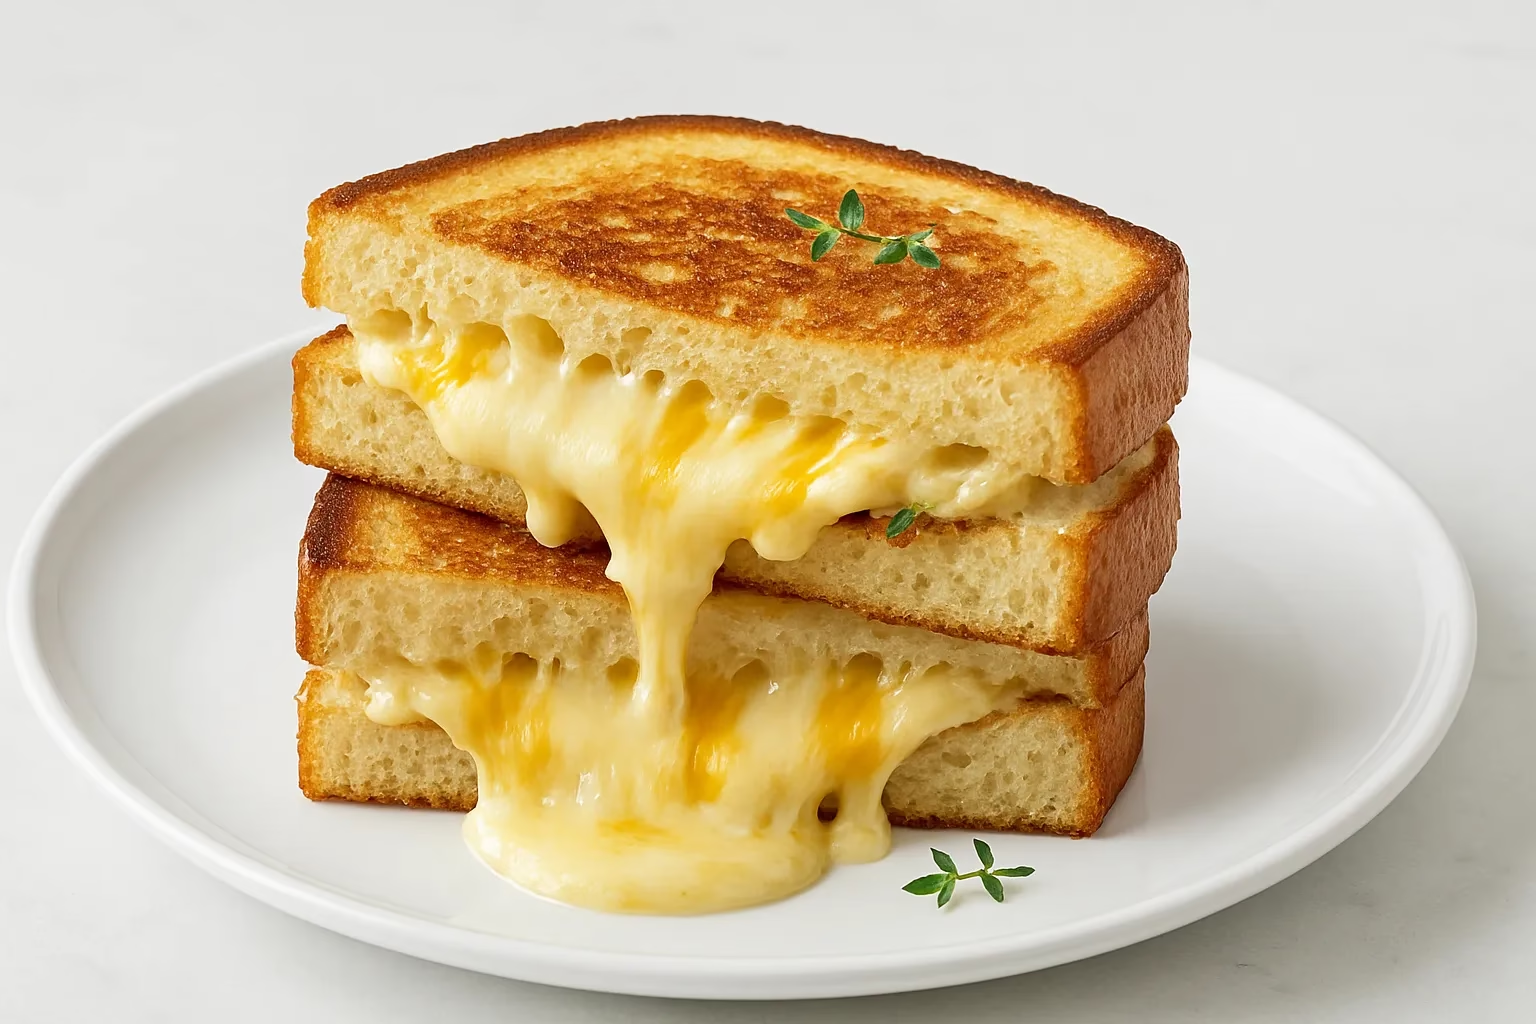
    Grilled cheese sandwich halves stacked on white plate with gooey melted cheese and golden crust in natural white lighting.

    Grilled Cheese: The Ultimate Comfort Food

    Master the art of grilled cheese with this easy-to-follow guide! Discover the perfect cheese blend, bread, and cooking techniques for the ultimate comfort food.
    Vibrant acai bowl topped with fresh fruits and granola

    Acai Bowl: The Ultimate Superfood Breakfast

    Learn to craft the ultimate Acai Bowl, a superfood breakfast that’s both healthy and indulgent. I’ll show you how!
    Spaghetti Carbonara served in a white bowl with grated cheese on top

    Delicious Spaghetti Carbonara: A Creamy Italian Favorite

    Spaghetti Carbonara is a must-try Italian classic. I’ll guide you through making this creamy, comforting pasta dish at home.
    Vegan Egg Roll in a Bowl served in a white bowl with green onions on top

    Vegan Egg Roll in a Bowl: Flavorful, Low-Carb Dinner Option

    Enjoy a low-carb, flavorful twist on classic egg rolls with this Egg Roll in a Bowl recipe! Simple, healthy, and packed with authentic Asian flavors.
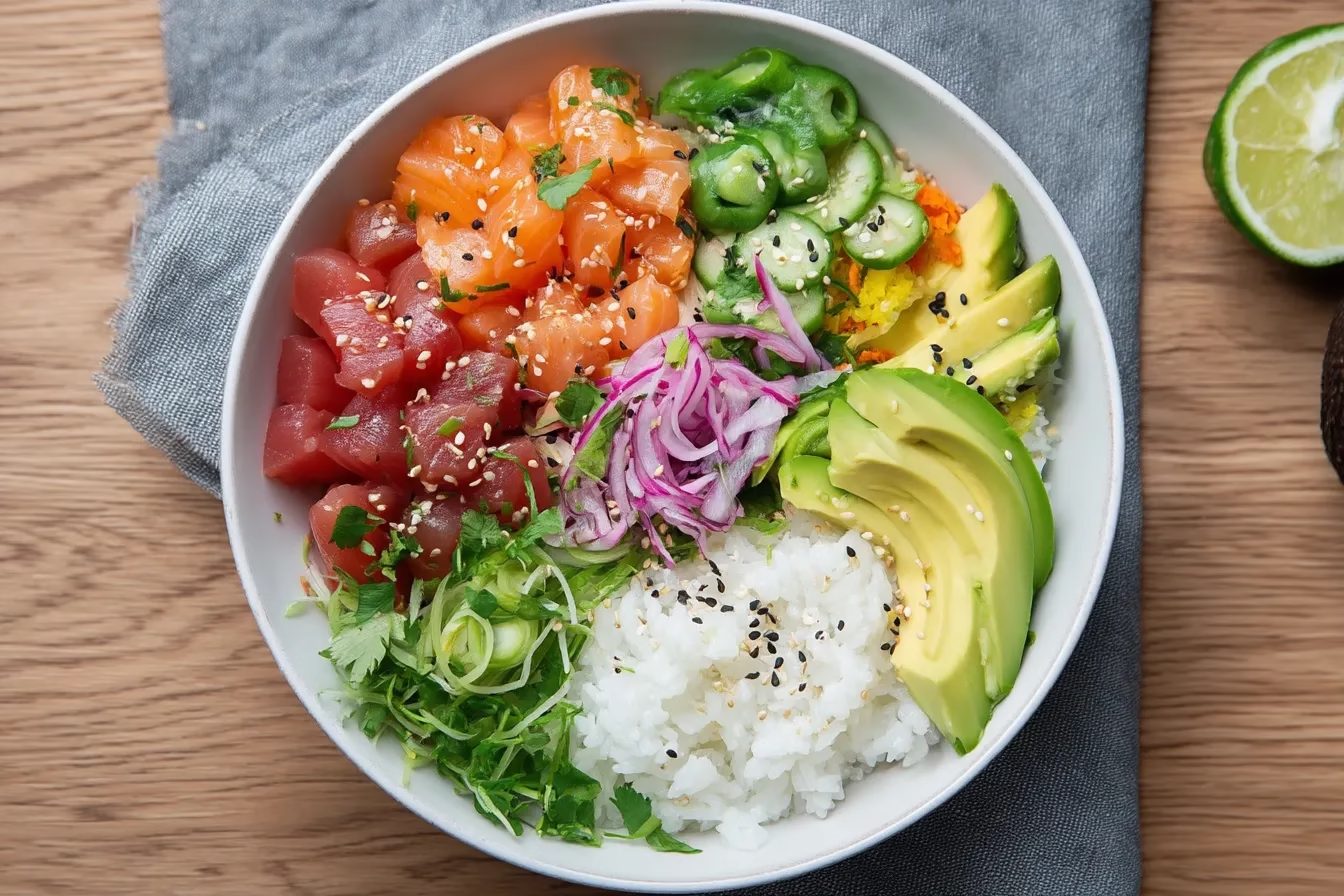
    Hawaiian poke bowl with ahi tuna, avocado, cucumber, and rice

    Poke Bowl: 9 Easy steps to follow.

    Discover the secrets to making the perfect Poke Bowl – a delicious Hawaiian dish you’ll love!
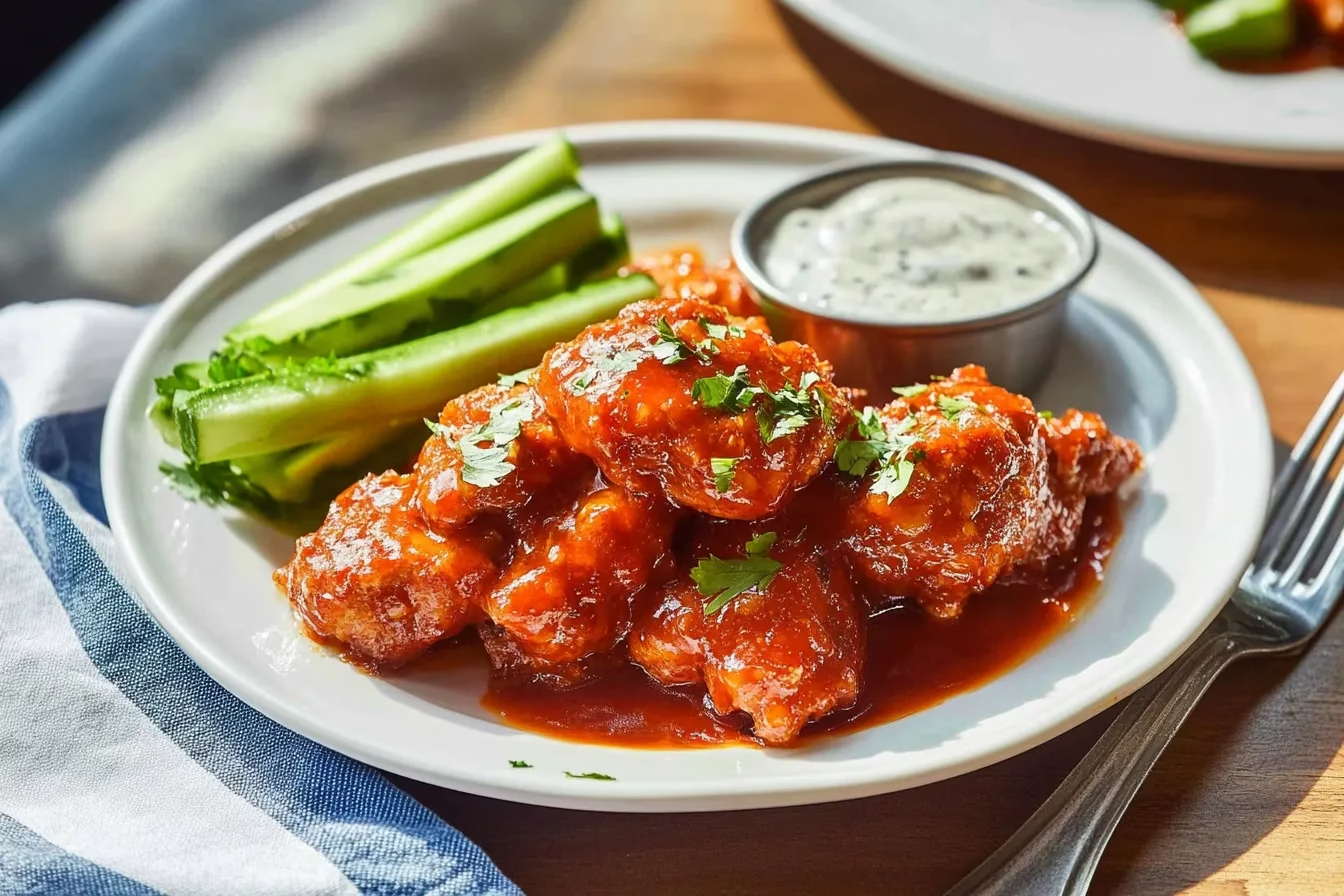
    These crispy Buffalo Wings are baked to perfection and tossed in a tangy, buttery hot sauce. Perfect for game day or any gathering, serve them with celery sticks and your favorite dipping sauce

    Buffalo Wings: Crispy, Saucy, and Irresistible

    Discover the secrets to making crispy, saucy Buffalo Wings at home. Our easy-to-follow guide has all the tips and tricks you need!
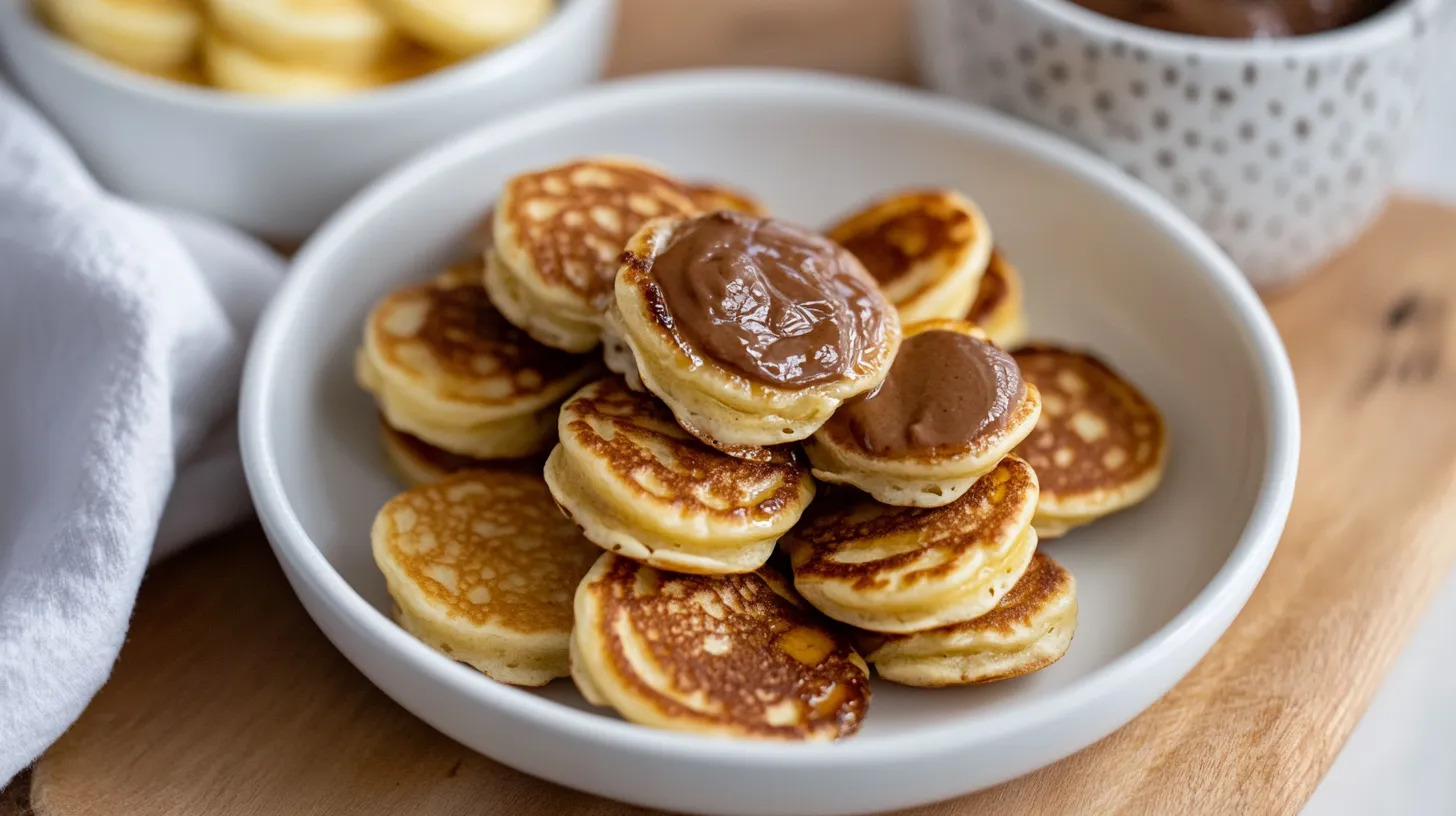
    mini pancakes, fluffy pancakes, bite-sized breakfast, fun pancakes

    Mini Pancakes: The Easiest Breakfast Recipe Ever!

    Mini pancakes for breakfast? Yes, please! I’ve shared my go-to recipe for making the perfect mini pancakes, quick, easy, and delicious!
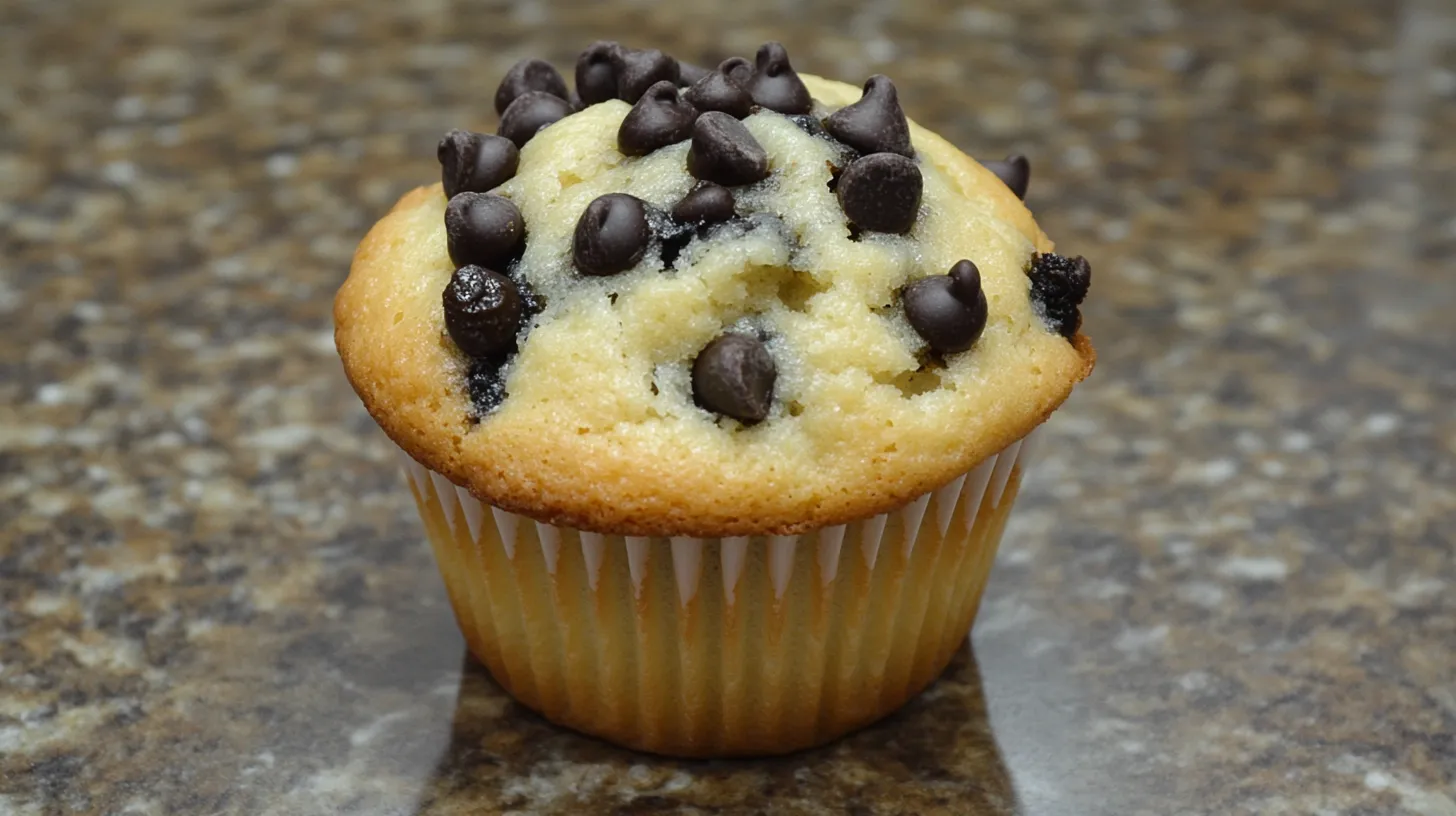
    These Chocolate Chip Muffins are soft, fluffy, and packed with melty chocolate chips. A bakery-style treat you can make right at home in under 30 minutes

    Easy Chocolate Chip Muffin Recipe for Breakfast!

    Craving a chocolate chip muffin for breakfast? I’ve got you covered with this simple recipe that’s sure to satisfy your sweet tooth!

    Key Takeaways

    • Quick and easy dinner solution
    • Customizable to suit various tastes
    • A healthier, low-carb alternative to traditional egg rolls
    • Perfect for busy weeknights
    • Great for meal prep and leftovers

    What is Egg Roll in a Bowl?

    Egg Roll in a Bowl is a tasty and healthy dish. It’s like a deconstructed egg roll, without the wrapping or frying. It keeps all the great flavors.

    This dish is a new take on traditional egg rolls. It’s easy to make and has lots of nutrients. It’s great for those who want a low-carb meal that’s full of flavor.

    Overview of the Dish

    This meal is simple and satisfying. It has ground meat, veggies like cabbage and carrots, and spices for an Asian taste. You can change it up to fit your diet and what you have.

    Key Ingredients

    The main parts of Egg Roll in a Bowl are:

    • Ground meat (chicken, or beef)
    • Cabbage
    • Carrots
    • Onions
    • Garlic
    • Soy sauce or other seasonings

    These ingredients add lots of flavor. They also have nutritional benefits. The veggies give you fiber, vitamins, and minerals. The meat helps your muscles.

    Nutritional Benefits

    Egg Roll in a Bowl is not only tasty, but also healthy. Here’s what it offers:

    NutrientBenefitApproximate Value per Serving
    ProteinSupports muscle health and satiety25-30 grams
    FiberAids in digestion and satiety5-7 grams
    Vitamin AImportant for vision and immune function20-25% of the Daily Value (DV)
    Vitamin CBoosts immunity and antioxidant levels40-50% of the DV

    This dish is a low-carb choice. It’s good for those on a low-carb diet. It has protein, healthy fats, and complex carbs. It’s a nutritious and filling meal.

    Why Choose Low-Carb Meals?

    Choosing low-carb meals can change your health for the better. Dishes like Egg Roll in a Bowl make it easy. By eating fewer carbs, you get many benefits, not just weight loss.

    Health Benefits of Low-Carb Eating

    Low-carb diets offer many health benefits. They improve your overall health and lower the risk of chronic diseases. You get to eat whole, nutrient-rich foods while keeping carbs low.

    Low-carb eating boosts your energy. Your body burns fat better, giving you more energy all day.

    Weight Management

    For weight management, low-carb diets work well. They lower insulin levels, helping you burn fat and lose weight. Eating Keto Egg Roll in a Bowl is a tasty way to stay on track.

    Low-carb meals also keep you full. They have lots of protein and fat, helping you manage your weight.

    Blood Sugar Control

    Low-carb eating is great for diabetes or prediabetes management. It helps control blood sugar levels. This can reduce the need for medication and improve health.

    Low-carb diets prevent blood sugar spikes. This is key for those who need to watch their blood sugar closely.

    How to Make Egg Roll in a Bowl

    Let’s get cooking! Making Egg Roll in a Bowl is easy. I’ll guide you through it. It’s a quick, healthy meal full of flavor.

    Step-by-Step Preparation

    First, cook your ground meat in a pan until it’s browned. Break it up into small pieces as it cooks. This takes about 5-7 minutes, depending on the heat and meat type.

    • Use a medium-high heat to get a good brown on the meat.
    • Break up the meat with a spatula to ensure it cooks evenly.

    Then, add your veggies – cabbage, carrots, and more – and cook until they’re tender. This step is key for the right texture and flavor.

    1. Add the veggies to the pan with the cooked meat.
    2. Cook for an additional 5 minutes, or until the veggies are tender.

    Cooking Tips for Best Flavor

    For the best flavor, use high-quality ingredients. Don’t be afraid to try different seasonings. Using fresh ginger and garlic really helps.

    « The key to a great Egg Roll in a Bowl is in the seasonings, » says Chef Wong, a renowned expert in Asian cuisine. « Don’t be shy with the soy sauce, sesame oil, and other flavorings. »

    IngredientQuantityTips
    Ground Meat1 lbChoose lean meat for a healthier option.
    Cabbage2 cupsShredded or chopped, your preference.
    Carrots1 cupGrate or julienne for best results.

    Serving Suggestions

    You can serve Egg Roll in a Bowl alone or with cauliflower rice or a green salad.

    Other serving ideas include:

    • Adding sliced green onions on top for extra flavor.
    • Serving with a side of steamed broccoli.
    • Using it as a filling for lettuce wraps.

    Variations on the Classic Recipe

    Egg Roll in a Bowl is very flexible. You can make it your own by adding or changing ingredients. This lets you tailor it to your taste.

    Vegetarian Egg Roll in a Bowl

    For a vegetarian version, use tofu or tempeh instead of ground meat. Add mushrooms, bell peppers, or snow peas for extra flavor and nutrients. « A great vegetarian Egg Roll in a Bowl has lots of veggies, » a chef advises.

    Protein-Packed Options

    To add more protein, try chicken, shrimp, or bacon. These not only taste great but also make the dish more filling. You can also try ground turkey or pork for something different.

    Spicy Additions and Toppings

    For a spicy twist, add spicy seasonings or toppings like sriracha or diced jalapeños. These can make the dish more flavorful and exciting. « Seasoning is key to a great dish, » a chef notes. Find the right amount of heat for you.

    Other ways to vary Egg Roll in a Bowl include adding different veggies, trying new seasonings, or mixing in other cuisines. The most important thing is to have fun and be creative!

    Common Mistakes to Avoid

    To make your Egg Roll in a Bowl tasty, avoid common mistakes. This dish is easy to make, but a few errors can ruin its taste and feel.

    Overcooking Ingredients

    Don’t overcook your ingredients. You want veggies to be crunchy and meat to be juicy. Cook them just until they’re done and then stop the heat. This keeps their natural taste and texture.

    Skipping Seasonings

    Don’t skip or use too little seasoning. Seasonings make Egg Roll in a Bowl special. Add them freely and taste as you go. This makes your dish balanced and tasty.

    Using Low-Quality Ingredients

    Bad ingredients can mess up your Egg Roll in a Bowl. Use fresh, top-quality ingredients for the best taste and feel. Fresh veggies, for example, make a huge difference in taste and health.

    Avoid these mistakes to make a delicious Egg Roll in a Bowl. It will quickly become a favorite. Happy cooking!

    Pairing Ideas for Egg Roll in a Bowl

    Now that you know how to make Egg Roll in a Bowl, let’s find some great pairings. This dish is very flexible. You can mix and match sides and drinks to make a complete meal.

    There are so many side dish options! A simple green salad with a light dressing is a great choice. For something more filling, try steamed broccoli or roasted vegetables. They add a nice texture contrast.

    You can also serve it with cauliflower rice. This is a low-carb option that goes well with the Egg Roll in a Bowl.

    • Green salad with light vinaigrette
    • Steamed broccoli
    • Roasted vegetables
    • Cauliflower rice

    Beverage Pairings

    The right drink can make your Egg Roll in a Bowl even better. Try a glass of iced tea with lemon or mint for a refreshing choice. Or, if you want something richer, a crisp beer pairs well, even with protein like chicken or shrimp.

    • Iced tea with lemon or mint
    • Crisp beer
    • Fresh limeade

    Balance Your Plate

    To make a balanced meal, mix different food groups. Add colors and textures to your plate. This makes your meal look good and ensures you get all the nutrients.

    Pairing your Egg Roll in a Bowl with the right sides and drinks can make it a special meal. Don’t be afraid to try new things. Find your favorite way to enjoy this versatile dish!

    Storing and Reheating Leftovers

    Got leftovers from your Egg Roll in a Bowl dinner? You’re in luck because this dish reheats beautifully! Let’s dive into the best ways to store and reheat your leftovers to keep them tasting great.

    Best Practices for Storage

    To keep your Egg Roll in a Bowl leftovers fresh, it’s essential to store them properly. First, let the dish cool down to room temperature. This step is key to prevent bacterial growth and keep your leftovers safe to eat.

    Once cooled, put the leftovers in an airtight container. Glass containers with tight-fitting lids are best. They keep flavors in and are safe. Don’t forget to label the container with the date.

    Storage MethodDurationTips
    Fridge3-4 daysKeep it in an airtight container.
    FreezerUp to 3 monthsPortion into smaller containers or freezer bags for easy reheating.

    How to Reheat for Optimal Taste

    Reheating your Egg Roll in a Bowl is easy. You can use the microwave or the stovetop. For the microwave, put leftovers in a safe dish, cover, and heat on high for 1-2 minutes, stirring halfway.

    For the stovetop, place leftovers in a pan over medium heat. Stir occasionally until warmed through. This method keeps the dish’s texture and flavors.

    Creative Ways to Use Leftovers

    Don’t just reheat your leftovers; get creative! Use your Egg Roll in a Bowl as a filling for lettuce wraps or as a topping for a fresh salad. You can also add it to a bed of cauliflower rice for a quick and easy meal.

    Another idea is to mix your leftovers with some beaten eggs and create a breakfast skillet. The possibilities are endless, and it’s a great way to reduce food waste and enjoy your meal in different ways.

    Reviews and User Experiences

    The Egg Roll in a Bowl community is buzzing with excitement. We’re thrilled to share feedback from home cooks who’ve fallen in love with this dish! From rave reviews to creative twists, we’re diving into the world of user experiences to bring you the best of the best.

    Testimonials from Home Cooks

    Home cooks just like you have taken to Egg Roll in a Bowl. Their testimonials show its simplicity and flavor. « I was skeptical at first, but this recipe has become a staple in my household, » says Sarah, a busy mom of three. « It’s quick, easy, and my kids devour it! »

    « I love how versatile this recipe is, » adds Mark, an avid cook. « I’ve tried it with different proteins and vegetables, and it never disappoints! »

    One of the best things about Egg Roll in a Bowl is its adaptability. Users have tried various combinations, from adding different spices and seasonings to incorporating other protein sources. Some popular variations include adding shrimp for an extra burst of flavor or using turkey instead of pork for a leaner option.

    Community Recipes

    The Egg Roll in a Bowl community is all about sharing and creativity. We’ve seen users share their own community recipes, from vegan versions to gluten-free adaptations. « I made it with tofu and added more veggies, » shares Emily. « It was amazing! »

    We’re excited to see how you’ll make Egg Roll in a Bowl your own! Whether you’re a seasoned chef or a kitchen newbie, this dish is sure to become a favorite. So go ahead, get creative, and share your experiences with the community!

    Conclusion: Enjoying Egg Roll in a Bowl

    Now you know about Egg Roll in a Bowl. It’s time to make it for dinner. This dish is tasty and easy to make. It’s a great choice for a low-carb meal any night.

    Key Takeaways

    Egg Roll in a Bowl is very flexible. You can make it spicy or mild, based on what you like. It’s perfect for anyone.

    Exploring Recipe Flexibility

    This recipe is super flexible. You can add different ingredients and spices to make it your own. It’s great for those who love to try new things in the kitchen.

    So, try making Egg Roll in a Bowl! It’s healthy, easy to make, and you can make it your own. I’m excited for you to enjoy cooking and eating this amazing dish.

    FAQ

    What is Egg Roll in a Bowl?

    Egg Roll in a Bowl is a twist on the classic egg roll. It’s made without wrapping or frying. It has savory meat, crunchy veggies, and Asian flavors.

    Is Egg Roll in a Bowl keto-friendly?

    Yes, it’s great for a keto diet. It’s low in carbs and rich in protein and healthy fats.

    Can I make Egg Roll in a Bowl vegetarian?

    Absolutely! Swap ground meat for tofu or tempeh. Add more veggies for a vegetarian version.

    How do I store leftovers of Egg Roll in a Bowl?

    Cool it down first. Then, put it in an airtight container in the fridge.

    Can I reheat Egg Roll in a Bowl?

    Yes, you can. Reheat it in the microwave or on the stovetop. It’s perfect for meal prep.

    What are some variations of Egg Roll in a Bowl?

    Try adding chicken, shrimp, or bacon. Add spice with sriracha or red pepper flakes.

    Is Egg Roll in a Bowl a healthy dinner option?

    Yes, it’s healthy. It’s full of nutrients, low in carbs, and rich in protein and fiber from veggies.

    Can I serve Egg Roll in a Bowl with other dishes?

    Yes, it goes well with cauliflower rice, steamed broccoli, or a green salad. Enjoy it with iced tea or beer too.

  • Buffalo Wings: Crispy, Saucy, and Irresistible

    Buffalo Wings: Crispy, Saucy, and Irresistible

    Who can resist the allure of crispy chicken wings smothered in a rich, tangy sauce? I remember my first time trying Authentic Buffalo Wings at a local sports bar. The crunch and spicy kick were love at first bite!

    The magic of Buffalo Wings is in their simplicity and perfect flavors. Making the Best Buffalo Wings at home is easier than you think. We’ll explore the history, types, and secrets to making irresistible Buffalo Wings.

    These crispy Buffalo Wings are baked to perfection and tossed in a tangy, buttery hot sauce. Perfect for game day or any gathering, serve them with celery sticks and your favorite dipping sauce

    Buffalo Wings

    These crispy Buffalo Wings are baked to perfection and tossed in a tangy, buttery hot sauce. Perfect for game day or any gathering, serve them with celery sticks and your favorite dipping sauce.
    No ratings yet
    Print Pin Share on Facebook Rate
    Type de plat: Plat principal
    Cuisine: American
    Temps de préparation: 15 minutes
    Temps de cuisson: 50 minutes
    Temps total: 1 heure 5 minutes
    Servings: 6 Servings
    Calories: 774kcal
    Author: Hervé
    Cost: $8-$12

    Equipment

    • Mixing bowl
    • Baking sheet
    • Wire rack
    • Parchment paper
    • Small saucepan
    • Tongs

    Ingrédients

    • 2.5 lbs chicken wings
    • 1 tbsp cornstarch
    • 1/2 tsp paprika
    • 1/2 tsp smoked paprika
    • 1/2 tsp garlic powder
    • 1/4 tsp onion powder
    • 1/8 tsp cayenne pepper
    • 1/4 tsp black pepper
    • 1/2 tsp salt
    • 1 tbsp cooking oil
    • 4 tbsp unsalted butter
    • 1/2 cup Frank’s RedHot Sauce
    • 1 tsp Worcestershire sauce
    • 1/2 tsp garlic powder

    Instructions

    Prepare the Wings

    • Preheat the oven to 400°F (200°C). Line a baking sheet with parchment paper and place a wire rack on top.
    • In a small bowl, mix together cornstarch, paprika, smoked paprika, garlic powder, onion powder, cayenne pepper, black pepper, and salt.
    • Pat the chicken wings dry with paper towels. Place them in a large mixing bowl and drizzle with cooking oil. Toss to coat evenly.
    • Sprinkle the seasoning mixture over the wings and toss until evenly coated.

    Bake the Wings

    • Arrange the seasoned wings on the prepared wire rack, ensuring they are not touching.
    • Bake for 30 minutes, then flip the wings and bake for an additional 20-25 minutes until crispy and golden brown.

    Prepare the Sauce

    • While the wings are baking, melt the butter in a small saucepan over medium heat.
    • Add Frank’s RedHot Sauce, Worcestershire sauce, and garlic powder to the melted butter. Stir until well combined and heated through.

    Toss and Serve

    • Transfer the baked wings to a large bowl. Pour the prepared sauce over the wings and toss to coat evenly.
    • Serve immediately with celery sticks and your choice of dipping sauce.

    Nutrition

    Calories: 774kcal | Carbohydrates: 3g | Protéines: 52g | Fat: 60g | Lipides saturés: 20g | Choléstérol: 220mg | Sodium: 1528mg | Potassium: 350mg | Fibre: 0.3g | Vitamine A: 15IU | Calcium: 30mg | Fer: 2mg
    Apports nutritionnels
    Buffalo Wings
    Quantité par portion
    Calories 774 Calories des lipides 540
    % des apports journaliers*
    Fat 60g92%
    Lipides saturés 20g125%
    Choléstérol 220mg73%
    Sodium 1528mg66%
    Potassium 350mg10%
    Carbohydrates 3g1%
    Fibre 0.3g1%
    Protéines 52g104%
    Vitamine A 15IU0%
    Calcium 30mg3%
    Fer 2mg11%
    * Percent Daily Values are based on a 2000 calorie diet.

    Table of Contents

    Key Takeaways

    • Learn the history and evolution of Buffalo Wings
    • Discover the different types of Buffalo Wings and their unique flavors
    • Get tips on making crispy Buffalo Wings at home
    • Explore the secret to achieving the perfect balance of sauce and spice
    • Find out how to make your Buffalo Wings stand out at your next gathering

    The History of Buffalo Wings

    Let’s explore the history of Buffalo Wings. It’s a story of innovation and taste. These wings are a big part of American food, but their start is simple.

    Origin Story: How It All Started

    In the 1960s, Buffalo, New York, was the place. Teressa Bellissimo and her husband Frank ran the Anchor Bar. A group of friends and their son came in late, looking for food.

    Teressa quickly made some chicken wings. She fried them and tossed them in spicy sauce. She added celery and blue cheese dressing to help with the heat. And so, Buffalo Wings were born!

    « The creation of Buffalo Wings was a moment of culinary ingenuity, born out of necessity and a dash of creativity. » –

    A food historian

    The Name: Why « Buffalo »?

    The name « Buffalo Wings » comes from Buffalo, New York. It honors the city where they first appeared. The name has stuck, linking to a specific way of making chicken wings.

    Evolution of the Recipe

    The Buffalo Wing recipe has changed a lot over time. It went from mild to very spicy. It also changed from frying to baking or grilling.

    Today, Buffalo Wings are everywhere in the U.S. Different places add their own twist to the classic recipe.

    The story of Buffalo Wings shows how food traditions can grow. What began as a simple snack has become a big deal. People keep trying new things with Buffalo Wings.

    Different Types of Buffalo Wings

    Buffalo wings come in many flavors, from classic to new ones. You can stick to the traditional or try something different. There’s a Buffalo wing for everyone.

    Classic Mild vs. Spicy

    The debate on mild vs. spicy Buffalo wings is ongoing. Classic mild wings have a buttery, slightly spicy taste. Spicy wings are for those who like a strong kick. The heat level depends on the hot sauce used.

    If you like it milder, use less hot sauce or try a milder sauce. For a bigger kick, add more hot sauce or use hotter peppers.

    BBQ and Other Flavor Variations

    There are many flavors beyond the classic Buffalo wing. BBQ wings are sweet and tangy. Other favorites include lemon pepper, garlic parmesan, and honey mustard wings.

    These flavors offer a break from the usual spicy or mild. Trying different sauces and seasonings can find your new favorite.

    Fried vs. Baked: Which is Better?

    Fried vs. baked Buffalo wings is a big debate. Fried wings are crispy and juicy. Baked wings are healthier, with less fat.

    Frying is traditional, but baking is a good alternative. It’s all about what you prefer and your diet.

    Essential Ingredients for Perfect Buffalo Wings

    Making perfect Buffalo Wings starts with the right ingredients. Whether you’re a pro chef or a home cook, the ingredients matter a lot. They help bring out the true taste of Buffalo Wings.

    The Best Chicken Cuts to Use

    The base of great Buffalo Wings is the chicken. Chicken wings are the top pick, but fresh, quality wings are key. You can choose drumsticks, flats, or both, based on what you like.

    For the best taste, pick wings that are plump and have good meat and skin. This makes your Buffalo Wings juicy inside and crispy outside.

    Sauces that Make a Difference

    Talking about Buffalo Wings means talking about the sauce. Buffalo Wing sauce is essential for their flavor. The classic mix is hot sauce and butter, with Frank’s RedHot being a top pick for hot sauce.

    But, you can try other sauces like BBQ sauce or honey mustard. Yet, the traditional hot sauce and butter combo is unbeatable for authentic Buffalo Wings.

    Spices and Seasoning Secrets

    Spices and seasonings can make your Buffalo Wings even better. A blend of paprika, garlic powder, and salt adds flavor before saucing.

    For more heat, some add cayenne pepper or red pepper flakes to the rub. The goal is to find the right balance so the wings aren’t too bland or too strong.

    Cooking Techniques to Elevate Your Buffalo Wings

    To make your Buffalo Wings amazing, try different cooking ways. The method you pick can change how tasty, soft, and fun they are.

    Frying: The Traditional Method

    Frying is the classic way to cook Buffalo Wings. It makes them crispy outside and juicy inside. To fry them right, get the oil hot – about 375°F (190°C) is best. Using a thermometer helps get that crispy feel.

    Here are some tips for frying Buffalo Wings:

    • Pat the chicken dry before frying for even cooking.
    • Don’t fry too many at once – do batches if needed.
    • Drain excess oil on paper towels to stay crispy.

    Baking: Healthier Alternatives

    Baking Buffalo Wings is a healthier choice. It’s not as crispy as frying but it makes the wings tender with less oil. Preheat your oven to 425°F (220°C) and bake for 30 minutes, or until done and lightly browned.

    To make baked wings taste better, you can:

    • Toss the wings in oil and seasonings before baking.
    • Use a wire rack on a baking sheet for better air flow.
    • Broil for a few minutes to get some browning.

    Grilling for Smoky Flavor

    Grilling Buffalo Wings gives them a smoky taste. It adds a special flavor that’s great for outdoor events. Preheat your grill to medium-high, then cook for 20-25 minutes, turning often, until they’re done and slightly charred.

    Here are some grilling tips:

    1. Marinate or season the wings before grilling for more taste.
    2. Watch the heat to avoid burning.
    3. Finish with a quick toss in your favorite Buffalo sauce.

    In conclusion, whether you like frying, baking, or grilling, there’s a method to make your Buffalo Wings better. Trying different ways can help you find your favorite way to make them.

    Buffalo Wings are even better with the right dipping sauce. The perfect dip can make the flavors pop. It adds a new twist to this favorite snack.

    The Iconic Blue Cheese Dip

    Blue cheese dip is a classic with Buffalo Wings. It’s tangy and balances the spicy wings well. Making it at home is easy: mix blue cheese, sour cream, mayonnaise, salt, and pepper.

    Frank’s RedHot says blue cheese is the best for cooling down the heat.

    Ranch Dressing: A Crowd Favorite

    Ranch dressing is a top pick for Buffalo Wings. It’s creamy and mild, a nice break from the spice. You can make ranch at home with buttermilk, mayonnaise, herbs, and garlic.

    Buffalo Wild Wings fans love ranch for a good reason!

    « The right dipping sauce can make or break your Buffalo Wing experience. Don’t be afraid to experiment with different flavors! »

    Other Creative Dips

    Blue cheese and ranch are great, but there’s more to try. Honey mustard dip is sweet and tangy. Greek yogurt dill dip is refreshing. For heat, try spicy queso dip.

    Whether you stick to classics or try new things, there’s a world of dips to explore. So, be creative and find your new favorite dip!

    Pairing Buffalo Wings with Drinks

    Enjoying Buffalo Wings is better with the right drink. You can have them at a sports bar, a cozy night in, or a party. The perfect drink makes the flavors pop.

    « The right drink can turn a good Buffalo Wings experience into a great one, » says a seasoned food critic. This is true because Buffalo Wings come in many flavors and heat levels. There’s a drink for every taste, from cool to hot.

    What Beer Goes Best with Wings?

    Beer is a classic choice for Buffalo Wings. It’s crisp and refreshing, cutting through the richness and spiciness. Choose a beer that matches the flavor and heat of your Buffalo Wings.

    For milder wings, a lighter beer like a lager or pilsner is great. These beers are refreshing and won’t overpower the wings. For spicier wings, a beer with more body, like an IPA or pale ale, works well. The hoppy bitterness balances the spiciness.

    Refreshing Non-Alcoholic Options

    Not everyone likes beer with their Buffalo Wings. Or maybe you want something different. Non-alcoholic drinks can be just as good. Cold milk can cool down spicy wings, while citrusy soda adds a refreshing contrast.

    Iced tea, flavored with citrus or mint, is also a great choice. The tannins in the tea cut through the richness of the wings. For something unique, try sparkling water with cucumber or lime for a refreshing option.

    Wine Pairing for a Unique Experience

    Wine can be a unique and sophisticated choice for Buffalo Wings. It’s key to match the wine to the sauce and spiciness. A dry Riesling or Gewürztraminer is excellent, balancing the heat and richness.

    For red wine lovers, a Pinot Noir is a good choice. Its light body and red fruit flavors complement the wings without overpowering them. The goal is to find a wine that enhances the flavors of the Best Buffalo Wings.

    In conclusion, the right drink can make your Buffalo Wings experience better. Whether it’s beer, a non-alcoholic drink, or wine, there’s a perfect match. Try different pairings to find your new favorite!

    Buffalo Wings Serving Styles

    Buffalo Wings can be served in many fun ways, whether you’re eating out or having a party. Their versatility makes them appealing to everyone. You can find a serving style for any taste or event.

    Traditional Restaurant Service

    Enjoying Authentic Buffalo Wings at a Buffalo Wing restaurant is special. The atmosphere, service, and wings all come together for a great experience. Restaurants have secret recipes that make their wings stand out.

    At restaurants, you’ll find many wing flavors and sauces. From mild to very spicy, there’s something for everyone. They also offer dips and sides like blue cheese dressing and celery sticks.

    Home Party Platter Ideas

    Serving Buffalo Wings at home can be fun. Making a Buffalo Wings platter for your party impresses guests. You can pick your favorite sauces and sides.

    To make a nice platter, arrange the wings nicely. Add dips, celery, and carrot sticks around them. Fresh parsley or cilantro can add color.

    Food Trucks and Festivals

    Buffalo Wings are great for food trucks and festivals. They’re easy to eat and come in many flavors. You can try traditional buffalo or new flavors like honey mustard or teriyaki.

    Wing festivals and food trucks offer new flavors. They also have fun atmospheres with live music and activities. It’s a great way to spend the day.

    Healthier Alternatives to Traditional Buffalo Wings

    You can enjoy Buffalo wings without feeling guilty. There are many options that are low in calories but high in flavor. These alternatives are perfect for a guilt-free snack.

    Cauliflower Wings: A Vegan Option

    Cauliflower wings are a great choice for those who want a vegan option. They are low in calories but pack a spicy punch. To make them, coat cauliflower florets in a mix of flour, spices, and sauce. Then, bake or air-fry until they’re crispy.

    Benefits of Cauliflower Wings:

    • Lower in calories and fat
    • Vegan-friendly
    • Rich in vitamins and antioxidants

    Air Fryers: Can They Deliver?

    Air fryers change the game for cooking Buffalo wings. They give you a crispy outside and juicy inside with little oil. This method cuts down on calories and makes cleaning up a breeze. To air-fry Buffalo wings, marinate chicken in your favorite sauce and spices. Then, cook them in the air fryer until they’re crispy.

    Tips for Air Frying Buffalo Wings:

    • Pat dry the wings before cooking for extra crispiness
    • Shake the basket halfway through cooking for even cooking
    • Experiment with different sauces and seasonings

    Lower-Calorie Sauces and Preparations

    Using lower-calorie sauces and methods can also make Buffalo wings healthier. Traditional sauce is high in calories and fat. Try using Greek yogurt or cottage cheese for creaminess without extra calories. Also, look for hot sauces with less sodium.

    Lower-Calorie Sauce Ideas:

    • Greek yogurt-based sauce
    • Cottage cheese sauce
    • Low-sodium hot sauce

    From Buffalo Wings’ birthplace to national chains and local gems, I’ve found the top spots for Buffalo Wings across the U.S.

    The Best Spots in Buffalo, NY

    Buffalo, NY, is the heart of Buffalo Wings. Skipping the authentic ones is a big mistake. Anchor Bar, where Buffalo Wings were born, is a must-see. « The New York Times » calls it the « birthplace of a legend. »

    John Young’s Wings ‘N Things is another local favorite. It’s often said to have invented Buffalo Wings around the same time as Anchor Bar. Buffalo’s rich history with Buffalo Wings offers a wide range of places to try.

    National Chains Everyone Loves

    National chains have made Buffalo Wings popular across the U.S. Buffalo Wild Wings is famous for its many wing flavors and sports atmosphere. It’s everywhere, making it a top choice for wing lovers.

    Dunkin’ Wings is another chain that’s become popular. It offers a variety of wing flavors. These chains make it easy to enjoy Buffalo Wings anywhere.

    Local Gems Worth Visiting

    There are also local spots that serve amazing Buffalo Wings. In New York City, Buffalo Wingers is loved by both locals and visitors. It offers a true Buffalo Wing experience.

    In the Midwest, Buffalo Style Wings in Chicago has a big following. It puts a unique spin on the classic dish. These local places are worth a visit for their special takes on Buffalo Wings.

    Exploring the best Buffalo Wing restaurants shows that love for this dish is everywhere. Whether you’re in Buffalo, NY, or elsewhere in the U.S., you’ll find a great place to try Buffalo Wings.

    Buffalo Wings are a big part of American pop culture. They’re found in sports bars and movies and TV shows. They’ve grown beyond just a snack.

    Movie and TV References

    Buffalo Wings have shown up in many films and TV shows. They often mean fun and friendship. Think of The Hangover or Friends and The Office. These moments show how much people love Buffalo Wings.

    Food shows have also made Buffalo Wings famous. They’re often in cooking challenges and eating contests. This shows how creative people can be with them.

    Buffalo Wings at Sporting Events

    Sports events, like football and hockey, love Buffalo Wings. They’re easy to eat while cheering. A platter of Buffalo Wings can make the atmosphere electric.

    The link between Buffalo Wings and sports is real. Buffalo, New York, where they started, loves sports. Now, Buffalo Wings are in stadiums everywhere, showing their wide appeal.

    Wing Festivals Across the Country

    Wing festivals celebrate Buffalo Wings. They have all kinds of flavors and contests. It’s a fun way to enjoy Buffalo Wings.

    The Buffalo Wing Festival in Buffalo, New York, is a big deal. It draws people from everywhere. It’s a chance to try new flavors and enjoy live music.

    Tips for Hosting a Buffalo Wing Party

    Hosting a Buffalo Wing party is all about creating an unforgettable experience for your guests. Start by preparing in advance. Make a list of the Best Buffalo Wings recipes you want to serve, and don’t forget the Buffalo Wing sauce!

    Preparation is Key

    Plan your menu and prepare your ingredients. Set the mood with sports games or music in the background. You can also consider ordering from popular Buffalo Wing restaurants or food trucks to make things easier.

    Fun Themes and Activities

    Create a fun atmosphere with Buffalo-themed decorations and games. You can have a wing-eating contest, play sports trivia, or simply enjoy the company of your friends and family while savoring delicious Buffalo Wings.

    Engage Your Guests

    To keep your guests engaged, consider setting up different stations with various Buffalo Wing sauces and dips. This will allow them to explore different flavors and have a great time. With these tips, you’ll be well on your way to hosting an epic Buffalo Wing party!

    FAQ

    What’s the origin of Buffalo Wings?

    Buffalo Wings started in Buffalo, New York. They were first made by Teressa Bellissimo in 1964 at the Anchor Bar.

    What’s the best type of chicken to use for Buffalo Wings?

    The best chicken for Buffalo Wings is the wings themselves. This includes the drumette and flat sections. They are crispy on the outside and juicy inside.

    Can I make Buffalo Wings without deep-frying?

    Yes, you can bake or grill Buffalo Wings instead of deep-frying. This is a healthier option that keeps the flavor great.

    What’s the secret to making crispy Buffalo Wings?

    To get crispy Buffalo Wings, dry the wings well before cooking. Use double-frying and don’t overcrowd the cooking area.

    Can I use store-bought Buffalo Wing sauce?

    Store-bought Buffalo Wing sauce is easy to find. But making your own sauce lets you control the flavor and heat level.

    What’s the best dipping sauce for Buffalo Wings?

    The best dipping sauce is up to you. But blue cheese dressing and ranch dressing are classic choices. They cool down the spiciness.

    How do I make a healthier version of Buffalo Wings?

    For a healthier version, bake or air-fry instead of deep-frying. Use lower-calorie sauces. You can also try cauliflower wings for a vegan option.

    Can I make Buffalo Wings in advance?

    Yes, you can make parts of Buffalo Wings ahead of time. But cook the wings just before serving to keep them crispy.

    What’s the best way to reheat Buffalo Wings?

    Reheat Buffalo Wings in the oven for crispiness. Or use an air fryer for a quick reheat without losing texture.

    Are Buffalo Wings gluten-free?

    Traditional Buffalo Wings can be gluten-free. Just use gluten-free sauces and seasonings. Always check the ingredients of store-bought items.

    Can I make Buffalo Wings without hot sauce?

    Yes, you can use other ingredients for flavor instead of hot sauce. Try BBQ sauce or garlic parmesan. But it won’t be the traditional taste.

  • Mini Pancakes: The Easiest Breakfast Recipe Ever!

    Mini Pancakes: The Easiest Breakfast Recipe Ever!

    Are you tired of the same old breakfast routine? Imagine starting your day with a stack of fluffy, bite-sized treats that are not only adorable but also incredibly easy to make!

    I’m excited to share with you my simple recipe for delicious pancakes that are perfect for busy mornings. Using just a few pantry staples, you can whip up a batch of these tasty morsels in no time – we’re talking just 20 minutes from start to finish!

    These easy pancakes are a hit with both kids and adults, making them a great breakfast option for the whole family. Plus, you can customize them with your favorite toppings or mix-ins for endless variety.

    mini pancakes, fluffy pancakes, bite-sized breakfast, fun pancakes

    Mini Pancakes

    These fluffy mini pancakes are fun, easy to make, and perfect for breakfast, brunch, or as a snack. Stack them high or serve with fruit, syrup, or even a dollop of whipped cream!
    No ratings yet
    Print Pin Share on Facebook Rate
    Cuisine: American
    Temps de préparation: 10 minutes
    Temps de cuisson: 10 minutes
    Temps total: 20 minutes
    Servings: 4 Servings
    Calories: 160kcal
    Author: Hervé
    Cost: $2-$4

    Equipment

    • Mixing bowl
    • Whisk
    • Non-stick skillet or griddle
    • Spatula
    • Measuring cups and spoons

    Ingrédients

    • 1 cup all-purpose flour
    • 1 tbsp sugar
    • 2 tsp baking powder
    • 1/4 tsp salt
    • 3/4 cup milk
    • 1 egg
    • 2 tbsp melted butter or oil
    • 1/2 tsp vanilla extract
    • Butter or oil for greasing

    Instructions

    Make the Batter

    • In a mixing bowl, whisk together flour, sugar, baking powder, and salt.
      In a mixing bowl whisk together flour sugar baking powder and salt
    • In another bowl, beat the egg with milk, melted butter or oil, and vanilla.
      In another bowl, beat the egg with milk, melted butter or oil, and vanilla.
    • Add wet ingredients to dry ingredients and stir until just combined. Do not overmix.
      Add-wet-ingredients-to-dry-ingredients-and-stir-until-just-combined.-Do-not-overmix.

    Cook the Pancakes

    • Heat a greased non-stick skillet over medium heat.
      Heat-a-greased-non-stick-skillet-over-medium-heat
    • Spoon small rounds (about 1 tbsp each) of batter into the pan.
      Spoon small rounds about 1 tbsp each of batter into the pan
    • Cook until bubbles form on top, then flip and cook 1–2 more minutes until golden.
      Cook until bubbles form on top then flip and cook 1–2 more minutes until golden

    Serve

    • Serve warm with maple syrup, fresh fruit, or whipped cream.
      Serve warm with maple syrup fresh fruit or whipped cream

    Nutrition

    Calories: 160kcal | Carbohydrates: 20g | Protéines: 4g | Fat: 6g | Lipides saturés: 3g | Choléstérol: 35mg | Sodium: 160mg | Potassium: 110mg | Fibre: 1g | Sucre: 4g | Vitamine A: 5IU | Calcium: 60mg | Fer: 1.3mg
    Apports nutritionnels
    Mini Pancakes
    Quantité par portion
    Calories 160 Calories des lipides 54
    % des apports journaliers*
    Fat 6g9%
    Lipides saturés 3g19%
    Choléstérol 35mg12%
    Sodium 160mg7%
    Potassium 110mg3%
    Carbohydrates 20g7%
    Fibre 1g4%
    Sucre 4g4%
    Protéines 4g8%
    Vitamine A 5IU0%
    Calcium 60mg6%
    Fer 1.3mg7%
    * Percent Daily Values are based on a 2000 calorie diet.

    Table of Contents

    Key Takeaways

    • Quick and easy breakfast recipe ready in 15 minutes
    • Customizable with your favorite toppings or mix-ins
    • Perfect for busy mornings and family breakfasts
    • Simple pantry ingredients required
    • Can be made ahead and frozen for later use

    The Charm of Bite-Sized Breakfast Treats

    The charm of mini pancakes lies not just in their adorable size but also in their versatility for various occasions. Mini pancakes are perfect for children and great in lunch boxes, making them a hit with kids and parents alike. But their appeal doesn’t stop there; they’re also ideal for serving at special events like baby showers, wedding brunches, or high tea gatherings.

    One of the key reasons mini pancakes have such universal appeal is their practicality. They’re not just cute, but also great for portion control. Their small size makes them perfect for little hands, and they can be easily dressed up or down depending on the occasion. Whether you’re looking for a fun breakfast treat or a elegant addition to a fancy brunch, mini pancakes fit the bill.

    Moreover, mini pancakes offer an interactive food experience when served with various toppings, and they cook faster than regular pancakes, making them perfect for busy mornings. This combination of fun, versatility, and practicality is what makes mini pancakes and bites-sized treats so charming.

    Essential Ingredients for Perfect Mini Pancakes

    One of the joys of this recipe is its use of everyday pantry staples to create something truly special. The ingredients needed for making perfect mini pancakes are straightforward and likely already stocked in your kitchen.

    To make these delicious treats, you’ll need all-purpose flour, sugar, baking powder, and a pinch of salt. The wet ingredients include milk, unsalted butter (melted), and an egg. Using room temperature ingredients is crucial for achieving the right consistency and texture.

    The role of each ingredient is important: baking powder helps the pancakes rise, while butter adds richness. You can adjust the type of flour and milk based on dietary needs. For instance, you can use gluten-free flour or dairy-free milk alternatives.

    IngredientQuantityPurpose
    All-purpose Flour1 cupProvides structure
    Sugar2 tablespoonsAdds sweetness
    Baking Powder2 teaspoonsHelps pancakes rise
    Milk1 cupAdds moisture
    Unsalted Butter (melted)2 tablespoonsAdds richness
    Egg1Binds ingredients

    Using fresh baking powder is essential for the pancakes to rise properly. The type of milk you use can affect the texture; whole milk yields a richer result, while lower-fat alternatives can be used for a lighter version.

    Kitchen Tools for Easy Preparation

    To whip up a batch of mini pancakes, you’ll need a few essential kitchen tools. A whisk and a couple of bowls are must-haves for mixing the batter.

    A non-stick skillet or griddle is crucial for cooking the pancakes without them sticking. Make sure your pan is heated evenly and greased lightly before cooking. Using a skillet on medium heat will give you the best results.

    For uniformly sized mini pancakes, consider using a squeeze bottle or piping bag. This tool helps in portioning out the batter evenly, making your mini pancakes look professional. You don’t need fancy equipment; basic kitchen tools will get the job done!

    Step-by-Step Mini Pancakes Recipe

    Now that we have our ingredients and tools ready, let’s dive into the step-by-step process of making delicious mini pancakes! Making mini pancakes is a straightforward process that requires some basic cooking skills and attention to detail.

    Preparing the Batter

    First, we need to prepare the batter. Although the batter preparation is crucial, our main focus here is on the cooking process. However, it’s worth noting that a smooth batter is essential for evenly cooked pancakes. To achieve this, make sure to mix your ingredients properly.

    Cooking the Mini Pancakes

    Heat a non-stick skillet or griddle pan over medium-low heat. Use a little butter to grease the pan, ensuring your pancakes don’t stick. Drop a small amount of batter (about 2-3 teaspoons) from a spoon onto the pan. You’ll know they’re ready to flip when bubbles start appearing and popping on the surface of the pancake. Only flip once, when the first side is golden brown. Cook for about 45 seconds to 1 minute per side. To cook multiple mini pancakes at once without crowding the pan, leave some space between each pancake.

    Keep cooked pancakes warm while preparing the rest of the batch. This way, you can enjoy all your mini pancakes at the right temperature.

    Pro Tips for Fluffy, Golden Mini Pancakes

    To achieve perfectly fluffy and golden mini pancakes, follow these pro tips! As someone who’s spent years perfecting the art of pancake making, I’m excited to share my expertise with you.

    First, make sure your ingredients are at room temperature. This simple step ensures that your batter has an even texture and achieves more volume. « The quality of your ingredients directly impacts the final product, » and having them at the right temperature is crucial.

    When cooking, don’t overcook your mini pancakes! They dry out easier than larger pancakes, so keep an eye on them. If you notice they’re burning, reduce the heat immediately. Maintaining the ideal pan temperature is key to achieving that perfect golden color without burning.

    Some other tips to keep in mind: avoid overmixing the batter, as this can lead to dense pancakes. Check that your baking powder is still active to ensure your pancakes rise properly. With these tips, you’ll be making fluffy, golden mini pancakes like a pro!

    Creative Variations and Add-ins

    Mini pancakes are a canvas waiting for your culinary creativity! You can transform them into a delightful treat by incorporating various ingredients into the batter or using different toppings.

    Sweet Options

    For those with a sweet tooth, consider adding fresh fruits, chocolate chips, or a drizzle of honey or maple syrup. You can also sprinkle some cinnamon or vanilla powder into the batter for an extra flavor boost.

    Savory Possibilities

    In the mood for something savory? Try adding grated cheese, chopped herbs, or grated carrots to the batter. You can top them with avocado, sour cream, or even smoked salmon for a delicious twist.

    IngredientsToppings
    Cheese, ChivesSour Cream, Chopped Herbs
    Herbs, GarlicAvocado, Smoked Salmon
    Grated Carrots, CheeseHummus, Chopped Nuts

    Storage and Freezing Your Mini Pancakes

    One of the best things about mini pancakes is that they can be made ahead and frozen for later use. To store them, first, let the pancakes cool completely to prevent sogginess. Once cooled, you can refrigerate them in anairtight containerfor up to 5 days.

    For longer storage,freezingis an excellent option. To freeze, place the cooled pancakes in a single layer on a baking sheet and flash freeze until solid. Then, transfer them to anairtight bagor container, separating the layers with non-stick parchment paper to prevent sticking.

    To reheat, you can microwave the frozen pancakes for 10-15 seconds or more until warm. Alternatively, wrap them in foil and bake in a 350ºF/180ºC oven for about 10minutes. Frozen minipancakeswill maintain their quality for up to 3 months. You can also store them in single-serving portions for convenient grab-and-go breakfasts.

    Conclusion

    The joy of mini pancakes lies in their simplicity and versatility. This easy recipe can become a staple in any home kitchen, bringing joy to both kids and adults alike. You can experiment with various toppings and add-ins to create your own unique flavor combinations. Plus, making a batch ahead and freezing them is a lifesaver for busy mornings. Whether you’re hosting a brunch or planning a fun breakfast for kids’ parties, mini pancakes are always a hit. So, give this recipe a try and enjoy the delightful world of pancakes!

    Pair your breakfast with fresh fruit, yogurt, or other favorites for a complete meal. Share your own mini pancakes creations or experiences in the comments below!

    FAQ

    What’s the best way to prevent lumps in the batter?

    To avoid lumps, make sure to whisk together the dry ingredients, like flour and sugar, before adding the wet ingredients, and use room temperature milk and egg.

    Can I use a regular pan instead of a non-stick skillet?

    Yes, you can use a regular pan, but it’s recommended to use a non-stick surface to prevent the pancakes from sticking and to make them easier to flip.

    How do I know when to flip the pancakes?

    You’ll know it’s time to flip when you see bubbles on the surface and the edges start to dry. This is usually after about 2-3 minutes over medium heat.

    Can I make the batter ahead of time and store it in the fridge?

    Yes, you can prepare the batter ahead of time and store it in the fridge for up to a day. Just give it a good stir before cooking.

    What’s the best way to keep the pancakes warm while cooking the rest of the batch?

    To keep them warm, place the cooked pancakes on a baking sheet in a single layer and keep them in a low-temperature oven (around 200°F) until you’re ready to serve.

    Can I freeze the cooked pancakes for later use?

    Yes, you can freeze them! Simply place the cooled pancakes in a single layer in a freezer-safe bag or container and store them in the freezer for up to 2 months. To reheat, simply toast or microwave them.

  • My Favorite Banana Brownie Recipe to Try Tonight!

    My Favorite Banana Brownie Recipe to Try Tonight!

    Are you tired of the same old banana bread and looking for a new way to use up those overripe bananas? I’ve got a game-changer for you! Imagine sinking your teeth into a rich, fudgy brownie infused with the natural sweetness of ripe bananas.

    This isn’t just any banana brownie recipe; it’s a perfect blend of moist chocolate and the subtle sweetness of bananas. I’ve tested this recipe countless times to get it just right, and I’m excited to share it with you.

    Stack of fudgy banana chocolate brownies with subtle banana slices and melted chocolate on marble surface

    Banana Brownie Recipe

    These banana brownies are rich, fudgy, and wonderfully moist thanks to ripe bananas. Combining chocolatey goodness with a hint of natural sweetness, they’re a perfect twist on classic brownies!
    No ratings yet
    Print Pin Share on Facebook Rate
    Type de plat: Dessert
    Cuisine: American
    Diet: Low Calorie
    Keyword: banana-brownie, chocolate dessert
    Temps de préparation: 10 minutes
    Temps de cuisson: 25 minutes
    Temps total: 35 minutes
    Servings: 9 Squares
    Calories: 210kcal
    Author: Hervé
    Cost: $5-$8

    Equipment

    • 8×8 inch baking pan
    • Mixing bowl
    • Whisk

    Ingrédients

    • 1/2 cup unsalted butter (melted)
    • 1 ripe banana (mashed)
    • 3/4 cup granulated sugar
    • 2 eggs
    • 1 tsp vanilla extract
    • 1/2 cup unsweetened cocoa powder
    • 1/2 cup all-purpose flour
    • 1/4 tsp salt
    • 1/2 cup chocolate chips (optional)

    Instructions

    Prepare the Batter

    • Preheat oven to 350°F (175°C). Grease or line an 8×8 inch baking pan.
      Person whisking butter, mashed banana, and sugar in a ceramic bowl on a marble countertop
    • In a mixing bowl, combine melted butter, mashed banana, and sugar. Whisk until smooth.
      Adding vanilla extract to chocolate brownie batter in a ceramic bowl on a marble countertop
    • Add eggs and vanilla extract, and mix well.
      Cracking an egg into chocolate banana brownie batter with vanilla extract on a marble countertop
    • Sift in cocoa powder, flour, and salt. Stir until just combined. Fold in chocolate chips if using.
      Whisking cocoa powder, flour, and salt into chocolate banana brownie batter on marble countertop

    Bake

    • Pour the batter into the prepared pan and spread evenly.
      Pouring chocolate banana brownie batter into a greased baking pan on marble countertop
    • Bake for 22–25 minutes or until a toothpick inserted comes out with moist crumbs.
      Testing baked chocolate banana brownies with toothpick in oven

    Cool and Serve

    • Allow brownies to cool completely before cutting into squares.
      Slicing cooled chocolate banana brownies into squares on marble countertop

    Video

    Notes

    Special Notes

    • Use overripe bananas for maximum sweetness and moisture.
    • Do not overmix the batter to keep brownies fudgy.
    • For a nutty twist, add chopped walnuts or pecans.
    • Store leftovers in an airtight container for up to 3 days.
    • Serve warm with a scoop of vanilla ice cream for an indulgent treat.

    Nutrition

    Calories: 210kcal | Carbohydrates: 28g | Protéines: 3g | Fat: 10g | Lipides saturés: 6g | Choléstérol: 45mg | Sodium: 90mg | Fibre: 2g | Sucre: 20g
    Apports nutritionnels
    Banana Brownie Recipe
    Quantité par portion
    Calories 210 Calories des lipides 90
    % des apports journaliers*
    Fat 10g15%
    Lipides saturés 6g38%
    Choléstérol 45mg15%
    Sodium 90mg4%
    Carbohydrates 28g9%
    Fibre 2g8%
    Sucre 20g22%
    Protéines 3g6%
    * Percent Daily Values are based on a 2000 calorie diet.

    Banana Brownie Recipe – Frequently Asked Questions (FAQ)


    How to make banana brownies with 3 ingredients?

    Mash ripe bananas, mix with peanut butter and cocoa powder, then bake until set.

    Are banana brownies healthy?

    Yes, especially when made with natural ingredients like bananas, cocoa, and nut butter, without added sugars or flours.

    Can I make banana brownies without flour?

    Absolutely, many recipes use just bananas, cocoa powder, and nut butter, making them flourless and gluten-free.

    Do banana brownies need eggs?

    Not necessarily. Some recipes are egg-free, relying on bananas and nut butter to bind the ingredients.

    How ripe should bananas be for brownies?

    The riper, the better. Overripe bananas with brown spots are ideal for sweetness and moisture.

    Can I add chocolate chips to banana brownies?

    Yes, adding chocolate chips enhances the chocolate flavor and adds texture to the brownies.

    Are banana brownies gluten-free?

    They can be, especially when made without flour or using gluten-free alternatives.

    Can I use almond butter instead of peanut butter in banana brownies?

    Yes, almond butter is a great substitute and offers a different flavor profile.

    How long do banana brownies last?

    Stored in an airtight container, they last up to 3 days at room temperature or up to a week in the fridge.

    Can I freeze banana brownies?

    Yes, wrap them tightly and freeze for up to 3 months. Thaw at room temperature before serving.

    Do banana brownies taste like banana bread?

    They have a similar banana flavor but are denser and more chocolatey than banana bread.

    What’s the best cocoa powder for banana brownies?

    Unsweetened cocoa powder, preferably Dutch-processed, provides a rich chocolate flavor.

    Can I make banana brownies without sugar?

    Yes, ripe bananas provide natural sweetness, eliminating the need for added sugar in some recipes.

    Are banana brownies suitable for vegans?

    Yes, when made without animal products like eggs or dairy, they are vegan-friendly.

    How to make banana brownies more fudgy?

    Use less flour, more banana, and avoid overbaking to achieve a fudgier texture.

    Can I add nuts to banana brownies?

    Absolutely, adding nuts like walnuts or pecans adds crunch and flavor.

    What’s the calorie count for banana brownies?

    It varies, but flourless banana brownies can have around 140 calories per serving, depending on ingredients.

    Do banana brownies need baking soda?

    Not always. Some recipes rely on the natural leavening from eggs and bananas, but baking soda can add lightness.

    Can I make banana brownies in a microwave?

    Yes, microwave-safe recipes exist for quick banana brownies, often in mug cake form.

    Are banana brownies kid-friendly?

    Yes, their natural sweetness and soft texture make them appealing to children.

    How to store banana brownies?

    Keep them in an airtight container at room temperature for 2-3 days or refrigerate for up to a week.

    Can I add protein powder to banana brownies?

    Yes, adding protein powder can boost nutritional value, but adjust other ingredients to maintain texture.

    Table of Contents

    Key Takeaways

    • Moist and fudgy brownies with a hint of banana flavor
    • Perfect for using up overripe bananas
    • Easy to make and versatile
    • Can be adapted to dairy-free and gluten-free diets
    • A delicious twist on traditional banana bread
    Stack of fudgy banana chocolate brownies with subtle banana slices and melted chocolate on marble surface
    Stack of fudgy banana chocolate brownies with subtle banana slices and melted chocolate on marble surface

    The Perfect Blend of Banana and Chocolate

    Imagine sinking your teeth into a dense, fudgy brownie infused with the sweetness of ripe bananas. These banana brownies are dark, fudgy, and indulgent, with a subtle sweetness that comes from using real, ripe bananas. They’re the perfect treat when you have overripe bananas and are looking for something beyond banana bread.

    So, what makes these brownies so special? Let’s dive into the details.

    Why You’ll Love These Banana Brownies

    These brownies stand out because they use simple pantry ingredients, eliminating the need for a special trip to the grocery store. The use of real, ripe bananas ensures authentic flavor and natural sweetness, unlike recipes that rely on banana extract or artificial flavors.

    What Makes This Recipe Special

    The method behind these brownies ensures a perfect crackly top and a super moist, fudgy center. They’re also forgiving and adaptable – you can adjust the recipe based on whether you have 1, 2, or 3 ripe bananas. Here’s a quick comparison of how the number of bananas affects the brownies:

    Number of BananasResult
    1 bananaMake a half batch for a smaller treat
    2 bananasPerfect for a standard batch with a subtle banana flavor
    3 bananasIntensifies the banana flavor and moisture

    I’ve tested this recipe multiple times to perfect the ratio of bananas to chocolate, ensuring you get the best of both worlds in every bite. With these brownies, you’ll experience the delightful combination of ripe bananas and rich chocolate.

    Ingredients for Decadent Banana Brownies

    To make the most decadent banana brownies, you’ll need a few key ingredients and some essential equipment. The quality of your ingredients will directly impact the flavor and texture of your brownies.

    Key Ingredients and Substitutions

    Let’s start with the basics. You’ll need butter, which can be melted, so it doesn’t matter if it’s cold, though soft butter works quicker. I prefer salted butter, but unsalted is fine if you add an extra ¼ tsp of salt. The type of chocolate you use is up to you – milk, semi-sweet, or dark; I personally love dark chocolate for its depth.

    Eggs should be large and at room temperature. If they’re cold, a quick fix is to place them in hot water for 5-10 minutes. For sugar, granulated is what I use, but light brown sugar is a good alternative. Flour is another staple; I recommend all-purpose flour, and while you can substitute it with a 1:1 gluten-free blend, be aware of potential texture changes.

    IngredientSubstitution
    ButterUnsalted butter + ¼ tsp salt
    ChocolateMilk, semi-sweet, or dark chocolate
    SugarGranulated or light brown sugar
    Flour1:1 Gluten-free flour blend

    Equipment You’ll Need

    Now, let’s talk about the equipment. You’ll need a medium saucepan or a microwave-safe bowl to melt the butter and chocolate together – the microwave is my preferred method for simplicity. A large mixing bowl is essential for combining your wet ingredients (eggs, sugar, vanilla extract) before adding the melted chocolate mixture.

    For measuring your dry ingredients like flour, cocoa powder, and salt, measuring cups and spoons are a must, though a kitchen scale is even better for precision. An 8×8 inch baking pan is perfect for these brownies; lining it with parchment paper makes removal easy. Don’t forget a rubber spatula for folding in the chocolate chips and a wire cooling rack to help your brownies cool properly.

    Step-by-Step Banana Brownie Recipe

    Now that we have our ingredients ready, let’s dive into the step-by-step process of making these delicious banana brownies! This recipe is straightforward and fun to follow, so don’t be intimidated if you’re new to baking.

    Preparing the Banana Mixture

    First, melt the butter with the chocolate chips and stir until they’re completely smooth. In a separate bowl, mash the bananas until they look like puree and there are no more large chunks. This mixture is the heart of our brownies, providing moisture and a deep banana flavor.

    Mixing the Batter

    Next, whisk the eggs with the sugars aggressively for 2-3 minutes until they’re well combined. Add the chocolate mixture to the egg mixture and whisk again until it’s completely combined. Then, add the mashed bananas, mixing until those are completely incorporated. After that, add the cocoa powder and mix until it’s well combined. Finally, add the flour and salt, whisking just until the dry ingredients are incorporated. Fold in the chocolate chips until they’re evenly distributed throughout the batter.

    Baking Instructions

    Preheat your oven to 350°F (175°C) and line an 8×8 inch baking pan with parchment paper, leaving some overhang for easy removal. Pour the batter into the prepared pan and smooth the top. Bake for about 35-40 minutes, or until the edges are set and the center is slightly underdone. After removing from the oven, gently tap the pan on the counter to check if the brownies are properly baked. Let them cool in the pan for at least 30 minutes before slicing.

    Tips for Perfect Fudgy Banana Brownies

    The secret to achieving that perfect fudginess in your banana brownies lies in a few simple techniques. To start, it’s crucial to understand when your brownies are done baking.

    How to Tell When Brownies Are Done

    When the top of your brownies have a thin little crackle on top, you can press on it with your finger to see how firm the brownies are underneath. If the batter jiggles when you move the pan, it’s definitely not done baking. You want to be able to push your finger on the top, in the center, and feel some resistance.

    At this point, you’ll remove them from the oven and they will continue to bake as they’re cooling. If they’re firm when you remove them from the oven, they won’t be very gooey once they’re completely cooled. Another thing I do is tap the pan on the counter; if the brownies level off perfectly, they’re done. If the center sinks below the edges, put them back in for a few minutes.

    Achieving That Perfect Crackly Top

    A crackly top is a hallmark of well-baked brownies. To achieve this, make sure your ingredients are at the right temperature, and don’t overmix the batter.

    Slicing and Serving Tips

    For clean cuts, allow your brownies to cool completely before slicing. Use a sharp knife, wiping it clean between cuts. For an extra-special dessert, try serving them with a scoop of vanilla ice cream and a drizzle of caramel sauce.

    • Cool brownies completely before slicing for clean cuts.
    • Use a sharp knife, wiping it clean between cuts.
    • Refrigerate brownies for 30 minutes for easier slicing.
    • Serve with vanilla ice cream and caramel sauce for a special treat.
    TipBenefit
    Cool completely before slicingCleaner cuts
    Use a sharp knifeProfessional-looking results
    Refrigerate before slicingEasier to cut through fudgy center

    Delicious Variations to Try

    Ready to take your banana brownies to the next level? Let’s dive into some fantastic variations you can try! The basic recipe is just the starting point – with a few tweaks, you can create entirely new flavor experiences.

    Add-ins and Mix-ins

    One of the simplest ways to change up your banana brownies is by adding different mix-ins. Consider adding chopped nuts like walnuts or pecans to the batter for a delightful texture contrast. If you’re a chocolate lover, throw in some mini milk or semi-sweet chocolate chips to intensify the chocolate experience. These additions not only enhance the flavor but also add a fun surprise to each bite.

    Frosting and Topping Ideas

    While the brownies are delicious on their own, adding a frosting or topping can elevate them to new heights. A simple cream cheese frosting pairs beautifully with the banana flavor, creating a treat reminiscent of frosted banana bread but with the fudgy texture of brownies. For chocolate enthusiasts, a ganache topping made with equal parts heavy cream and chocolate chips is a game-changer – pour it over the cooled brownies for a glossy finish. Other ideas include a dusting of cocoa powder or powdered sugar, a drizzle of caramel sauce with sea salt, or even a dollop of whipped cream with a drizzle of chocolate milk.

    Storing and Enjoying Your Banana Brownies

    You’ve successfully baked a batch of mouth-watering banana brownies; now, let’s ensure they stay delicious for days to come. Proper storage is key to maintaining their freshness and flavor.

    For short-term storage, allow your banana brownies to cool completely before transferring them to an airtight container. They’ll stay fresh at room temperature for up to 3-4 days. If you want to extend their shelf life, refrigeration is your friend – they will stay fresh for 7-10 days.

    When serving refrigerated brownies, let them come back to room temperature for about 30 minutes to allow the flavors to fully bloom and the texture to soften. You can also freeze them for up to 3 months by wrapping them tightly in parchment paper and plastic wrap.

    To enjoy your brownies at their best, try warming a slice in the microwave for 10-15 seconds before serving. You can also crumble older brownies over ice cream or use them as the base for a trifle.

  • Brown Butter Banana Bread Recipe You’ll Love!

    Brown Butter Banana Bread Recipe You’ll Love!

    Are you tired of the same old banana bread recipe? What if you could elevate it to a whole new level with just one simple ingredient?

    I’m excited to share my favorite recipe that will transform your baking game forever! By incorporating brown butter, you’ll add a rich, nutty depth to this classic treat.

    This isn’t just any ordinary banana bread – the addition of brown butter makes it irresistibly delicious and sets it apart from traditional recipes.

    This brown butter banana bread is extra rich

    Brown Butter Banana Bread

    This brown butter banana bread is extra rich, flavorful, and moist with deep caramelized notes thanks to the browned butter. It’s the perfect way to use ripe bananas and makes a cozy breakfast or snack.
    No ratings yet
    Print Pin Share on Facebook Rate
    Type de plat: Dessert
    Cuisine: American
    Diet: Low Calorie
    Keyword: brown butter
    Temps de préparation: 15 minutes
    Temps de cuisson: 55 minutes
    Temps total: 1 heure 10 minutes
    Servings: 10 Slices
    Calories: 240kcal
    Author: Hervé
    Cost: $5-$8

    Equipment

    • Saucepan
    • Large mixing bowl
    • Medium mixing bowl
    • 9×5 inch loaf pan
    • Wire rack

    Ingrédients

    • 0.5 cup unsalted butter (browned)
    • 3 ripe bananas (mashed, about 1 1/2 cups)
    • 0.66 cup brown sugar
    • 2 eggs
    • 1 tsp vanilla extract
    • 1.5 cups all-purpose flour
    • 1 tsp baking soda
    • 0.5 tsp salt
    • 0.5 tsp ground cinnamon
    • 0.5 cup plain yogurt or sour cream
    • Butter or spray for greasing pan

    Instructions

    Brown the Butter

    • Melt butter in a saucepan over medium heat. Cook, stirring constantly, until it turns golden brown and smells nutty. Let cool slightly.

    Mix Wet Ingredients

    • In a large bowl, combine browned butter, mashed bananas, brown sugar, eggs, vanilla, and yogurt. Mix until smooth.

    Add Dry Ingredients

    • In a separate bowl, whisk together flour, baking soda, salt, and cinnamon. Add to wet mixture and stir until just combined.

    Bake

    • Preheat oven to 350°F (175°C). Grease a 9×5 inch loaf pan.
    • Pour batter into prepared pan and smooth the top. Bake for 50–60 minutes or until a toothpick comes out clean.
    • Cool in pan for 10 minutes, then transfer to a wire rack to cool completely.

    Video

    Notes

    Special Notes

    • Use overripe bananas for the best flavor and sweetness.
    • Browned butter adds a rich, nutty flavor to the bread.
    • Do not overmix the batter to keep the bread tender.
    • Check for doneness by inserting a toothpick into the center; it should come out clean.
    • Store leftovers in an airtight container at room temperature for up to 3 days.

    Nutrition

    Calories: 240kcal | Carbohydrates: 32g | Protéines: 4g | Fat: 10g | Lipides saturés: 6g | Choléstérol: 45mg | Sodium: 220mg | Fibre: 1g | Sucre: 16g
    Apports nutritionnels
    Brown Butter Banana Bread
    Quantité par portion
    Calories 240 Calories des lipides 90
    % des apports journaliers*
    Fat 10g15%
    Lipides saturés 6g38%
    Choléstérol 45mg15%
    Sodium 220mg10%
    Carbohydrates 32g11%
    Fibre 1g4%
    Sucre 16g18%
    Protéines 4g8%
    * Percent Daily Values are based on a 2000 calorie diet.

    Table of Contents

    Key Takeaways

    • Discover the secret to making your banana bread stand out with a simple yet game-changing ingredient.
    • Learn how to incorporate brown butter into your baking for added depth of flavor.
    • Get a step-by-step guide to making the perfect loaf, from selecting the right bananas to achieving a golden-brown crust.
    • Impress your friends and family with a deliciously unique twist on a classic recipe.
    • Enjoy a foolproof recipe that’s approachable for bakers of all skill levels.

    What Makes Brown Butter Banana Bread Special

    What elevates a banana bread recipe from ordinary to exceptional is the perfect blend of browned butter and super-ripe bananas. This isn’t just another banana bread recipe; it’s a game-changer in the world of baked goods.

    The Magic of Brown Butter

    The magic happens when you brown the butter, transforming it into a nutty, aromatic ingredient that adds a depth of flavor to the bread. This process is what sets our bread recipe apart from the rest.

    Why This Recipe Stands Out

    Our banana bread recipe stands out for several reasons. First, it uses overripe bananas, which are sweeter and blend into the batter beautifully. The texture is perfectly balanced – moist and tender without being heavy or gummy. Unlike many recipes that rely on excessive sugar, this one lets the natural sweetness of the banana shine while the brown butter adds complexity. Plus, it’s incredibly versatile, allowing you to customize it with add-ins like chocolate chips or nuts.

    Understanding Brown Butter

    Let’s dive into the world of brown butter and explore what makes it so special. Brown butter is a simple yet transformative ingredient that elevates baked goods, including our beloved banana bread, to a new level of flavor and sophistication.

    What Is Brown Butter?

    Brown butter, or browned butter, is essentially butter that has been cooked until it reaches a rich, nutty aroma and a deep golden color. This process involves melting the butter and continuing to heat it until the water content evaporates and the milk solids start to brown.

    How to Brown Butter Perfectly

    To make brown butter, start by melting unsalted butter in a light-colored pan over medium-low heat. As the butter melts, it will begin to foam. Continue to cook, swirling the pan occasionally, until the butter turns a rich amber color and develops a nutty aroma.

    Here are some key tips to achieve perfect brown butter:

    • Use a light-colored pan to monitor the color change.
    • Cut the butter into even pieces for even melting.
    • Keep swirling the pan gently as the butter cooks.

    Once your butter is perfectly browned, immediately transfer it to a heat-safe bowl to stop the cooking process.

    StepDescriptionVisual Cue
    1Melt unsalted butter in a light-colored pan over medium-low heat.Butter starts to melt.
    2Continue cooking, swirling the pan occasionally.Butter foams and changes color.
    3Watch for the butter to turn a rich amber color and develop a nutty aroma.Nutty aroma and amber color.

    Choosing the Right Ingredients

    When it comes to baking the perfect banana bread, the quality of your ingredients can make all the difference. The right combination not only enhances the flavor but also ensures the bread is moist and delicious.

    Selecting the Perfect Bananas

    The foundation of great banana bread is, of course, the bananas. You’ll want to use overripe bananas for the best flavor. They should be soft and have plenty of brown spots on the skin. This ripeness brings out the natural sweetness and gives your bread a deeper flavor.

    Essential Ingredients List

    Beyond those perfect overripe bananas, you’ll need a handful of pantry staples. Unsalted butter is crucial for browning, as it allows for a better control over the salt content and prevents the butter from burning too easily. All-purpose flour provides structure, while baking soda helps the bread rise. Brown sugar adds moisture and a caramel-like flavor that complements the brown butter beautifully.

    Other essential ingredients include eggs to bind everything together, and a touch of vanilla extract to enhance the flavors. A pinch of salt balances the sweetness and brings out the nutty notes in the browned butter. If you’re feeling adventurous, you can add mix-ins like chocolate chips or nuts to take your bread to the next level!

    Brown Butter Banana Bread Recipe

    Here’s everything you need to know to bake the perfect loaf of brown butter banana bread. This rich and decadent banana bread makes it a delicious treat for any time of day. Serve it plain or with a dollop of whipped cream or a scoop of ice cream for an extra indulgent treat.

    Ingredients You’ll Need

    To make this scrumptious banana bread, you’ll need the following ingredients. The recipe is quite straightforward and requires ingredients that are easily available.

    • Ripe bananas
    • Unsalted butter
    • Sugar
    • Eggs
    • Vanilla extract
    • All-purpose flour
    • Baking soda
    • Salt
    • Optional: chocolate chips or nuts

    This recipe is versatile; you can choose to add chocolate chip for an extra burst of flavor.

    Kitchen Tools Required

    To prepare this bread, you’ll need a few essential kitchen tools: a 9×5-inch loaf pan, a mixing bowl, a whisk, and a spatula.

    Preparation Time

    The preparation time for this banana bread recipe is approximately 20 minutes, and the baking time is about 55-60 minutes.

    Yield Information

    This recipe yields one standard 9×5-inch loaf of brown butter banana bread, which can be sliced into approximately 10-12 servings. The slices are substantial and satisfying – perfect for breakfast, afternoon snacks, or even dessert when warmed and topped with a scoop of vanilla ice cream.

    If you’re serving a crowd, consider doubling the recipe and baking in two separate loaf pans. One loaf keeps beautifully for several days at room temperature and can also be frozen in slices for quick individual servings.

    Step-by-Step Baking Instructions

    Now that we have our ingredients ready, let’s dive into the step-by-step process of making the perfect brown butter banana bread. This recipe is all about bringing together the right ingredients and techniques to create a truly delicious treat.

    Preparing Your Brown Butter

    To start, we need to prepare our brown butter. This involves melting the butter in a saucepan over medium heat and cooking it until it turns golden brown and develops a nutty aroma. Stir occasionally to prevent burning. Once it’s done, let it cool slightly before using it in your recipe.

    Mixing the Batter

    Next, we’ll mix our batter. In a large bowl, combine your mashed bananas, sugar, eggs, and the slightly cooled brown butter. Mix these ingredients until they’re well combined. In a separate bowl, whisk together your dry ingredients, including flour, baking powder, and salt. Gradually add the dry ingredients to the wet ingredients, stirring until just combined. Be careful not to overmix! If you’re adding chocolate chips or nuts, fold them in gently at this stage.

    • Pour your batter into the prepared loaf pan and smooth the top with your spatula.
    • If you’re adding a topping like additional chocolate chips or a sprinkle of turbinado sugar, now’s the time to do it!

    Baking to Perfection

    Place the pan in your preheated 350°F oven, positioning it in the center rack for the most even baking. Bake for 55-65 minutes, or until a toothpick inserted into the center comes out clean. If the bread starts to brown too much on top, you can tent it with aluminum foil halfway through baking. Once done, let the bread cool in the pan for about 10 minutes before transferring it to a wire rack to cool completely.

    Pro Tips for the Best Brown Butter Banana Bread

    The secret to exceptional brown butter banana bread lies in the details – let’s explore the pro tips that make all the difference. Baking is both an art and a science, and with a few expert tips, you can elevate your banana bread to new heights. Whether you’re a seasoned baker or just starting out, these insights will help you achieve perfection in your baking.

    Achieving the Perfect Texture

    Achieving the perfect texture in your banana bread is all about balance. You want it to be moist but not soggy, and firm but not dense. The key lies in not overmixing the batter and using the right amount of butter. Brown butter, in particular, adds a depth of flavor that enhances the overall texture. Make sure to use ripe bananas for the best results, as they provide natural sweetness and moisture.

    Common Mistakes to Avoid

    Even experienced bakers can go wrong with banana bread. Common mistakes include overmixing the batter, which develops too much gluten, resulting in tough bread. Another pitfall is not watching the butter closely when browning it – it can quickly go from perfectly brown butter to burnt. Additionally, be patient and resist the temptation to open the oven door too early, as this can cause your bread to sink. Using unripe bananas and not cooling the bread properly before slicing are other mistakes to avoid.

    Delicious Variations to Try

    One of the best things about this brown butter banana bread recipe is its versatility. You can enjoy it in its pure form or get creative with various additions to suit your taste preferences.

    Adding Chocolate Chips

    For chocolate lovers, adding chocolate chips can elevate this banana bread to a new level. Simply fold in your favorite chocolate chips into the batter before baking. This addition introduces a delightful contrast in texture and flavor, making the bread even more irresistible.

    Nut Additions

    Nuts can add a wonderful crunch and flavor to your banana bread. Consider adding walnuts or pecans to create a delicious contrast in texture. Simply chop the nuts and fold them into the batter along with any chocolate chips you’re using.

    Spice Variations

    Spices can transform this banana bread into a seasonal treat. For example, adding cinnamon or a pumpkin spice blend can give it a warm, autumnal flavor. You can also experiment with cardamom for a unique twist or add a pinch of black pepper to enhance the other flavors.

    Dietary Adaptations

    Making dietary adaptations to our beloved brown butter banana bread recipe is easier than you think! Whether you’re gluten-free, vegan, or just looking for a healthier twist, we’ve got you covered.

    Gluten-Free Version

    To make a gluten-free version of our banana bread, you can substitute the traditional flour with a gluten-free all-purpose flour blend. Look for a mix that contains a combination of rice flour, potato starch, and tapioca flour for the best results. Keep in mind that gluten-free baked goods can be more dense, so you might need to adjust the ratio of flours or add an extra egg to achieve the right texture.

    Vegan Alternatives

    Creating a vegan version of this brown butter banana bread requires some clever substitutions, but the results can be just as delicious! You can replace eggs with flaxseed or chia seed eggs, or use applesauce as a moistening agent. For the brown butter, consider using coconut oil and adding a teaspoon of nutritional yeast to achieve that nutty flavor. Make sure to choose dairy-free chocolate chips if you’re adding them to your bread. With these simple swaps, you can enjoy a vegan banana bread that’s just as tasty as the original!

    Serving Suggestions

    Now that you’ve baked your delicious brown butter banana bread, let’s explore some creative ways to serve it! This banana bread recipe is versatile and can be enjoyed at any time of day.

    Perfect Pairings

    Pair your bread with a warm cup of coffee or tea for a cozy breakfast. For a sweeter treat, enjoy it with a scoop of vanilla ice cream or a dollop of whipped cream, especially if you’ve added chocolate chips to your recipe!

    • A drizzle of honey or maple syrup adds a delightful flavor.
    • Fresh fruit or nuts on top can enhance the texture and flavor.

    Presentation Ideas

    Presentation can elevate your banana bread to a new level! For a casual gathering, slice the bread and arrange it on a wooden board with a side of butter or jam.

    • For a special occasion, consider layering the bread with mascarpone or cream cheese frosting.
    • Individual muffins topped with a banana slice or chocolate chip make for an elegant presentation.

    Storing and Freezing Your Banana Bread

    Now that you’ve baked your delicious brown butter banana bread, let’s talk about how to keep it fresh for as long as possible. Proper storage is key to maintaining its moist texture and rich flavor.

    Counter and Refrigerator Storage

    For short-term storage, you can keep your banana bread at room temperature for up to 3 days. Simply wrap it in plastic wrap or aluminum foil and place it in an airtight container. If you prefer to refrigerate it, your bread can last for about 5 days. Just be sure to wrap it tightly to prevent drying out.

    Freezing for Later

    For longer storage, freezing is an excellent option. To freeze your banana bread, wrap it tightly with plastic wrap and then place it in an airtight container or freezer-safe sealable plastic bag. Don’t forget to label and date the packaging; it will last up to a few months in the freezer. Here’s a simple guide to freezing:

    StepDescription
    1Cool the bread completely to prevent condensation.
    2Wrap each slice or the whole loaf tightly in plastic wrap.
    3Wrap again with aluminum foil for extra protection.
    4Place in a freezer-safe bag, label, and date it.

    To thaw, you can leave the wrapped bread at room temperature for about 2-3 hours or unwrap and microwave individual slices for 20-30 seconds. For a fresh-baked taste, try toasting frozen slices directly from the freezer!

    Conclusion

    Transform classic banana bread by browning butter. This adds a rich, nutty flavor. Try this brown butter banana bread recipe for a simple twist on a comfort food favorite!

    Brown Butter Banana Bread FAQs

    • Q: What is brown butter banana bread?
      A: Brown butter banana bread is a banana bread recipe that uses browned butter for a rich, nutty flavor.
    • Q: How do I brown butter for banana bread?
      A: Melt butter in a pan over medium heat, stirring until it foams and turns amber with a nutty aroma. Remove from heat immediately.
    • Q: Does brown butter make a difference in banana bread?
      A: Yes, it adds a deeper, toasty flavor that enhances the sweetness and richness of the bread.
    • Q: Can I use regular butter instead of brown butter?
      A: Yes, but you’ll miss the unique flavor that browned butter adds to the recipe.
    • Q: What kind of bananas should I use?
      A: Use overripe bananas with lots of brown spots for maximum sweetness and moisture.
    • Q: Can I make this recipe gluten-free?
      A: Yes, use a gluten-free all-purpose flour blend as a substitute.
    • Q: What size loaf pan is best for banana bread?
      A: A 9×5-inch loaf pan is standard and works well for this recipe.
    • Q: Can I add nuts to this banana bread?
      A: Yes, walnuts or pecans are a popular addition for extra crunch and flavor.
    • Q: How should I store brown butter banana bread?
      A: Store it at room temperature for up to 3 days or refrigerate for up to 1 week in an airtight container.
    • Q: Can I freeze this banana bread?
      A: Yes, wrap it tightly and freeze for up to 3 months. Thaw at room temperature.
    • Q: Is brown butter banana bread healthy?
      A: It is a treat with wholesome ingredients like bananas, but it also contains butter and sugar.
    • Q: Can I use sour cream or yogurt?
      A: Yes, both add moisture and tenderness. Use full-fat for best results.
    • Q: Can I turn this into muffins?
      A: Yes, divide the batter into muffin tins and bake at 350°F for about 20–25 minutes.
    • Q: How do I know when banana bread is done baking?
      A: Insert a toothpick into the center; it should come out clean or with a few moist crumbs.
    • Q: What spices can I add?
      A: Cinnamon, nutmeg, or allspice are great options to enhance the flavor.
    • Q: Why is my banana bread dry?
      A: It may be overbaked or contain too much flour. Measure flour correctly and check for doneness early.
    • Q: Can I use frozen bananas?
      A: Yes, thaw them completely and drain excess liquid before using.
    • Q: Should I use salted or unsalted butter?
      A: Use unsalted butter to better control the salt content of the recipe.
    • Q: Can I reduce the sugar?
      A: Yes, but reducing it too much may affect the texture and moisture of the bread.
    • Q: Why is my banana bread gummy in the center?
      A: It likely needed more baking time. Ensure the center is fully cooked before removing from the oven.
  • Discover My Easy Blueberry Muffin Recipe for Mornings!

    Discover My Easy Blueberry Muffin Recipe for Mornings!

    Are you tired of the same old breakfast routine? Imagine starting your day with warm, freshly baked blueberry muffins that are not only delicious but also incredibly easy to make!

    I’ve been making these incredible treats for years, and they’ve become a staple in my household. The best part? You can have them ready in under 30 minutes from start to finish, making them the perfect breakfast solution for busy mornings.

    My family just loves them, and I’m excited to share this simple recipe with you. With just a few basic ingredients for Easy Blueberry Muffin Recipe, you can create a batch of moist, tender muffins bursting with juicy blueberries.

    Easy Blueberry Muffin Recipe

    Easy Blueberry Muffin Recipe

    These easy blueberry muffins are soft, fluffy, and bursting with juicy blueberries. Perfect for breakfast, brunch, or an afternoon snack, they come together in just 30 minutes!
    No ratings yet
    Print Pin Share on Facebook Rate
    Cuisine: American
    Temps de préparation: 10 minutes
    Temps de cuisson: 20 minutes
    Temps total: 30 minutes
    Servings: 12 Muffins
    Calories: 210kcal
    Author: Hervé
    Cost: $4-$6

    Equipment

    • Mixing bowls
    • Whisk
    • 12-cup muffin tin
    • Paper liners or cooking spray
    • Oven

    Ingrédients

    • 1/2 cup unsalted butter melted and cooled
    • 1 cup granulated sugar
    • 2 eggs
    • 1 tsp vanilla extract
    • 1/2 cup milk
    • 2 cups all-purpose flour
    • 2 tsp baking powder
    • 1/2 tsp salt
    • 1 1/2 cups fresh or frozen blueberries do not thaw if frozen

    Instructions

    Prepare the Batter

    • Preheat oven to 375°F (190°C). Line a 12-cup muffin tin with liners or grease with cooking spray.
    • In a large bowl, whisk together melted butter and sugar. Add eggs and vanilla; whisk until smooth.
    • Add milk and mix well. In a separate bowl, whisk flour, baking powder, and salt.
    • Add dry ingredients to wet ingredients and mix until just combined.
    • Gently fold in blueberries.

    Bake and Serve

    • Divide batter evenly among muffin cups. Bake for 18–22 minutes or until golden and a toothpick comes out clean.
    • Let muffins cool in the pan for 5 minutes, then transfer to a wire rack to cool completely.

    Nutrition

    Calories: 210kcal | Carbohydrates: 29g | Protéines: 3g | Fat: 9g | Lipides saturés: 5g | Choléstérol: 45mg | Sodium: 140mg | Potassium: 80mg | Fibre: 1g | Sucre: 15g | Vitamine A: 6IU | Vitamine C: 2mg | Calcium: 40mg | Fer: 1.1mg
    Apports nutritionnels
    Easy Blueberry Muffin Recipe
    Quantité par portion
    Calories 210 Calories des lipides 81
    % des apports journaliers*
    Fat 9g14%
    Lipides saturés 5g31%
    Choléstérol 45mg15%
    Sodium 140mg6%
    Potassium 80mg2%
    Carbohydrates 29g10%
    Fibre 1g4%
    Sucre 15g17%
    Protéines 3g6%
    Vitamine A 6IU0%
    Vitamine C 2mg2%
    Calcium 40mg4%
    Fer 1.1mg6%
    * Percent Daily Values are based on a 2000 calorie diet.

    Table of Contents

    Key Takeaways

    • Quick and easy to prepare, ready in under 30 minutes.
    • Made with simple pantry ingredients.
    • Perfectly balanced moistness and flavor.
    • Ideal for busy mornings or as a breakfast treat.
    • A family-friendly recipe that’s sure to please.

    Why These Blueberry Muffins Will Brighten Your Mornings

    There’s nothing quite like the aroma of freshly baked blueberry muffins to brighten up your morning! These delicious treats have become a staple in our household, and I’m excited to share why they’re my go-to breakfast recipe.

    The Perfect Breakfast Treat

    These blueberry muffins aren’t just any ordinary muffin – they strike the perfect balance between bakery-quality taste and homemade comfort. With a tender crumb that’s never dry or dense, they’re the perfect way to start your day.

    BenefitsDescription
    Bakery-quality tasteMade with love and care, just like your favorite bakery
    Homemade comfortWarm, inviting aroma that fills your home
    Tender crumbNever dry or dense, always soft and delicious

    My Family’s Favorite Recipe

    My family has unanimously declared these blueberry muffins their favorite breakfast treat. We love them so much that we’ve added a few spin-offs over the years, including lemon blueberry muffins and chocolate chip versions. The recipe has become such a staple that my kids can practically recite the ingredients list from memory!

    What Makes This Easy Blueberry Muffin Recipe Special

    What makes my easy blueberry muffin recipe stand out is the perfect blend of simplicity and bakery-style results. My bakery-style Blueberry Muffins come topped with a buttery brown sugar streusel that takes their flavor over the top. You can skip the coffee shop version; these homemade Blueberry Muffins can be yours in just 45 minutes!

    Bakery-Style Results at Home

    I’ve spent years tweaking this recipe to achieve that elusive bakery-style dome top and tender interior that many home bakers struggle to replicate. The result is a muffin that not only looks professional but also tastes like it came straight from your favorite bakery. What sets my easy blueberry muffin recipe apart is the perfect balance of simplicity and spectacular results – you don’t need fancy equipment or hard-to-find ingredients to create muffins that rival your favorite bakery’s.

    Simple Ingredients, Extraordinary Flavor

    The secret to these muffins’ extraordinary flavor lies in the combination of butter and vanilla that creates a rich base, allowing the natural sweetness of the blueberries to shine through without being overwhelmed. Unlike many complicated recipes that call for specialty ingredients, my approach uses pantry staples you likely already have on hand – proving that sometimes the simplest ingredients yield the most impressive results.

    Essential Ingredients for Perfect Blueberry Muffins

    Baking the perfect blueberry muffins starts with understanding the essential ingredients that make them irresistible. The quality and combination of these ingredients are what set great muffins apart from good ones.

    All About the Blueberries: Fresh vs. Frozen

    You can use either fresh or frozen blueberries in this recipe with excellent results. If you’re using frozen blueberries, it’s best to add them straight from the freezer to prevent your batter from turning purple. This simple tip helps maintain the muffins’ appealing color and texture.

    Flour, Sugar, and Leavening Agents

    The dry ingredients play a crucial role in the structure and sweetness of your blueberry muffins. All-purpose flour provides the perfect base, while granulated sugar adds sweetness without making the muffins too dense. The baking powder is essential for giving your muffins a light and airy texture.

    Wet Ingredients That Create Moisture and Flavor

    The wet ingredients bring everything together, adding moisture, richness, and flavor to your muffins. Butter and milk or non-dairy milk contribute to the muffins’ tenderness, while eggs provide structure. A touch of vanilla adds warmth, and using sour cream or yogurt can enhance moisture and activate the baking powder for fluffier results.

    By combining these essential ingredients thoughtfully, you’ll be on your way to baking blueberry muffins that are not only delicious but also visually appealing.

    Kitchen Equipment You’ll Need

    To make baking a breeze, having the right kitchen tools is crucial for achieving those fluffy, delicious blueberry muffins. The foundation of great baking starts with quality equipment.

    Muffin Pan and Liners

    A quality 12-cup muffin pan is essential. I personally love using one with a nonstick surface and sturdy construction that distributes heat evenly. My go-to is the USA Pan 12-Cup Nonstick Muffin Pan, available on Amazon for $29.95. Muffin liners aren’t just decorative; they make cleanup easy and help your muffins release perfectly. I prefer unbleached parchment liners.

    EquipmentDescription
    Muffin PanNonstick surface, sturdy construction
    Muffin LinersUnbleached parchment, easy release
    Mixing BowlsLarge for dry ingredients, medium for wet

    Mixing Tools and Measuring Equipment

    For mixing, you’ll need two bowls and a rubber spatula for folding in blueberries. Accurate measuring is crucial, so gather your measuring cups and spoons. I recommend separate sets for dry and wet ingredients.

    My Easy Blueberry Muffin Recipe Step-by-Step

    Let’s dive into making the perfect blueberry muffins with my easy step-by-step recipe! You don’t need any special equipment or advanced baking skills to make these delicious muffins. The process is straightforward and fun, and I’ll guide you through each step.

    Preparing Your Ingredients

    Before you start mixing, make sure you have all your ingredients ready. This includes fresh or frozen blueberries, flour, sugar, baking powder, salt, melted butter or oil, eggs, milk, vanilla extract, and sour cream. Having everything at room temperature will make the mixing process smoother.

    Mixing the Dry Ingredients

    In a large bowl, whisk together your dry ingredients: flour, sugar, baking powder, and salt. This helps distribute the leavening agents evenly throughout the batter, ensuring your muffins rise beautifully.

    Combining Wet Ingredients

    In a separate bowl, mix your wet ingredients: melted butter or oil, eggs, milk, vanilla extract, and sour cream. Whisk until smooth and well incorporated. Room temperature ingredients will blend more easily here.

    Folding in the Blueberries

    Gently fold in your blueberries into the batter. If using frozen berries, add them directly from the freezer without thawing to prevent them from breaking and causing purple streaks in your batter.

    Filling the Muffin Cups

    Fill your muffin cups all the way to the top for those impressive bakery-style muffins. This might seem like too much batter, but it’s the secret to achieving those beautiful domed tops.

    Muffin SizeNumber of MuffinsBaking Tips
    Standard10Fill to the top for big bakery-style tops
    Large8Fill a bit more for larger muffins
    MiniVariesAdjust baking time accordingly

    Baking Tips for Tall, Fluffy Muffins

    The key to making your blueberry muffins stand out lies in the baking technique. To achieve those tall, bakery-style muffins, there are a few crucial steps to follow.

    The Perfect Oven Temperature Technique

    One of my favorite tips for achieving tall muffin tops is using a two-temperature baking method. Start by preheating your oven to a high temperature – I recommend 425°F for the first 5 minutes. Then, reduce the temperature to 350°F for the remaining baking time without opening the oven door. This initial blast of high heat causes the batter to rise rapidly, creating that beautiful dome. The lower temperature then ensures the centers bake through perfectly without burning the tops.

    To get the best results, make sure your muffin batter is thick enough to scoop rather than pour. If it seems too runny, add a tablespoon of flour at a time until it reaches the right consistency. Also, fill your muffin tins or liners all the way to the top to get that perfect dome shape.

    How to Know When Your Muffins Are Done

    To test for doneness, insert a toothpick into the center of a muffin – it should come out clean or with just a few moist crumbs, but no wet batter. Another tip is to allow your muffins to cool in the pan for about 5 minutes before transferring them to a wire rack. This brief resting period helps them set up properly and makes them easier to remove from the pan without breaking.

    Here are some key tips to keep in mind:

    • Use a two-temperature baking method for tall, fluffy muffins.
    • Ensure your muffin batter is thick and not too runny.
    • Don’t overbake – check for doneness with a toothpick.
    • Let muffins cool briefly in the pan before transferring them to a wire rack.

    Delicious Variations to Try

    Now that you’ve mastered the basic blueberry muffin recipe, it’s time to get creative with some delicious variations! I’ve had a blast experimenting with different twists on this recipe, and I’m excited to share my favorites with you.

    One of my top recommendations is to try making lemon blueberry muffins. Simply add 1-2 tablespoons of fresh lemon zest and substitute 1 tablespoon of the milk with fresh lemon juice for a bright, citrusy twist that perfectly complements the blueberries.

    Lemon Blueberry Muffins

    The lemon adds a nice brightness to the sweetness of the blueberries. It’s a simple yet effective way to give your muffins a refreshing flavor.

    Adding Nuts or Other Fruits

    For added texture and nutrition, consider folding in 1/2 cup of chopped walnuts, pecans, or almonds along with the blueberries. You can also experiment with other fruits like raspberries or blackberries for a different flavor profile.

    • Try substituting raspberries or blackberries for a different flavor.
    • Add 1/2 cup of chopped nuts for added crunch and nutrition.

    Gluten-Free and Dairy-Free Options

    This recipe is versatile and can be adapted to suit dietary needs. For gluten-free muffins, substitute a 1:1 gluten-free flour blend for the all-purpose flour. To make dairy-free muffins, use plant-based milk, coconut oil or a plant-based butter alternative, and dairy-free yogurt.

    Storing and Freezing Your Blueberry Muffins

    After baking a batch of blueberry muffins, you’ll want to keep them fresh, and I’m here to share my tips on how to do just that. Proper storage is key to enjoying your blueberry muffins over time.

    To keep your muffins fresh at room temperature, store them in an airtight container for up to 4 days. However, in my experience, they rarely last that long!

    For longer storage, you can freeze the muffins for up to 3 months. To do this, cool the muffins completely before placing them in a freezer-friendly container or bag. I recommend freezing them individually on a baking sheet first, then transferring to a container once solid. This prevents them from sticking together and allows you to thaw just one or two at a time.

    Storage MethodDurationInstructions
    Room TemperatureUp to 4 daysStore in an airtight container
    FreezerUp to 3 monthsCool completely, then freeze in a freezer-friendly container or bag

    To reheat frozen muffins, you can either thaw them overnight in the refrigerator and bring to room temperature, or reheat from frozen in a 300°F oven for about 10 minutes until warmed through. For an extra-special treat, try slicing a room temperature muffin in half, adding a small pat of butter, and placing under the broiler for a minute.

    Conclusion

    As we wrap up this journey through my easy blueberry muffin recipe, I’m excited for you to experience the joy of baking these delicious treats at home. This blueberry muffin recipe is our most popular for a reason! It’s quick to make and yields muffins with a moist, tender center bursting with blueberries and a perfectly golden-brown top.

    I hope it becomes a beloved staple in your home, just as it has in mine. Whether you’re an experienced baker or just starting out, these muffins strike the perfect balance between impressive results and approachable technique. Don’t be surprised if friends and family start requesting your new favorite treat!

    Frequently Asked Questions About Blueberry Muffin Recipe

    1. Can I use frozen blueberries instead of fresh ones?

    Yes, you can use frozen blueberries without thawing them. They may release more moisture during baking, which is normal.

    2. How do I prevent blueberries from sinking to the bottom of the muffins?

    Add a spoonful of plain batter to each muffin cup before folding in the berries to help keep them suspended.

    3. Can I substitute buttermilk for regular milk?

    Yes, buttermilk adds tang and tenderness. You can also make a substitute by adding lemon juice or vinegar to milk.

    4. How can I make my muffins more moist?

    Use sour cream, yogurt, or buttermilk to add extra moisture to the batter.

    5. What’s the best way to store blueberry muffins?

    Store them in an airtight container at room temperature for up to 4 days.

    6. Can I freeze blueberry muffins?

    Yes, wrap them individually and store in a freezer-safe bag for up to 2 months.

    7. How can I add a crunchy topping?

    Add streusel or sprinkle coarse sugar on top before baking for a crunchy finish.

    8. Why are my muffins dense?

    Overmixing the batter can develop gluten, resulting in dense muffins. Mix just until combined.

    9. Can I use whole wheat flour?

    Yes, but the texture may be heavier. Mix half whole wheat and half all-purpose for better results.

    10. How do I make vegan blueberry muffins?

    Replace eggs with flaxseed eggs, and use plant-based milk and oil instead of butter.

    11. Can I add lemon zest?

    Yes, lemon zest enhances the flavor and pairs well with blueberries.

    12. What sugar is best?

    White sugar is common, but brown sugar adds moisture and depth of flavor.

    13. How full should I fill the muffin cups?

    Fill them 2/3 to 3/4 full to allow rising without spilling.

    14. Can I add nuts?

    Yes, chopped nuts like almonds or walnuts add crunch and flavor.

    15. Why do muffins stick to the liners?

    If muffins are too moist or warm, they may stick. Let them cool completely before removing liners.

    16. Can I make mini muffins?

    Yes, adjust baking time to 10–12 minutes for mini muffins.

    17. Why do muffins come out flat?

    Flat tops can result from overmixing or low oven temperature.

    18. Can I use dried blueberries?

    Yes, soak them in warm water for 10 minutes to rehydrate before use.

    19. How do I make gluten-free muffins?

    Use a gluten-free flour blend and ensure all ingredients are gluten-free.

    20. Why did my blueberries turn green?

    This is a harmless reaction to alkaline ingredients. Use buttermilk to reduce pH and prevent this.

    21. Can I make the batter ahead?

    It’s best to bake immediately, but the batter can rest in the fridge for up to 24 hours.

    22. How to get domed tops?

    Start baking at 425°F for 5 minutes, then reduce temperature for the remainder of the baking time.

    23. Should I coat blueberries in flour?

    It can help prevent sinking, but using thick batter may work better.

    24. Can I add spices?

    Yes, cinnamon or nutmeg adds warmth and depth to the flavor.

    25. How to reheat muffins?

    Reheat in the oven at 300°F for 5–10 minutes or microwave for 20–30 seconds.

    26. Can I make them egg-free?

    Yes, use flax eggs or a commercial egg replacer.

    27. How to reduce sugar?

    Reduce by up to 50%, but it may change texture and sweetness.

    28. Why are my muffins dry?

    Overbaking or too much flour can dry them out. Measure accurately and check doneness early.

    29. Can I add a glaze?

    Yes, a powdered sugar and milk glaze adds sweetness and shine.

    30. Are blueberry muffins healthy?

    They can be high in sugar and fat. Use whole grains, reduce sugar, and add fruit or seeds for a healthier version.

  • Simple Cornbread Casserole Recipe for Family Gatherings

    Simple Cornbread Casserole Recipe for Family Gatherings

    Are you tired of serving the same old side dishes at family gatherings? I’m about to share a game-changer that has become a staple at our family events a deliciously simple cornbread-inspired dish that’s a perfect blend of sweet and savory!

    This comforting dish combines the homey warmth of traditional cornbread with the creamy richness of a casserole, creating a culinary experience that’s more than the sum of its parts. Whether you’re hosting a holiday dinner or just want to elevate your weeknight meals, this dish strikes the perfect balance between impressive and effortless.

    cornbread casserole recipe

    Cornbread Casserole Recipe

    This cornbread casserole is creamy, cheesy, and irresistibly easy to make. With just a handful of ingredients, it’s the perfect comfort food side dish for holidays or weeknight dinners.
    No ratings yet
    Print Pin Share on Facebook Rate
    Cuisine: Southern
    Temps de préparation: 10 minutes
    Temps de cuisson: 45 minutes
    Temps total: 55 minutes
    Servings: 8 Servings
    Calories: 310kcal
    Author: Hervé
    Cost: $5-$7

    Equipment

    • Mixing bowl
    • Spatula
    • Baking dish (9×13)
    • Measuring cups and spoons
    • Oven

    Ingrédients

    • 1 box cornbread mix (8.5 oz)
    • 1 can whole kernel corn (15 oz) drained
    • 1 can creamed corn (15 oz)
    • 1 cup sour cream
    • 1/2 cup melted butter
    • 1 cup shredded cheddar cheese
    • Salt and pepper to taste

    Instructions

    Mix Ingredients:

    • Preheat oven to 350°F (175°C). Grease a 9×13-inch baking dish.
    • In a large bowl, mix together the cornbread mix, drained corn, creamed corn, sour cream, melted butter, and cheese. Add salt and pepper to taste.

    Bake:

    • Pour the mixture into the prepared baking dish and spread evenly.
    • Bake for 40–45 minutes, or until the top is golden and the center is set.

    Cool and Serve:

    • Let cool slightly before serving. Garnish with fresh herbs if desired.

    Nutrition

    Calories: 310kcal | Carbohydrates: 28g | Protéines: 6g | Fat: 20g | Lipides saturés: 10g | Choléstérol: 50mg | Sodium: 480mg | Potassium: 220mg | Fibre: 2g | Sucre: 5g | Vitamine A: 10IU | Vitamine C: 4mg | Calcium: 120mg | Fer: 1.2mg
    Apports nutritionnels
    Cornbread Casserole Recipe
    Quantité par portion
    Calories 310 Calories des lipides 180
    % des apports journaliers*
    Fat 20g31%
    Lipides saturés 10g63%
    Choléstérol 50mg17%
    Sodium 480mg21%
    Potassium 220mg6%
    Carbohydrates 28g9%
    Fibre 2g8%
    Sucre 5g6%
    Protéines 6g12%
    Vitamine A 10IU0%
    Vitamine C 4mg5%
    Calcium 120mg12%
    Fer 1.2mg7%
    * Percent Daily Values are based on a 2000 calorie diet.

    Table of Contents

    Key Takeaways

    • Easy-to-make cornbread casserole recipe perfect for family gatherings
    • Combines the warmth of cornbread with the richness of a casserole
    • Versatile dish that pairs well with various main courses
    • Customizable to suit your family’s taste preferences
    • Perfect for holiday dinners or weeknight meals

    The Perfect Southern Comfort Food for Any Occasion

    There’s something special about a warm, golden-browncornbread casserolethat makes it perfect for any occasion. It’s a dish that embodies the essence of Southern comfort food, bringing together the warmth of cornbread and the ease of a casserole.

    Cornbread casserole is a true family favorite, and for good reason. It’s creamy, corny, custardy, and sweet – the perfect complement to a holiday meal or a simple weeknight dinner with a bowl of chili!

    Why Cornbread Casserole Is a Family Favorite

    • Cornbread casserole combines the best of bread and side dish, offering a golden crust on top and a moist, tender interior.
    • Unlike traditional cornbread, this casserole version is creamy and almost pudding-like, making it irresistible.

    What Makes This Recipe Special

    This corn casserole recipe stands out because it brings together simple ingredients to create a dish that tastes like it took hours to prepare, all in just a few minutes. The sweet-savory balance makes it versatile enough for both holiday meals and everyday dinners.

    Essential Ingredients for Cornbread Casserole Recipe

    Let’s start with the essentials: the ingredients that make this cornbread casserole recipe shine. The beauty of this recipe lies in its simplicity, requiring just a few key ingredients that you likely have on hand.

    Base Ingredients You’ll Need

    For your base, you’ll need a box of cornbread muffin mix, such as Martha White Honey Cornbread Muffin Mix. You’ll also need a can each of whole kernel corn and creamed corn, with the whole kernel corn drained. Add to that sour cream for richness, melted butter for flavor, and eggs to bind everything together.

    IngredientQuantity
    Cornbread Muffin Mix1 pack (7oz)
    Whole Kernel Corn15 oz can, drained
    Creamed Corn15 oz can
    Sour Cream1/4 cup
    Melted Butter3/4 stick (6 TBSP)
    Eggs2, whisked

    Optional Add-ins for Extra Flavor

    To give your cornbread casserole an extra boost, consider adding shredded cheddar cheese. You can also experiment with other mix-ins like diced jalapeños for spice or crumbled bacon for smokiness. The combination of both creamed corn and whole kernel corn creates a perfect texture contrast, making this recipe a standout.

    Step-by-Step Preparation Instructions

    Now that we have our ingredients, let’s dive into the preparation process! Making this cornbread casserole is a simple and enjoyable process that requires some basic prep work and baking.

    Preparing Your Baking Dish

    First, preheat your oven to 375°F (190°C). While that’s heating up, prepare your baking dish by spraying a 7×11 inch glass baking dish with cooking spray or melting butter in it. This step is crucial as it prevents the casserole from sticking and adds flavor to the edges.

    Mixing the Cornbread Batter

    In a large bowl, combine the cornbread mix, drained corn, creamed corn, sour cream, melted butter, whisked eggs, and shredded cheese. Mix everything together until just combined. Be careful not to overmix, as this can make the casserole tough.

    Baking to Golden Perfection

    Pour the mixture into your prepared baking dish and spread it out evenly. Bake for about 40-45 minutes or until a toothpick inserted into the center comes out clean. Start checking at the 35-minute mark to avoid overcooking. The casserole is done when the edges are slightly pulled away from the sides and the top is a beautiful golden brown.

    Recipe Variations to Try

    I love experimenting with different variations of cornbread casserole to keep things interesting! This versatile dish can be transformed to suit any meal or preference, making it a staple in my kitchen.

    Sweet vs. Savory Options

    For a sweeter version that’s almost dessert-like, you can increase the sugar to 1/2 cup or even 3/4 cup and consider adding a teaspoon of vanilla extract. This makes a delightful breakfast option or dessert when served warm with a scoop of vanilla ice cream. On the other hand, if you prefer a more savory direction, reduce or omit the sugar entirely and lean into herbs like thyme, rosemary, or sage.

    Adding Cheese and Other Mix-ins

    Cheese lovers can transform this dish by folding in 1-1/2 cups of shredded cheddar, pepper jack, or a Mexican cheese blend into the batter, then sprinkling another 1/2 cup on top for that irresistible cheesy pull when serving. You can also add a Southwestern kick by including diced green chiles or finely chopped jalapeños along with some cumin and chili powder.

    VariationIngredients to AddResult
    Sweet Corn Casserole1/2 cup sugar, 1 tsp vanilla extractDessert-like breakfast or dessert
    Savory CornbreadHerbs like thyme, rosemary, or sageAromatic depth, perfect for main courses
    Cheesy Delight1-1/2 cups shredded cheese, 1/2 cup on topIrresistible cheesy pull
    Southwestern KickDiced green chiles, jalapeños, cumin, chili powderSpicy, pairs well with chili

    Tips for the Best Cornbread Casserole

    After countless attempts at making cornbread casserole, I’ve distilled the process down to some crucial tips for success. To achieve a truly outstanding casserole, it’s not just about following the recipe, but also about understanding the nuances that can make or break the dish.

    Common Mistakes to Avoid

    One of the most common mistakes is opening the oven door too frequently during baking. This can cause temperature fluctuations, leading to uneven rising and baking. I recommend resisting the urge to peek until at least 35 minutes have passed. Another critical error is overmixing the batter; stir just until the ingredients are combined to avoid developing gluten, which can make your casserole tough.

    • Don’t overmix the batter – this develops gluten, making the casserole tough.
    • Avoid frequent oven door opening to prevent temperature fluctuations.

    Achieving the Perfect Texture

    For the creamiest texture, bring refrigerated ingredients like eggs and sour cream to room temperature before mixing. This creates a smoother batter that bakes more evenly. If you’re using cheese, consider shredding it yourself from a block for a creamier consistency. The toothpick test is also crucial – insert it in the center, and it should come out with a few moist crumbs but no wet batter.

    • Bring refrigerated ingredients to room temperature for a smoother batter.
    • Shred cheese from blocks for better melting quality and texture.
    • Use the toothpick test to check for doneness.

    Make-Ahead and Storage Options

    This cornbread casserole is perfect for busy gatherings because it can be prepared completely up to two days in advance. You can refrigerate it until you’re ready to bake, making it an ideal dish for the holiday season when time is of the essence.

    Preparing in Advance for Gatherings

    One of the things I love most about this corn casserole is its flexibility. You can prep it entirely ahead of time and store it in the refrigerator until baking. For holiday meals when oven space is limited, you can bake it earlier and reheat it covered with foil at 300°F for about 20 minutes before serving.

    • Prepare the casserole up to two days in advance and refrigerate until baking.
    • For added convenience, mix the wet ingredients ahead of prep time and store them separately in the refrigerator.

    Storing and Reheating Leftovers

    Leftover corn casserole can be stored in an airtight container in the refrigerator for up to 4 days. To reheat, use the oven method at 300-350°F covered with foil to retain moisture, or microwave small portions for 45-90 seconds.

    • Store leftovers in an airtight container in the refrigerator.
    • Reheat in the oven at 300-350°F for the best results.

    Serving Suggestions and Pairings

    The beauty of cornbread casserole lies in its ability to complement various main courses, making it a versatile side dish for any occasion.

    Holiday Meal Pairings

    For holiday meals, cornbread casserole is a standout alongside traditional favorites like roast turkey, honey-baked ham, or prime rib. The slight sweetness of the cornbread provides a perfect contrast to savory meats. At Thanksgiving, I place it between the turkey and cranberry sauce on the table – its creamy texture makes it an excellent vehicle for soaking up gravy without getting soggy.

    Everyday Dinner Companions

    For everyday dinner, nothing beats serving cornbread casserole with a hearty bowl of chili – a classic combination that’s hard to resist. It also pairs beautifully with BBQ dishes like pulled pork or ribs.

    Main CoursePairing Notes
    Roast TurkeyPerfect for Thanksgiving, complements savory flavors
    Honey-Baked HamContrasting sweetness enhances the meal
    ChiliA classic combination that’s a crowd-pleaser

    Conclusion: A Timeless Dish for Creating Family Memories

    With this simple yet delicious cornbread casserole recipe, you’re not just making a meal, you’re crafting moments that will be cherished for years to come. This cornbread casserole is more than just a side dish; it’s a way to bring people together, creating a sense of warmth and comfort around the table.

    I’ve seen this humble corn dish become a requested favorite at family gatherings, with loved ones asking for it by name. The beauty of passing down recipes like this one is that they become part of your family’s story and tradition.

    Whether you follow this cornbread casserole recipe exactly or add your own twist, I hope it brings as much joy to your table as it has to mine. I’d love to hear how this recipe works for you and what special occasions you serve it at!

    Cornbread Casserole Recipe FAQs

    • Q: What is cornbread casserole?
      A: Cornbread casserole is a moist and savory side dish made with cornbread mix, corn, sour cream, cheese, and sometimes eggs or butter.
    • Q: Can I use any cornbread mix for this recipe?
      A: Yes, any brand of cornbread mix will work, though some prefer sweeter or more savory blends depending on taste.
    • Q: Do I need to drain the canned corn?
      A: Yes, you should drain the whole kernel corn before adding it to the mix to avoid excess moisture.
    • Q: What kind of cheese works best?
      A: Cheddar cheese is commonly used, but you can also try Monterey Jack or a cheese blend.
    • Q: Can I make cornbread casserole ahead of time?
      A: Yes, you can mix it ahead and refrigerate until ready to bake. Let it come to room temperature before baking.
    • Q: How do I store leftovers?
      A: Store leftovers in an airtight container in the fridge for up to 3-4 days.
    • Q: Can I freeze cornbread casserole?
      A: Yes, you can freeze it after baking. Wrap tightly and freeze for up to 2 months. Thaw and reheat before serving.
    • Q: Can I make it without eggs?
      A: Yes, it may be slightly less structured, but still tasty. You can try an egg substitute like flaxseed meal or commercial replacers.
    • Q: What’s the best baking dish size?
      A: A 7×11-inch or 9×13-inch casserole dish works well for this recipe.
    • Q: Can I add meat to cornbread casserole?
      A: Yes, cooked ground beef, sausage, or shredded chicken can be added for a heartier version.
    • Q: Is this dish gluten-free?
      A: Only if you use a gluten-free cornbread mix and verify all other ingredients are gluten-free.
    • Q: Can I make this spicy?
      A: Yes, you can mix in diced jalapeños, green chiles, or a dash of hot sauce.
    • Q: Can I use Greek yogurt instead of sour cream?
      A: Yes, Greek yogurt is a great substitute that still adds creaminess and tang.
    • Q: How do I reheat cornbread casserole?
      A: Reheat in the oven at 350°F for about 15–20 minutes or microwave individual portions.
    • Q: Can I use frozen corn instead of canned?
      A: Yes, thaw and drain it first to avoid extra moisture.
    • Q: How long does it take to bake?
      A: Typically, 40–45 minutes at 375°F or until a toothpick inserted comes out clean.
    • Q: Can I add veggies to this casserole?
      A: Yes, diced bell peppers, onions, or even zucchini make great additions.
    • Q: Can I use creamed corn only?
      A: It’s best to use a combination of creamed and whole kernel corn for texture, but all creamed corn can work in a pinch.
    • Q: Why is my casserole soggy in the middle?
      A: It may be underbaked or too much liquid was used. Ensure accurate measuring and bake until fully set.
    • Q: Can I make a vegan version of cornbread casserole?
      A: Yes, use plant-based butter, non-dairy sour cream, and egg substitutes like flax eggs or applesauce.
  • My Favorite Easy Banana Pudding Recipe – Simple & Delicious!

    My Favorite Easy Banana Pudding Recipe – Simple & Delicious!

    Are you looking for a dessert that’s both easy to make and sure to impress? I’ve got just the thing – a classic Southern treat that’s become a staple at family gatherings and potlucks!

    This no-bake delight requires just 5 ingredients and 15 minutes of prep, making it perfect for busy days or last-minute invitations. With layers of creamy vanilla pudding, fresh bananas, and crunchy Nilla wafers, this banana pudding is a crowd-pleaser.

    I’ve tested and refined this recipe over the years to ensure it’s both simple and delicious. Whether you’re a seasoned baker or a novice in the kitchen, you’ll love this easy-to-follow recipe for a classic dessert.

    Banana pudding recipes

    Banana Pudding with Cinnamon

    This banana pudding with a hint of cinnamon is creamy, comforting, and packed with layers of vanilla wafers, ripe bananas, and smooth pudding. A classic Southern dessert with a warm twist!
    No ratings yet
    Print Pin Share on Facebook Rate
    Cuisine: American
    Temps de préparation: 15 minutes
    Temps de cuisson: 10 minutes
    Temps total: 25 minutes
    Servings: 6 Serves
    Calories: 280kcal
    Author: Hervé
    Cost: $6-$9

    Equipment

    • Saucepan
    • Whisk
    • Mixing bowl
    • Spatula
    • Glass dish or cups
    • Measuring cups

    Ingrédients

    • 2 cups whole milk
    • 1/2 cup granulated sugar
    • 2 tbsp cornstarch
    • 1/4 tsp salt
    • 2 egg yolks lightly beaten
    • 1 tsp vanilla extract
    • 1/2 tsp ground cinnamon
    • 2 bananas sliced
    • 1 cup vanilla wafers
    • Whipped cream for topping (optional)

    Instructions

    Make the Pudding:

    • In a saucepan, whisk together sugar, cornstarch, cinnamon, and salt. Gradually whisk in milk and cook over medium heat.
    • Once warm, whisk some of the mixture into the beaten egg yolks, then return to saucepan and cook until thickened.
    • Remove from heat and stir in vanilla extract. Let cool slightly.

    Assemble the Dessert:

    • Layer vanilla wafers, sliced bananas, and warm pudding in a dish or serving cups.
    • Repeat layers and finish with pudding on top.

    Chill and Serve:

    • Chill in the refrigerator for at least 2 hours. Top with whipped cream before serving if desired.

    Nutrition

    Calories: 280kcal | Carbohydrates: 38g | Protéines: 4g | Fat: 12g | Lipides saturés: 6g | Choléstérol: 65mg | Sodium: 200mg | Potassium: 300mg | Fibre: 2g | Sucre: 22g | Vitamine A: 10IU | Vitamine C: 8mg | Calcium: 110mg | Fer: 0.7mg
    Apports nutritionnels
    Banana Pudding with Cinnamon
    Quantité par portion
    Calories 280 Calories des lipides 108
    % des apports journaliers*
    Fat 12g18%
    Lipides saturés 6g38%
    Choléstérol 65mg22%
    Sodium 200mg9%
    Potassium 300mg9%
    Carbohydrates 38g13%
    Fibre 2g8%
    Sucre 22g24%
    Protéines 4g8%
    Vitamine A 10IU0%
    Vitamine C 8mg10%
    Calcium 110mg11%
    Fer 0.7mg4%
    * Percent Daily Values are based on a 2000 calorie diet.

    Key Takeaways

    • Quick and easy to prepare with just 5 ingredients
    • No-bake dessert perfect for busy days or last-minute gatherings
    • Layers of creamy vanilla pudding, fresh bananas, and crunchy Nilla wafers
    • Simple and delicious recipe for a classic Southern treat
    • Perfect for family gatherings, potlucks, or any occasion

    The Perfect No-Bake Dessert for Any Occasion

    When it comes to desserts, few are as versatile and crowd-pleasing as a well-made banana pudding. This easy banana pudding recipe works perfectly in various settings, from casual potlucks to holiday gatherings. You can serve it in a classic 9×13-inch baking dish for a more casual affair, or get creative with your presentation for a more formal event.

    One of the things I love about this banana pudding is its versatility. I’ve served it at backyard barbecues, holiday dinners, and everything in between, with equal success. The no-bake aspect makes it ideal for hot summer days when you don’t want to heat up the kitchen, and it’s also a lifesaver during busy holiday seasons when oven space is limited.

    • The dessert is incredibly easy to assemble and chill, making it perfect for last-minute gatherings.
    • It strikes a great balance between convenience and homemade taste, impressing your guests without requiring hours of preparation.
    • This pudding is a crowd-pleaser that appeals to both kids and adults, with its creamy texture, soft cookies, and fresh fruit.
    • Preparing it ahead of time is a breeze, as it actually tastes better after a few hours in the refrigerator.

    As someone who’s made this banana pudding recipe countless times, I can attest that it’s a reliable favorite. It’s a testament to how a simple dessert can become a go-to treat for any occasion.

    Why This Easy Banana Pudding Recipe Is a Family Favorite

    This easy banana pudding recipe has become a staple in my household, and I’m excited to share why it’s a family favorite. The simplicity and deliciousness of this dessert make it a perfect treat for any occasion.

    The nostalgia associated with this dessert is one of its strongest appeals. Let’s dive into what makes it so special.

    A Nostalgic Southern Classic

    This banana pudding recipe is a nostalgic Southern classic that brings back fond memories. It’s a comforting dessert that feels like a warm hug. The combination of vanilla pudding, ripe bananas, and a crunchy cookie topping is a winning combination that never fails to impress.
    Quick Preparation with Minimal Effort

    One of the reasons this recipe stands out is its quick preparation time. It comes together in just 15 minutes of active preparation, making it perfect for busy weeknights or last-minute gatherings. Here are a few reasons why I love it:

    • It’s incredibly easy to make, requiring minimal effort and ingredients.
    • The recipe is perfect for involving kids in the kitchen, as they can help with layering the ingredients.
    • Despite the short prep time, the flavors meld together beautifully as it chills in the refrigerator, giving the impression that you spent hours in the kitchen.
    • Having this recipe in your repertoire can be a lifesaver for dinner parties and potluck commitments.

    The beauty of this easy banana pudding recipe is that it’s a set-it-and-forget-it dessert. The refrigerator does most of the work, allowing the flavors to develop while you’re free to focus on other things. This makes it an ideal recipe for anyone looking for a delicious dessert without the fuss.

    Ingredients You’ll Need

    When it comes to making the perfect banana pudding, having the right ingredients is crucial. The beauty of this recipe lies in its simplicity, requiring just a few key components to create a delicious dessert.

    The Basic 5-Ingredient List

    The foundation of this easy banana pudding recipe is built around five essential ingredients: ripe bananas, vanilla pudding mix, milk, vanilla wafers, and whipped cream. You’ll need a small, 4-serving box of Jell-O instant vanilla pudding mix, though a larger box can be used for thicker layers. For the creamiest results, use whole milk or a mix of milk and half-and-half.

    Ingredient Quality Tips

    To elevate your banana pudding, focus on the quality of your vanilla and other ingredients. Here are some tips:

    • Choose ripe but firm bananas for the best flavor.
    • For the pudding mix, Jell-O is a reliable brand that yields consistent results.
    • Consider using high-quality vanilla wafers, such as Nilla, for the best texture.
    • If you’re feeling fancy, substitute Cool Whip with homemade whipped cream and a touch of vanilla extract.

    Kitchen Tools for Perfect Banana Pudding

    When it comes to serving banana pudding, the right dish can make all the difference. The presentation of your banana pudding can elevate the entire dessert experience. I’ve found that having the right kitchen tools not only makes the process easier but also enhances the overall presentation.

    The right serving dish can turn your banana pudding into a showstopper. Whether you’re serving a crowd or just your family, the choice between a trifle bowl and a baking dish can affect how your dessert is received.

    Serving Options: Trifle Dish vs. Baking Dish

    Want to impress your guests with a beautiful, layered presentation? Serve your banana pudding in a glass trifle bowl. The clear sides showcase the dreamy layers of cookies, pudding, and bananas, making it an eye-catching centerpiece for any dessert table.

    • For special occasions, a glass trifle bowl is perfect as it showcases the beautiful layers.
    • For family dinners or potlucks, a 9×13 baking dish is ideal – it’s easier to transport and serves a crowd.
    • Individual servings in small mason jars or dessert cups create an adorable presentation.
    • The serving dish you choose affects how the layers distribute.
    • A deep dish pie plate works well for smaller gatherings, balancing elegance and practicality.

    Step-by-Step Easy Banana Pudding Recipe

    With our pudding mixture prepared, it’s time to create the perfect layers that make this dessert so delightful. The layering process is where you get to see your banana pudding come together.

    Preparing the Pudding Mixture

    Before we start layering, ensure your pudding mixture is smooth and creamy. This will be the glue that holds our layers together, so it’s essential to get it right. You can refer to the previous section for the exact steps on preparing the pudding mixture.

    Creating the Perfect Layers

    To create the perfect layers, start by arranging a single layer of nilla wafers to cover the bottom of a 9×13-inch dish. Pour half of the prepared pudding over the wafers and spread evenly. Next, arrange a single layer of sliced bananas on top of the pudding. Repeat this process by adding another layer of nilla wafers, followed by the remaining pudding, and finally another layer of banana slices.

    Layer OrderIngredientDescription
    1stNilla WafersSingle layer covering the bottom
    2ndPudding MixtureHalf of the prepared pudding
    3rdBanana SlicesSingle layer, slightly overlapping
    4thNilla WafersAnother single layer
    5thPudding MixtureRemaining pudding
    6thBanana SlicesFinal layer, topped with cool whip

    Pro Tips for the Best Banana Pudding

    Banana pudding perfection is within reach with these simple yet effective tips. To make your dessert truly special, it’s all about the details.

    Selecting and Preparing Bananas

    Choose bananas that are ripe but still firm. To prevent browning, you can sprinkle sliced bananas with a bit of lemon juice. This simple step keeps your bananas looking fresh and appetizing.

    Achieving the Perfect Texture

    The key to the perfect texture is allowing your banana pudding to chill for at least 4 hours. This patience will be rewarded as the cookies soften and the layers meld together beautifully.

    Make-Ahead Strategies

    Making banana pudding ahead of time is a great strategy. You can prepare it the day before serving, and it actually improves with time. Just be sure to add the final layer of bananas and whipped topping just before serving for the best presentation.

    Preparation StepTimingBenefit
    Chill pudding for 4 hoursAt least 4 hours before servingAllows flavors to meld and cookies to soften
    Add final banana layerJust before servingPrevents bananas from browning
    Prepare pudding mixtureCan be made a day aheadReduces preparation stress on the day of serving

    Common Mistakes to Avoid

    A great banana pudding requires more than just the right ingredients; it also demands attention to detail to avoid common mistakes. When preparing this dessert, two key issues can arise: runny pudding and browning bananas. By understanding how to prevent these problems, you can ensure your banana pudding is always a hit.

    Preventing Runny Pudding

    To prevent runny pudding, it’s essential to follow the recipe’s instructions for chilling times. Allowing the pudding to set properly in the refrigerator will help it achieve the right consistency. Be gentle when layering the ingredients to avoid disrupting the pudding’s texture.

    Keeping Bananas Fresh

    If you make this easy banana pudding recipe ahead of time, your bananas may start to get brown spots. To avoid this, use a very light spritz of lemon juice on the banana slices before adding them to the pudding.

    • Brush banana slices with a mixture of water and lemon juice to prevent browning.
    • Reserve the top layer of slices to add just before serving for the freshest appearance.
    • Use slightly thicker slices (about 1/4 inch) as they hold up better than very thin ones.
    • Ensure your banana slices are completely covered by either pudding or whipped topping.

    By following these tips, you can create a delicious and visually appealing banana pudding that will be a hit with your family and friends.

    Delicious Variations to Try

    Take your banana pudding to the next level with these delicious variations! You can easily customize this classic dessert to suit your taste preferences.

    Experiment with different types of cookies to change up the flavor profile. Try using chocolate sandwich cookies or wafers for a different twist.

    Pudding Flavor Options

    Instead of traditional vanilla pudding, consider using chocolate or butterscotch pudding for a unique flavor. You can also add a hint of vanilla to enhance the overall taste.

    Topping Ideas

    Top your banana pudding with homemade whipped cream made from heavy cream and a touch of vanilla extract for added flavor. Other topping ideas include toasted coconut flakes, cocoa powder, or a sprinkle of cinnamon. You can also use Cool Whip as a convenient alternative.

    • Make homemade whipped cream with heavy cream and powdered sugar for a richer topping.
    • Add a tablespoon of bourbon or rum to your whipped cream for an elegant twist.
    • Sprinkle toasted coconut flakes over the top for added texture and flavor.
    • Dust with cocoa powder or chocolate shavings for a chocolatey touch.
    • Add a pinch of cinnamon or nutmeg to give your banana pudding a seasonal flavor.

    Conclusion: Why This Easy Banana Pudding Will Become Your Go-To Dessert

    This easy banana pudding recipe is a game-changer! It’s the perfect balance of simplicity and impressive results, making it a crowd-pleaser for both kids and adults. With minimal prep time and make-ahead convenience, it’s ideal for any occasion. You’ll love how it delivers consistent, delicious results every time.

    FAQ

    Can I make this dessert ahead of time?

    Yes, you can prepare it a day in advance. In fact, letting it chill in the refrigerator for a few hours or overnight enhances the flavors and texture!

    What type of milk is best for this dessert?

    You can use any type of milk you prefer, such as whole milk, 2% milk, or even a non-dairy milk alternative like almond milk. However, keep in mind that using whole milk will give the creamiest results.

    Can I substitute vanilla wafers with another type of cookie?

    Absolutely! While vanilla wafers are traditional, you can experiment with other cookies like chocolate sandwich cookies or even shortbread cookies to give it a unique twist.

    How do I prevent my dessert from becoming too runny?

    To avoid a runny consistency, make sure to chill the dessert in the refrigerator for the recommended time. Also, be gentle when layering the ingredients to prevent the cookies from getting too soggy.

    Can I use fresh whipped cream instead of Cool Whip?

    Yes, you can definitely use fresh whipped cream as a substitute. Simply whip heavy cream with a bit of sugar until stiff peaks form, and you’re good to go!

    How long does this dessert last in the refrigerator?

    When stored properly in the refrigerator, this dessert can last for up to 3 days. Just be sure to cover it tightly with plastic wrap to prevent it from absorbing any odors.