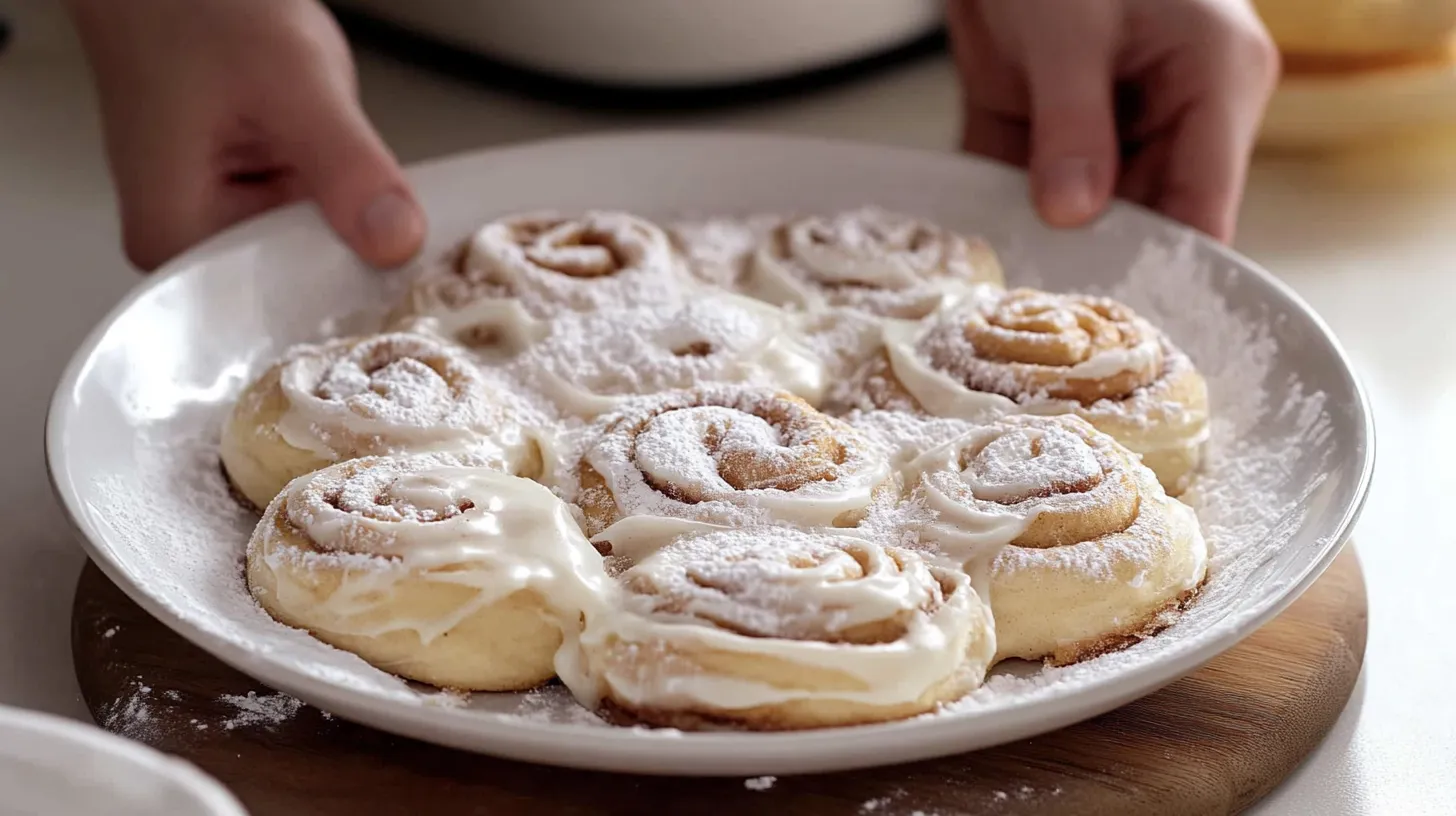
Imagine starting your day with a warm, gooey easy cinnamon roll recipe, freshly baked and straight from your oven. Sounds like a dream, right? But what if I told you that making these sweet treats doesn’t have to be a time-consuming ordeal? With my favorite homemade cinnamon rolls recipe, you can enjoy a delicious breakfast without sacrificing your morning.
These soft and fluffy rolls require only one rise, cutting your preparation time in half compared to traditional recipes. Plus, they freeze beautifully, making them perfect for busy mornings or special occasions like holidays.
Table of Contents

Easy Cinnamon Roll Recipe
Equipment
- Mixing bowl
- Whisk
- Rolling Pin
- Baking dish
- Measuring cups and spoons
- Spatula
Ingrédients
- 1 cup warm milk
- 2 1/4 tsp active dry yeast
- 1/3 cup granulated sugar
- 2 eggs
- 1/2 cup unsalted butter melted
- 4 1/2 cups all-purpose flour
- 1 tsp salt
- 1/2 cup softened butter for filling
- 1 cup brown sugar packed
- 2 tbsp ground cinnamon
- 4 oz cream cheese softened
- 1/4 cup butter softened
- 1 cup powdered sugar
- 1/2 tsp vanilla extract
- 1–2 tbsp milk as needed for glaze consistency
Instructions
Prepare Dough:
- In a bowl, whisk together warm milk, yeast, and sugar. Let sit for 5–10 minutes until foamy.
- Add eggs, melted butter, flour, and salt. Mix until a dough forms. Knead for 5–7 minutes until smooth and elastic.
- Cover and let rise for 1 hour or until doubled in size.
Add Filling and Shape Rolls:
- Roll dough into a rectangle. Spread with softened butter and sprinkle with brown sugar and cinnamon.
- Roll tightly into a log and cut into 12 even pieces. Place in greased baking dish.
Bake and Frost:
- Bake at 350°F (175°C) for 20–25 minutes until golden.
- Beat together cream cheese, butter, powdered sugar, vanilla, and milk until smooth. Spread over warm rolls.
Nutrition
Key Takeaways
- Simple, one-rise dough makes cinnamon rolls accessible to beginners.
- Soft, fluffy, and gooey rolls that taste like they came from a professional bakery.
- Clear instructions help you avoid common pitfalls.
- Perfect for special occasion breakfasts or holiday mornings.
- Can be prepared ahead of time and frozen for busy mornings.
What Makes These Cinnamon Rolls Special
Imagine sinking your teeth into a warm, freshly baked cinnamon roll in under 2 hours – it’s now possible with this easy cinnamon rolls recipe! These rolls are not only quick to make, but they’re also incredibly soft and fluffy, with a gooey cinnamon center that’s sure to satisfy any sweet tooth.
Soft, Fluffy, and Ready in Under 2 Hours
The magic behind these rolls lies in the use of Fleischmann’s® RapidRise® Yeast, which allows the dough to proof quickly, cutting down the overall preparation time significantly. Unlike traditional recipes that require multiple proofs and hours of waiting, this recipe streamlines the process, making it possible to enjoy warm, gooey cinnamon rolls in less than 2 hours. The result is a tender, delicious treat that’s perfect for any occasion.
Perfect for Beginners and Experienced Bakers
Whether you’re new to baking or a seasoned pro, this recipe is designed to be approachable and stress-free. The simple ingredients and straightforward instructions make it easy for beginners to achieve professional results. Meanwhile, experienced bakers will appreciate the yeast-based shortcut that doesn’t compromise on flavor or texture, allowing them to save time without sacrificing quality. With this recipe, you can enjoy the satisfaction of freshly baked rolls without the hassle.
Ingredients You’ll Need
To make these easy cinnamon rolls, you’ll need a few basic pantry staples. The quality of the ingredients plays a significant role in the final product, so it’s worth using the best you can find.
For the Dough
The dough is the foundation of your cinnamon rolls. You’ll need all-purpose flour to provide structure; you can also use bread flour for a chewier texture. White granulated sugar is necessary not just for flavor but to feed the yeast, which is crucial for the dough to rise. A pinch of salt enhances the flavor, while whole milk and butter contribute to a rich and soft dough. An egg adds additional richness and structure. I recommend using instant yeast for beginners as it’s more forgiving.
For the Cinnamon Filling
The filling is what gives cinnamon rolls their signature taste. You’ll need softened butter (not melted), brown sugar for that caramel-like flavor, and plenty of ground cinnamon. This combination creates the gooey center that’s characteristic of great cinnamon rolls.
For the Cream Cheese Icing
The cream cheese icing adds a tangy sweetness that complements the cinnamon rolls perfectly. To make it, you’ll need full-fat cream cheese, butter, confectioners’ sugar, and vanilla extract. Using high-quality ingredients like real butter and pure vanilla extract makes a significant difference in the flavor.
Essential Equipment
You don’t need a professional bakery setup to make these amazing cinnamon rolls – just a few simple tools. The beauty of this recipe lies in its simplicity, using equipment you likely already have in your kitchen.
Basic Kitchen Tools
To get started, you’ll need a large mixing bowl for combining your ingredients and a wooden spoon for mixing the dough. A clean surface for rolling out your dough is also essential – a silicone mat or your countertop works perfectly. A rolling pin helps achieve an even thickness, while a ruler or measuring tape ensures your rolls are perfectly proportioned.
For cutting your cinnamon roll log, I highly recommend using unflavored dental floss instead of a knife. It gives you clean cuts without squishing your beautiful rolls. You’ll also need a baking dish – a 9×13 rectangular pan or a 9-inch round cake pan works well.
Optional Tools That Help
While not necessary, some tools can make the process even easier. A stand mixer with a dough hook can save you time mixing, though hand-mixing works perfectly fine. A pastry brush is handy for spreading butter, and an offset spatula is great for applying the cream cheese icing.
| Tool | Purpose |
|---|---|
| Large Mixing Bowl | Combining ingredients |
| Wooden Spoon | Mixing dough |
| Rolling Pin | Achieving even dough thickness |
| Dental Floss | Cutting cinnamon roll log |
Making the Perfect Easy Cinnamon Roll Dough
The foundation of amazing cinnamon rolls lies in making a dough that’s soft, elastic, and full of flavor. To achieve this, we’ll go through a step-by-step process that ensures your dough turns out perfectly every time.
Mixing the Dry Ingredients
To start, mix your dry ingredients – flour, sugar, and salt – together in a large bowl. This initial step is crucial as it creates a well-mixed base that ensures even distribution of these essential components throughout your dough. Make sure to whisk them together thoroughly to avoid any lumps.
Adding Wet Ingredients
Next, warm the milk and butter together until they reach a temperature of around 110°F. This is a critical step because the temperature affects how the yeast activates. Whisk in the yeast until it dissolves, then pour this mixture over your dry ingredients. Add an egg to this mixture and combine everything until it forms a cohesive dough.
Kneading Techniques for Beginners
Transfer the dough to your work surface and knead by hand for about 3 minutes. Kneading is essential for developing the gluten in the dough, which gives your cinnamon rolls their perfect texture. If you’re new to kneading, don’t worry – it’s a straightforward process that involves pushing down on the dough with the heel of your hand, folding it back up, and repeating.
How to Tell When Your Dough is Ready
After kneading, let the dough rest for 10 minutes. To check if it’s ready, perform the ‘poke test’: gently poke the dough with your finger. If it springs back, leaving just a slight indentation, it’s ready. This step is vital as it allows the gluten to relax, making the dough easier to roll out into a perfect rectangle.
By following these steps, you’ll end up with a dough that’s not only easy to work with but also yields deliciously soft and flavorful cinnamon rolls. Happy baking!
Creating the Cinnamon Sugar Filling
To make truly unforgettable cinnamon rolls, you need to get the cinnamon sugar filling just right. The filling is where all that wonderful cinnamon flavor comes from, and getting it right makes the difference between good and mind-blowing cinnamon rolls.
Getting the Perfect Butter Consistency
Use super-soft butter for the filling—not too hard, not too melty. If the butter is too hard, it won’t be easy to spread it evenly over the soft dough. If it’s too melty, it will seep into the dough. Butter that’s had time to soften to room temperature should be just right. This perfect consistency is crucial for achieving that gooey center we all love in a cinnamon roll.
Spreading Techniques for Even Distribution
Once you have your softened butter, it’s time to spread it evenly over the dough, followed by the brown sugar and cinnamon mixture. The key is to spread the filling all the way to the edges, leaving a small 1/2-inch border to help seal your rolls. This ensures every bite has that perfect cinnamon-sugar flavor. I’ll share my technique for mixing the brown sugar and cinnamon together to create a filling that melts perfectly during baking without becoming grainy or leaking out of your rolls.
Rolling, Cutting, and Shaping Your Cinnamon Rolls
Now that we’ve prepared our cinnamon roll dough and cinnamon sugar filling, it’s time to roll, cut, and shape our rolls! This is where the magic happens, and your patience pays off.
How to Roll the Perfect Log
To achieve a perfect log, start by rolling the dough from the longest end. As you roll, apply even tension to prevent air pockets from forming. Let the log rest on its seam and gently press the two ends towards the center to condense it slightly. This helps maintain the integrity of the dough and prevents stretching.
The Dental Floss Cutting Trick
Ditch the knife and use unflavored dental floss to cut your cinnamon rolls! This trick ensures a clean cut without squishing the soft dough. Simply slide the floss under the log, cross it over the top, and pull for a perfect cut.
Arranging Rolls in the Baking Dish
Place the rolls in a buttered or greased 9×13 inch baking dish. You can also use two 9-inch round pans. It’s okay if the rolls touch each other; they’ll still bake evenly. The arrangement will depend on whether you prefer soft, pull-apart rolls or defined shapes.
Proofing and Baking Your Easy Cinnamon Roll Recipe
With our cinnamon rolls shaped and ready, the next step is crucial: proofing and baking them to achieve that irresistible texture and flavor. The proofing stage is where the magic happens, as your rolls puff up and develop that light, airy texture that makes them irresistible.
The Single Rise Method
I use a single rise method for these cinnamon rolls, which saves time without sacrificing texture or flavor. This method works by creating the right environment for the yeast to work efficiently. Simply place the rolls in a warm spot, cover them with a towel, and let them rise for about 1 hour.
Creating the Ideal Proofing Environment
Creating the ideal proofing environment is crucial, especially in cooler kitchens. If you live in a colder climate, you can preheat your oven to its lowest temperature setting, then turn it off and place the rolls inside. This trick creates a warm, draft-free space for your dough to rise.
Baking Time and Temperature Tips
Preheat your oven to 350°F. If you proofed your rolls in the oven, be sure to remove them first! Bake the cinnamon rolls for 25-30 minutes, or until they’re a light golden brown on top. Keep an eye on them, as the baking time may vary depending on your oven. If they’re browning too quickly, you can cover them with aluminum foil to prevent over-browning.
Finishing Touches: Icing Options and Serving Suggestions
The final flourish to our easy cinnamon roll recipe is the icing, and I’m excited to share my favorite options with you! When the rolls are fresh from the oven, making the icing is the next step. This takes about 5-10 minutes to whip up, so the rolls will be nice and warm by that time.
For the perfect cinnamon rolls, the icing is crucial. I recommend a classic cream cheese icing that’s tangy and rich. To achieve a smooth texture, ensure your cream cheese and butter are at room temperature. If you’re short on time, a simpler vanilla glaze is a great alternative.
The amount of icing matters – I always make a generous batch because there’s nothing worse than skimping on that creamy topping. Apply the icing while the rolls are still warm, allowing it to melt into the nooks and crannies, creating a bakery-style finish.
To keep your cinnamon rolls fresh, cover the dish tightly with plastic wrap and store at room temperature for 2-3 days. You can also place a couple of slices of bread in the dish to keep them moist. For longer storage, refrigerate for 4-5 days and revive them by warming in the microwave with a bit of butter.
With these tips, you’ll be enjoying delicious, gooey cinnamon rolls in no time! Whether you’re serving them for a special breakfast or brunch, they’re sure to be a hit.
FAQ
Can I make the dough ahead of time and refrigerate it overnight?
Yes, you can prepare the dough in advance and refrigerate it overnight! Just make sure to let it come to room temperature before proceeding with the cinnamon sugar filling and baking.
How do I store leftover cinnamon rolls?
Store leftover rolls in an airtight container at room temperature for up to 3 days or freeze them for up to 2 months. Simply wrap them tightly in plastic wrap or aluminum foil.
Can I use a stand mixer to knead the dough?
Absolutely! A stand mixer with a dough hook attachment makes kneading a breeze. Just be sure to follow the manufacturer’s instructions for speed and time to avoid overworking the dough.
Why did my cinnamon rolls turn out dense instead of fluffy?
Dense cinnamon rolls can result from overmixing the dough or not letting it proof long enough. Make sure to mix the ingredients just until they come together and give the dough sufficient time to rise in a warm, draft-free environment.
Can I customize the cinnamon sugar filling with other spices or nuts?
Yes, feel free to get creative with the filling! You can add different spices like nutmeg or cardamom, or even chopped nuts like walnuts or pecans to give your cinnamon rolls a unique twist.
How do I achieve the perfect cream cheese icing consistency?
To get the right consistency, make sure your cream cheese and butter are at room temperature before mixing. You can adjust the amount of milk or vanilla extract to achieve the desired consistency – thinner for drizzling or thicker for spreading.


