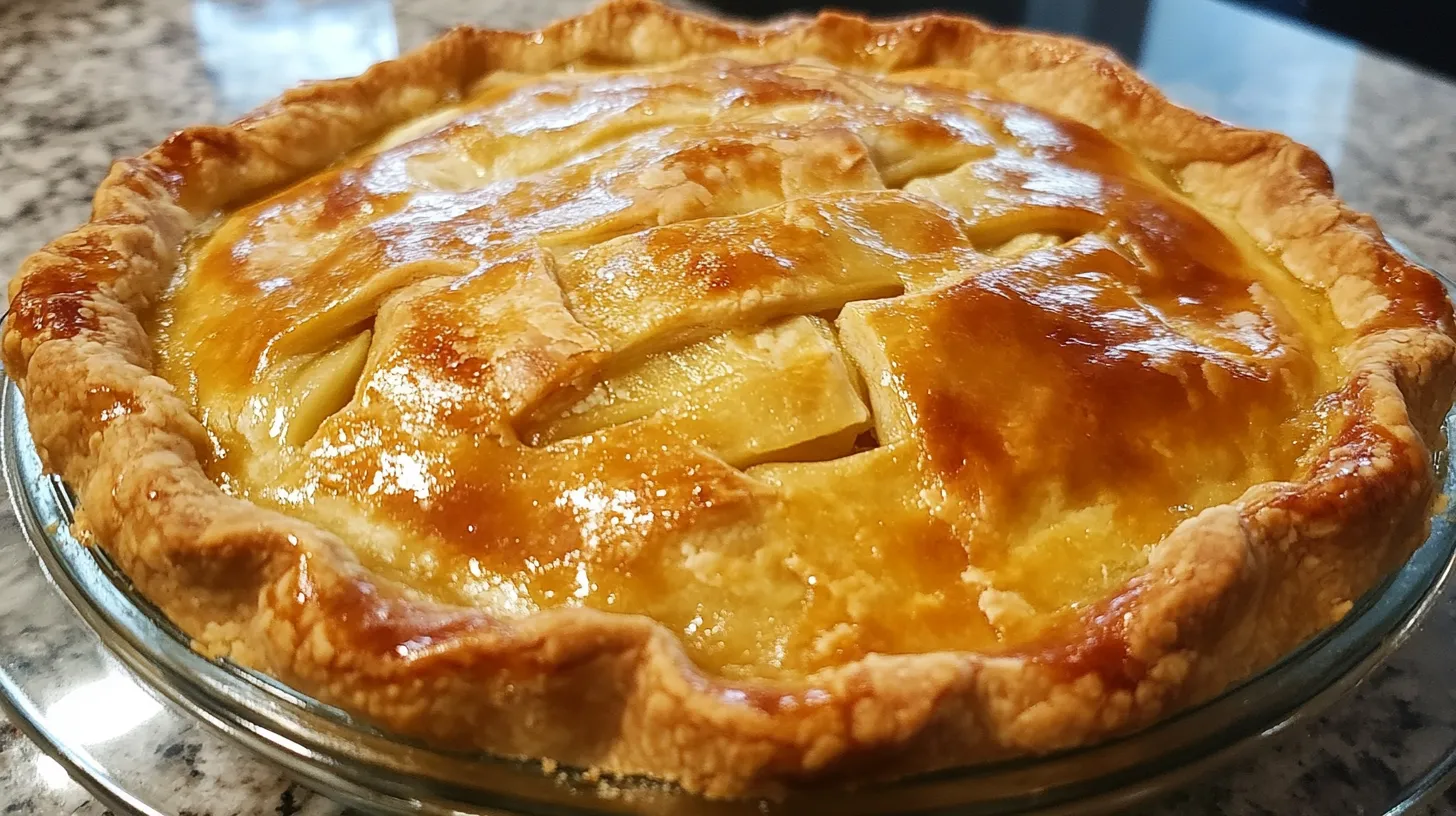
What’s the secret to a perfect dessert that impresses both family and friends? For me, it’s all about a classic apple pie that’s both simple to make and irresistibly delicious.
I still remember the first time I made this pie; it was for a family gathering, and it received rave reviews! The combination of tender apples, a flaky crust, and just the right amount of sweetness made it an instant hit.
My recipe simplifies the traditional process without sacrificing flavor, making it perfect for both beginners and seasoned bakers. By following my steps, you’ll create a dessert that looks and tastes like it came from a professional bakery!
Easy Apple Crisp Recipe
Equipment
- 9×9 inch baking dish
- Mixing bowl
- Pastry cutter
Ingrédients
- 6 medium apples (peeled and sliced)
- 2 tbsp lemon juice
- 1/2 cup granulated sugar
- 1 tsp ground cinnamon
- 1/4 tsp ground nutmeg
- 3/4 cup old-fashioned oats
- 3/4 cup all-purpose flour
- 1/2 cup brown sugar (packed)
- 1/2 cup unsalted butter (cold and cut into cubes)
- Vanilla ice cream (for serving, optional)
Instructions
Prepare the Apple Filling
- Preheat oven to 350°F (175°C). Grease a 9×9 inch baking dish.
- In a bowl, toss apple slices with lemon juice, sugar, cinnamon, and nutmeg. Spread evenly in the baking dish.
Make the Topping
- In another bowl, mix oats, flour, brown sugar, and cubed butter. Use fingers or a pastry cutter to form a crumbly topping.
Bake and Serve
- Sprinkle the topping evenly over the apples. Bake for 40–45 minutes or until golden and bubbly.
- Let cool slightly and serve warm with vanilla ice cream if desired.
Video
Notes
Special Notes
- For a richer flavor, consider adding a teaspoon of vanilla extract to the apple mixture.
- If using tart apples like Granny Smith, you may want to increase the sugar slightly.
- To make the topping extra crunchy, add a handful of chopped nuts like pecans or walnuts.
- Leftovers can be stored in the refrigerator for up to 3 days and reheated before serving.
- Serve with a scoop of vanilla ice cream or a dollop of whipped cream for an extra treat.
Nutrition
Table of Contents
Table of Contents
Key Takeaways
- A simple yet delicious apple pie recipe for any occasion.
- A perfect balance of sweet and tart flavors with a flaky crust.
- Simplified traditional pie-making process for all skill levels.
- Consistently receives compliments and recipe requests.
- A nostalgic, comforting dessert worth making from scratch.
The Perfect Homemade Apple Pie
If you’re on the hunt for the ultimate apple pie recipe, you’re in the right place. My easy apple pie recipe is a game-changer, yielding a perfectly baked pie with a flaky pie crust and tender apple filling every time.
Why This Recipe Works
This recipe stands out due to its precise balance of sugar and fruit, along with the right amount of thickener, ensuring that the apple filling is never too runny or too thick. The combination of butter and shortening in the crust provides a flaky texture that’s both sturdy and delicious.
Years of testing and refining have eliminated common issues like soggy bottoms and undercooked filling, making this recipe foolproof for both beginners and experienced bakers.
| Key Element | Why It Works |
|---|---|
| Perfect Sugar to Fruit Ratio | Ensures the filling is balanced and not too sweet |
| Right Amount of Thickener | Prevents the filling from becoming too runny or too thick |
| Butter-and-Shortening Crust | Provides a flaky texture and sturdy base for the pie |
What Makes This Apple Pie Special
The secret to this best apple pie lies in its harmonious balance of sweet and tart flavors, achieved by combining different apple varieties. The pre-cooking technique for the filling ensures the apples are tender without becoming mushy.
The crust, made with a mix of butter and shortening, not only tastes great but also holds up well to the generous apple filling, making every bite a delight.
Essential Ingredients for an Easy Apple Pie Recipe
Let’s dive into the heart of making the perfect apple pie: the ingredients. To create a truly memorable apple pie, you’ll need to focus on both the quality and the combination of the ingredients. I’m excited to share with you the essentials for both the flaky pie crust and the delicious apple filling.
For the Flaky Pie Crust
For a flaky pie crust, you’ll need 2 (9″) pie crusts worth of ingredients. This includes cold butter and shortening, which are crucial for achieving that perfect flakiness. I recommend using a combination of both for the best results. The cold ingredients help to create a crust that’s both tender and robust enough to hold the juicy filling. You’ll also need some ice water to bring the dough together.
For the Apple Filling
The apple filling is where the magic happens, and it’s all about balance. You’ll need 7 large Granny Smith apples, peeled, cored, and sliced into ½ inch slices. Mixing tart apples like Granny Smith with sweeter varieties such as Honeycrisp or Pink Lady gives you a perfect blend of flavor and texture. Add to that ½ cup granulated sugar, ½ cup light brown sugar, 2 tablespoons all-purpose flour to thicken the juices, 1 teaspoon ground cinnamon, and a hint of nutmeg. A tablespoon of lemon juice and some zest will brighten up the flavors.
Additional Items You’ll Need
Beyond the ingredients for the crust and filling, there are a few more items to have on hand. You’ll need a large egg, lightly beaten, for the egg wash to give your pie crust a beautiful golden brown finish. If you’re feeling fancy, 2 tablespoons of sanding sugar can add a lovely sparkle. Don’t forget the equipment: a pie plate, rolling pin, and possibly a pie shield to prevent the crust from burning.
Choosing the Best Apples for Your Pie
Choosing the right apples is a critical step in making an exceptional apple pie. The type of apples you choose can significantly affect the flavor and texture of your pie.
When making an apple pie, you need apples that are firm and hold their shape during baking. You also want a mix of sweetness and tartness to create a balanced flavor.
Tart Apple Varieties
Tart apples are essential for adding depth and complexity to your apple pie. Granny Smith apples are a popular choice due to their super tart flavor and firm texture.
| Variety | Tartness Level | Firmness |
|---|---|---|
| Granny Smith | High | Very Firm |
| Braeburn | Medium-High | Firm |
| Jonathan | Medium | Firm |
Sweet Apple Varieties
While tart apples provide acidity, sweet apples add natural sweetness and complexity to the filling. Honeycrisp apples are an excellent choice due to their crisp texture and balanced sweetness.
By mixing different apple varieties, you can create a more interesting and flavorful pie. My personal favorite combination is 4-5 Granny Smith apples paired with 3-4 Honeycrisp or Pink Lady apples.
Making the Perfect Pie Crust
The foundation of a great apple pie is undoubtedly its crust, and today I’m excited to share with you the secrets to making the perfect pie crust. A great pie crust is flaky, tender, and adds a delightful crunch to your apple pie.
Butter vs. Shortening: What Works Best
When it comes to making a great pie crust, the choice between butter and shortening is crucial. While some bakers swear by using only butter for its rich flavor, others prefer a combination of butter and shortening for the perfect balance of taste and texture. I recommend using a mix of both to achieve a flaky pie crust that’s both flavorful and tender.
- Butter adds flavor and tenderness
- Shortening helps with flakiness and structure
Step-by-Step Crust Preparation
Making the perfect crust involves a few simple steps. First, ensure that your ingredients are at room temperature. Then, combine your dry ingredients and cold butter in a bowl, using a pastry blender or your fingers to work the butter into the flour until it resembles coarse crumbs. Gradually add ice-cold water, stirring with a fork until the dough comes together in a ball. Divide the dough in half and refrigerate for at least 30 minutes before rolling out.
Make-Ahead Crust Options
One of the best things about making pie crust from scratch is that you can prepare it ahead of time. You can store the dough in the refrigerator for up to 5 days or freeze it for up to 3 months. Simply thaw frozen dough in the refrigerator overnight before using.
Preparing Your Apple Pie Filling
Now that we have our pie crust ready, it’s time to prepare the star of the show: the apple filling! This is where the magic happens, and I’m excited to guide you through making it.
Slicing and Preparing the Apples
To start, you’ll need to slice and prepare your apples. I recommend peeling, coring, and slicing them to about 1/4 inch thickness for the perfect texture. Uniform slices are crucial for even cooking, so take your time to get them just right. You can achieve this consistency by using a mandoline or a sharp knife.
Adding Spices and Flavors
In a large bowl, combine the sliced apples, granulated sugar, light brown sugar, flour, cinnamon, nutmeg, and lemon juice and zest. Toss to coat the apples evenly with the sugar-spice mixture. The right balance of spices enhances the apple flavor without overwhelming it. Don’t forget the lemon juice – it’s a non-negotiable ingredient that prevents browning and brightens the flavors!
Pre-Cooking the Filling: Is It Worth It?
Optional pre-cooking can make a big difference. Simply pour the apple filling into a greased large skillet or Dutch oven, and place it over medium-low heat. Stir and cook for 5 minutes until the apples begin to soften. This step jumpstarts the softening process and helps the flavors meld together, resulting in a juicier and more flavorful filling.
| Pre-Cooking Method | Benefits |
|---|---|
| Stovetop Pre-Cooking | Softens apples, melds flavors |
| No Pre-Cooking | Saves time, still delicious |
To ensure your filling isn’t too watery, discard any excess liquid before adding it to the crust. You can also experiment with variations in spice blends to suit your taste preferences – whether you like it more traditional or modern!
Assembling Your Apple Pie
Assembling your apple pie is where the magic happens, and I’m excited to guide you through this process! With our pie crust and apple filling ready, it’s time to bring them together to create a delicious masterpiece.
Adding the Bottom Crust
First, remove the discs of pie dough from the fridge and let them set at room temperature for 5-10 minutes. On a lightly floured surface, roll one of the discs into a 12″ circle that is ⅛ » thick. Gently place the crust into the bottom of the deep dish pie plate, making sure it’s evenly spread and not stretched too thin.
Filling the Pie
Spoon the apple filling into the crust, discarding any liquid at the bottom of the mixing bowl. Spread the apple slices evenly, making sure to pile them high for a generous filling.
Creating a Lattice Top (or Alternative Tops)
On a lightly floured surface, roll the second disc of pie dough into a 12″ circle that is ⅛ » thick. You can create a beautiful lattice top by weaving strips of dough over the filling, or opt for a solid top crust, crumble top, or decorative cut-out designs. Place the top crust over the apple filling, and use a sharp knife to trim the excess dough from around the edge of the pie plate. Use your fingers to pull both the bottom and top crust up and slightly away from the edge of the pie dish, then fold the edge under itself and press down to seal the edge in place. As Julia Child once said, « The only time to eat diet food is while you’re waiting for the steak to cook. » Let’s make this pie shine!
« The pie is the most important part of the meal, and the crust is the most important part of the pie. » – Anonymous
Finish by brushing the crust with an egg wash for a golden, shiny finish, and sprinkle with coarse sugar for added texture and beauty.
Baking Tips for the Perfect Apple Pie
To ensure your apple pie turns out perfectly, follow these essential baking tips that cover temperature, timing, and more. Baking an apple pie can be a bit tricky, but with the right guidance, you’ll achieve a beautifully baked pie that’ll impress anyone.
Temperature and Timing
Start by baking your pie at a high temperature of 400°F (204°C) for 25 minutes to set the crust. Then, reduce the oven temperature to 375°F (190°C) and continue baking for an additional 30-35 minutes. This two-stage baking process ensures a perfectly cooked crust and filling.
Using a Pie Shield to Prevent Burning
To prevent the edges of your pie crust from over-browning, create a homemade aluminum foil pie shield. Simply fold a long strip of foil in half lengthwise, then in half again, and wrap it around the edges of your pie plate. This simple trick will save your crust from burning.
How to Tell When Your Pie Is Done
You’ll know your apple pie is done when the crust is a lovely golden brown and the juice is bubbling up through the vents. For an extra check, use an instant-read thermometer to ensure the filling has reached about 200°F (93°C). Remember to place your pie on a baking sheet to catch any potential overflow and make it easier to handle.
| Baking Stage | Temperature | Time |
|---|---|---|
| Initial Baking | 400°F (204°C) | 25 minutes |
| Final Baking | 375°F (190°C) | 30-35 minutes |
Serving and Storing Your Apple Pie
With your freshly baked apple pie in hand, you’re probably wondering how to keep it tasting great for days to come. Let’s dive into the best practices for cooling, serving, and storing your pie to ensure it remains a delightful treat.
Cooling and Slicing
Allowing your pie to cool is crucial. Let it sit for at least 3 hours before slicing to allow the filling to set. This patience will be rewarded with clean, picture-perfect slices. Use a sharp knife and take your time to get the best results.
Delicious Serving Suggestions
Serve your apple pie slightly warm with a Chocolate pudding pie. You can also top it with whipped cream or drizzle with caramel sauce for added flavor. These simple touches can elevate your pie to a whole new level!
Storage and Freezing Instructions
Your pie can be stored at room temperature for up to 2 days or refrigerated for up to 5 days. For longer storage, let the pie cool completely, then freeze it. When you’re ready to enjoy it again, thaw at room temperature for an hour and reheat in the oven at 375°F for 35-40 minutes, applying gentle heat.
Conclusion
As we wrap up this easy apple pie recipe, I’m excited to share how it’s become a staple in my family’s gatherings. The combination of a flaky pie crust and tender apples, perfectly balanced with spices, makes it a dessert that’s hard to resist. To achieve the best apple pie, remember to use the right variety of apples, such as Granny Smith apples, and keep your ingredients cold.
When making the pie crust, don’t overwork the dough, and make sure to preheat your oven to the right temperature. The key to a golden brown crust is patience and keeping an eye on it while it bakes. Whether you’re using a pie plate or a pan, the result will be a delicious apple pie that’s sure to impress.
I encourage you to make this easy apple pie recipe your own by experimenting with different apple combinations or spice blends. Share your results and questions in the comments section below! As you bake, remember that while it takes time and a bit of effort, the reward is well worth it. So, go ahead, slice that pie, and enjoy the joy of sharing a homemade dessert with your loved ones.
Baking a pie from scratch may take a few hours or even days if you prepare the components ahead, but the joy and satisfaction it brings are immeasurable. So, the next time you’re planning a family gathering or a special occasion, consider making this apple pie recipe a centerpiece of your celebration.
What are the best apples to use for apple pie?
Tart and firm apples like Granny Smith, Honeycrisp, and Jonagold are ideal as they hold their shape and balance sweetness.
Should I peel the apples before making the pie?
Yes, peeling the apples ensures a smoother filling texture.
Can I use store-bought pie crust?
Yes, store-bought crusts are convenient and work well for quick recipes.
How do I prevent a soggy bottom crust?
Blind baking and using a thickener like cornstarch helps prevent sogginess.
What spices are used in apple pie?
Cinnamon, nutmeg, cloves, and allspice are commonly used spices.
Can I make apple pie in advance?
Yes, you can refrigerate unbaked pie or freeze the baked version for later.
How should I store leftover apple pie?
Keep it covered at room temperature for 2 days or refrigerate for 4–5 days.
Can I freeze apple pie?
Yes, freeze before or after baking. Wrap tightly and use within 3 months.
What’s the difference between apple pie and apple crumble?
Apple pie has a pastry crust; crumble has a streusel topping and no bottom crust.
How do I make the crust golden and shiny?
Brush with egg wash before baking to give it a golden sheen.
Can I add nuts or raisins to the filling?
Yes, walnuts, pecans, or raisins add flavor and texture.
Should I pre-cook the apple filling?
Pre-cooking ensures a thicker filling and even apple tenderness.
How do I know when the pie is done baking?
The crust will be golden brown and filling bubbly through the vents.
Can I make a gluten-free apple pie?
Yes, use gluten-free flour for the crust and cornstarch in the filling.
Can I make a vegan apple pie?
Use vegan butter and a dairy-free crust to make a fully plant-based pie.
What’s the best way to serve apple pie?
Serve warm with vanilla ice cream or whipped cream for a classic dessert.
Why is lemon juice added to apple pie?
Lemon juice prevents apple browning and balances sweetness with acidity.
What’s the best flour for a flaky crust?
All-purpose flour works well; avoid overmixing to preserve flakiness.
Should the dough rest before rolling?
Yes, chilling the dough for at least 30 minutes helps with rolling and flakiness.
How long should I cool the pie before slicing?
Let it cool for at least 2 hours so the filling sets properly.

